
Hemisoleus muscle flap operative steps with pictures
Reading File
The hemisoleus muscle flap is a workhorse for covering defects in the middle third of the leg. Let me search the textbook library and images simultaneously.
Searching sources...
Finding Sources
Searching Images
hemisoleus muscle flap operative steps surgery
Searching the Web
hemisoleus muscle flap operative steps technique lower leg reconstruction
Good - found a textbook section and useful web sources. Let me read the textbook content and extract more detail from the web sources in parallel.
Reading File
Reading Web Page
https://plasticsurgerykey.com/soleus-flap
Searching Images
soleus muscle flap dissection leg reconstruction middle third
I found a textbook image URL. Let me fetch the key textbook images and read more of the textbook content in parallel.
Reading File
Loading Image
Loading Image
Good - I have the anatomy image. Let me now fetch the soleus flap coverage area diagram and the vascular anatomy diagram from the textbook.
Loading Image
Loading Image
Excellent - I now have comprehensive content and images. Let me compile the full answer.
Hemisoleus Muscle Flap - Operative Steps
Overview & Indications
The hemisoleus flap uses the medial (or lateral) half of the soleus muscle for soft tissue coverage of the middle third of the leg (proximally based) or the distal third (distally based). It is the preferred local option when the gastrocnemius cannot reach and free flap transfer is not available or indicated.
Key advantage over whole soleus: Harvesting only half the muscle preserves plantar flexion strength and reduces donor morbidity significantly.
Surgical Anatomy
The soleus is a Type II muscle (Mathes & Nahai), with:
- A dominant proximal pedicle from the popliteal artery (superior pedicle)
- Middle pedicles from the posterior tibial artery (supply medial half)
- Lateral pedicles from the peroneal artery (supply lateral half)
- An inferior pedicle from the posterior tibial artery for distally based flaps
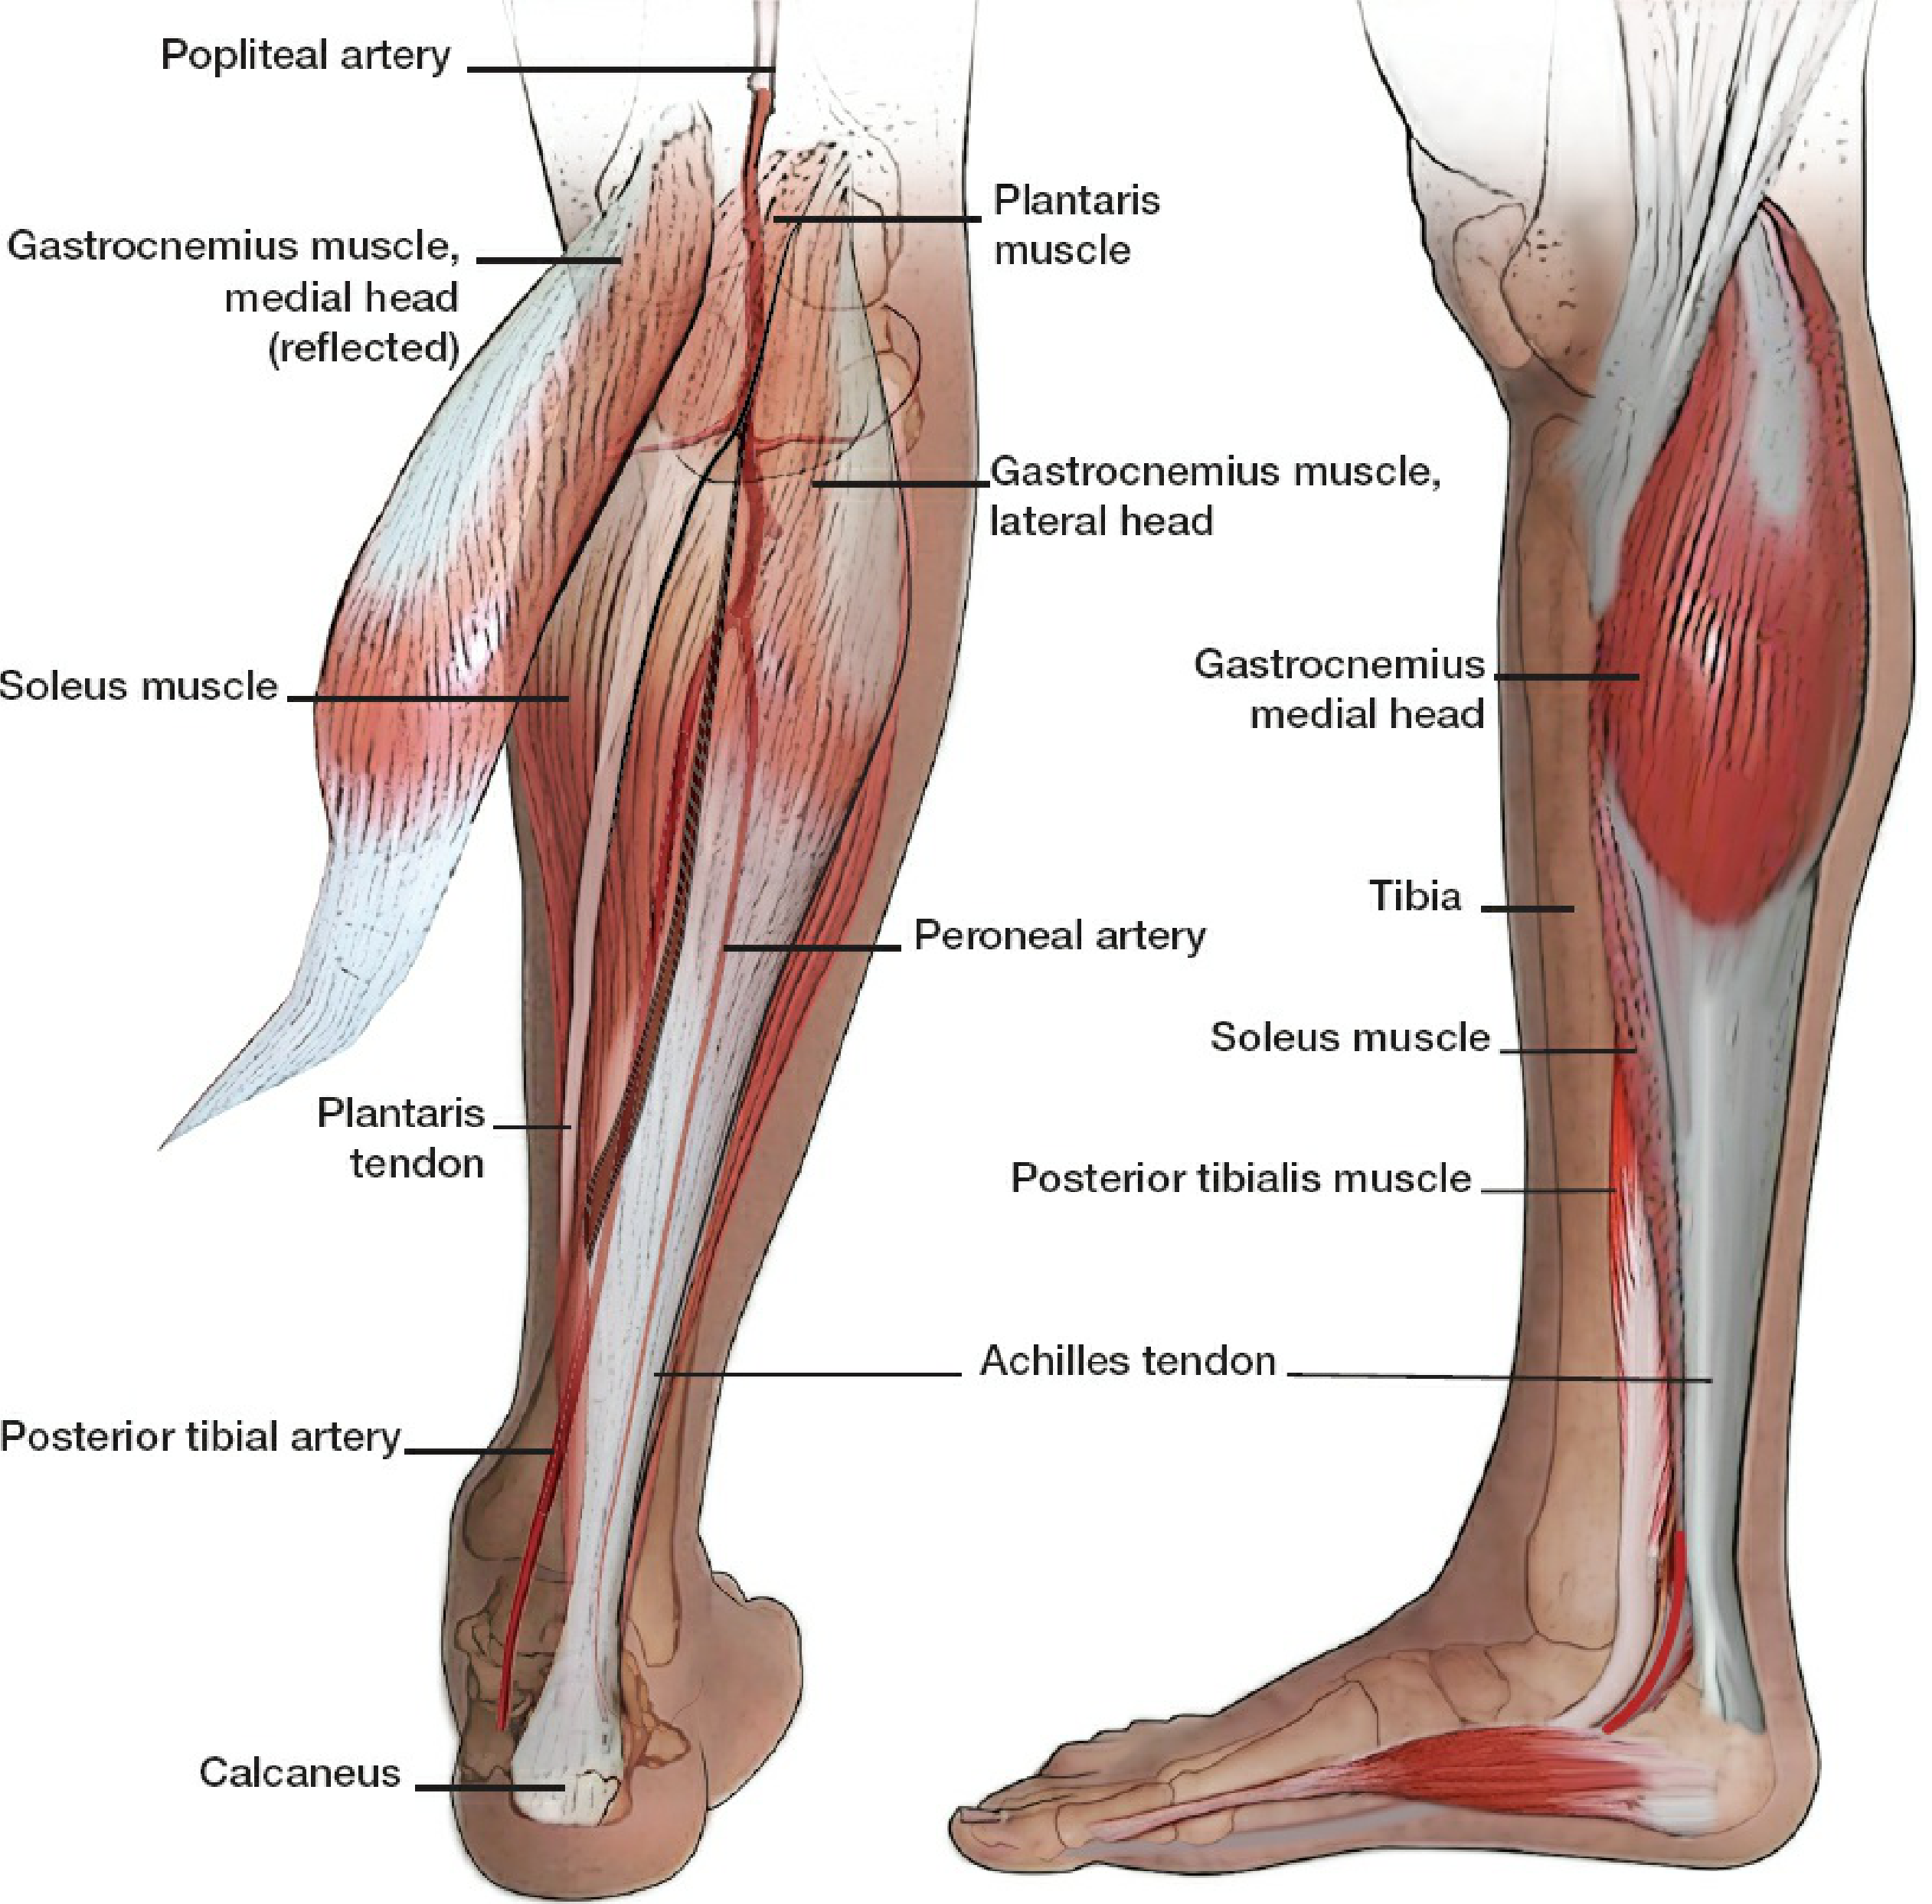
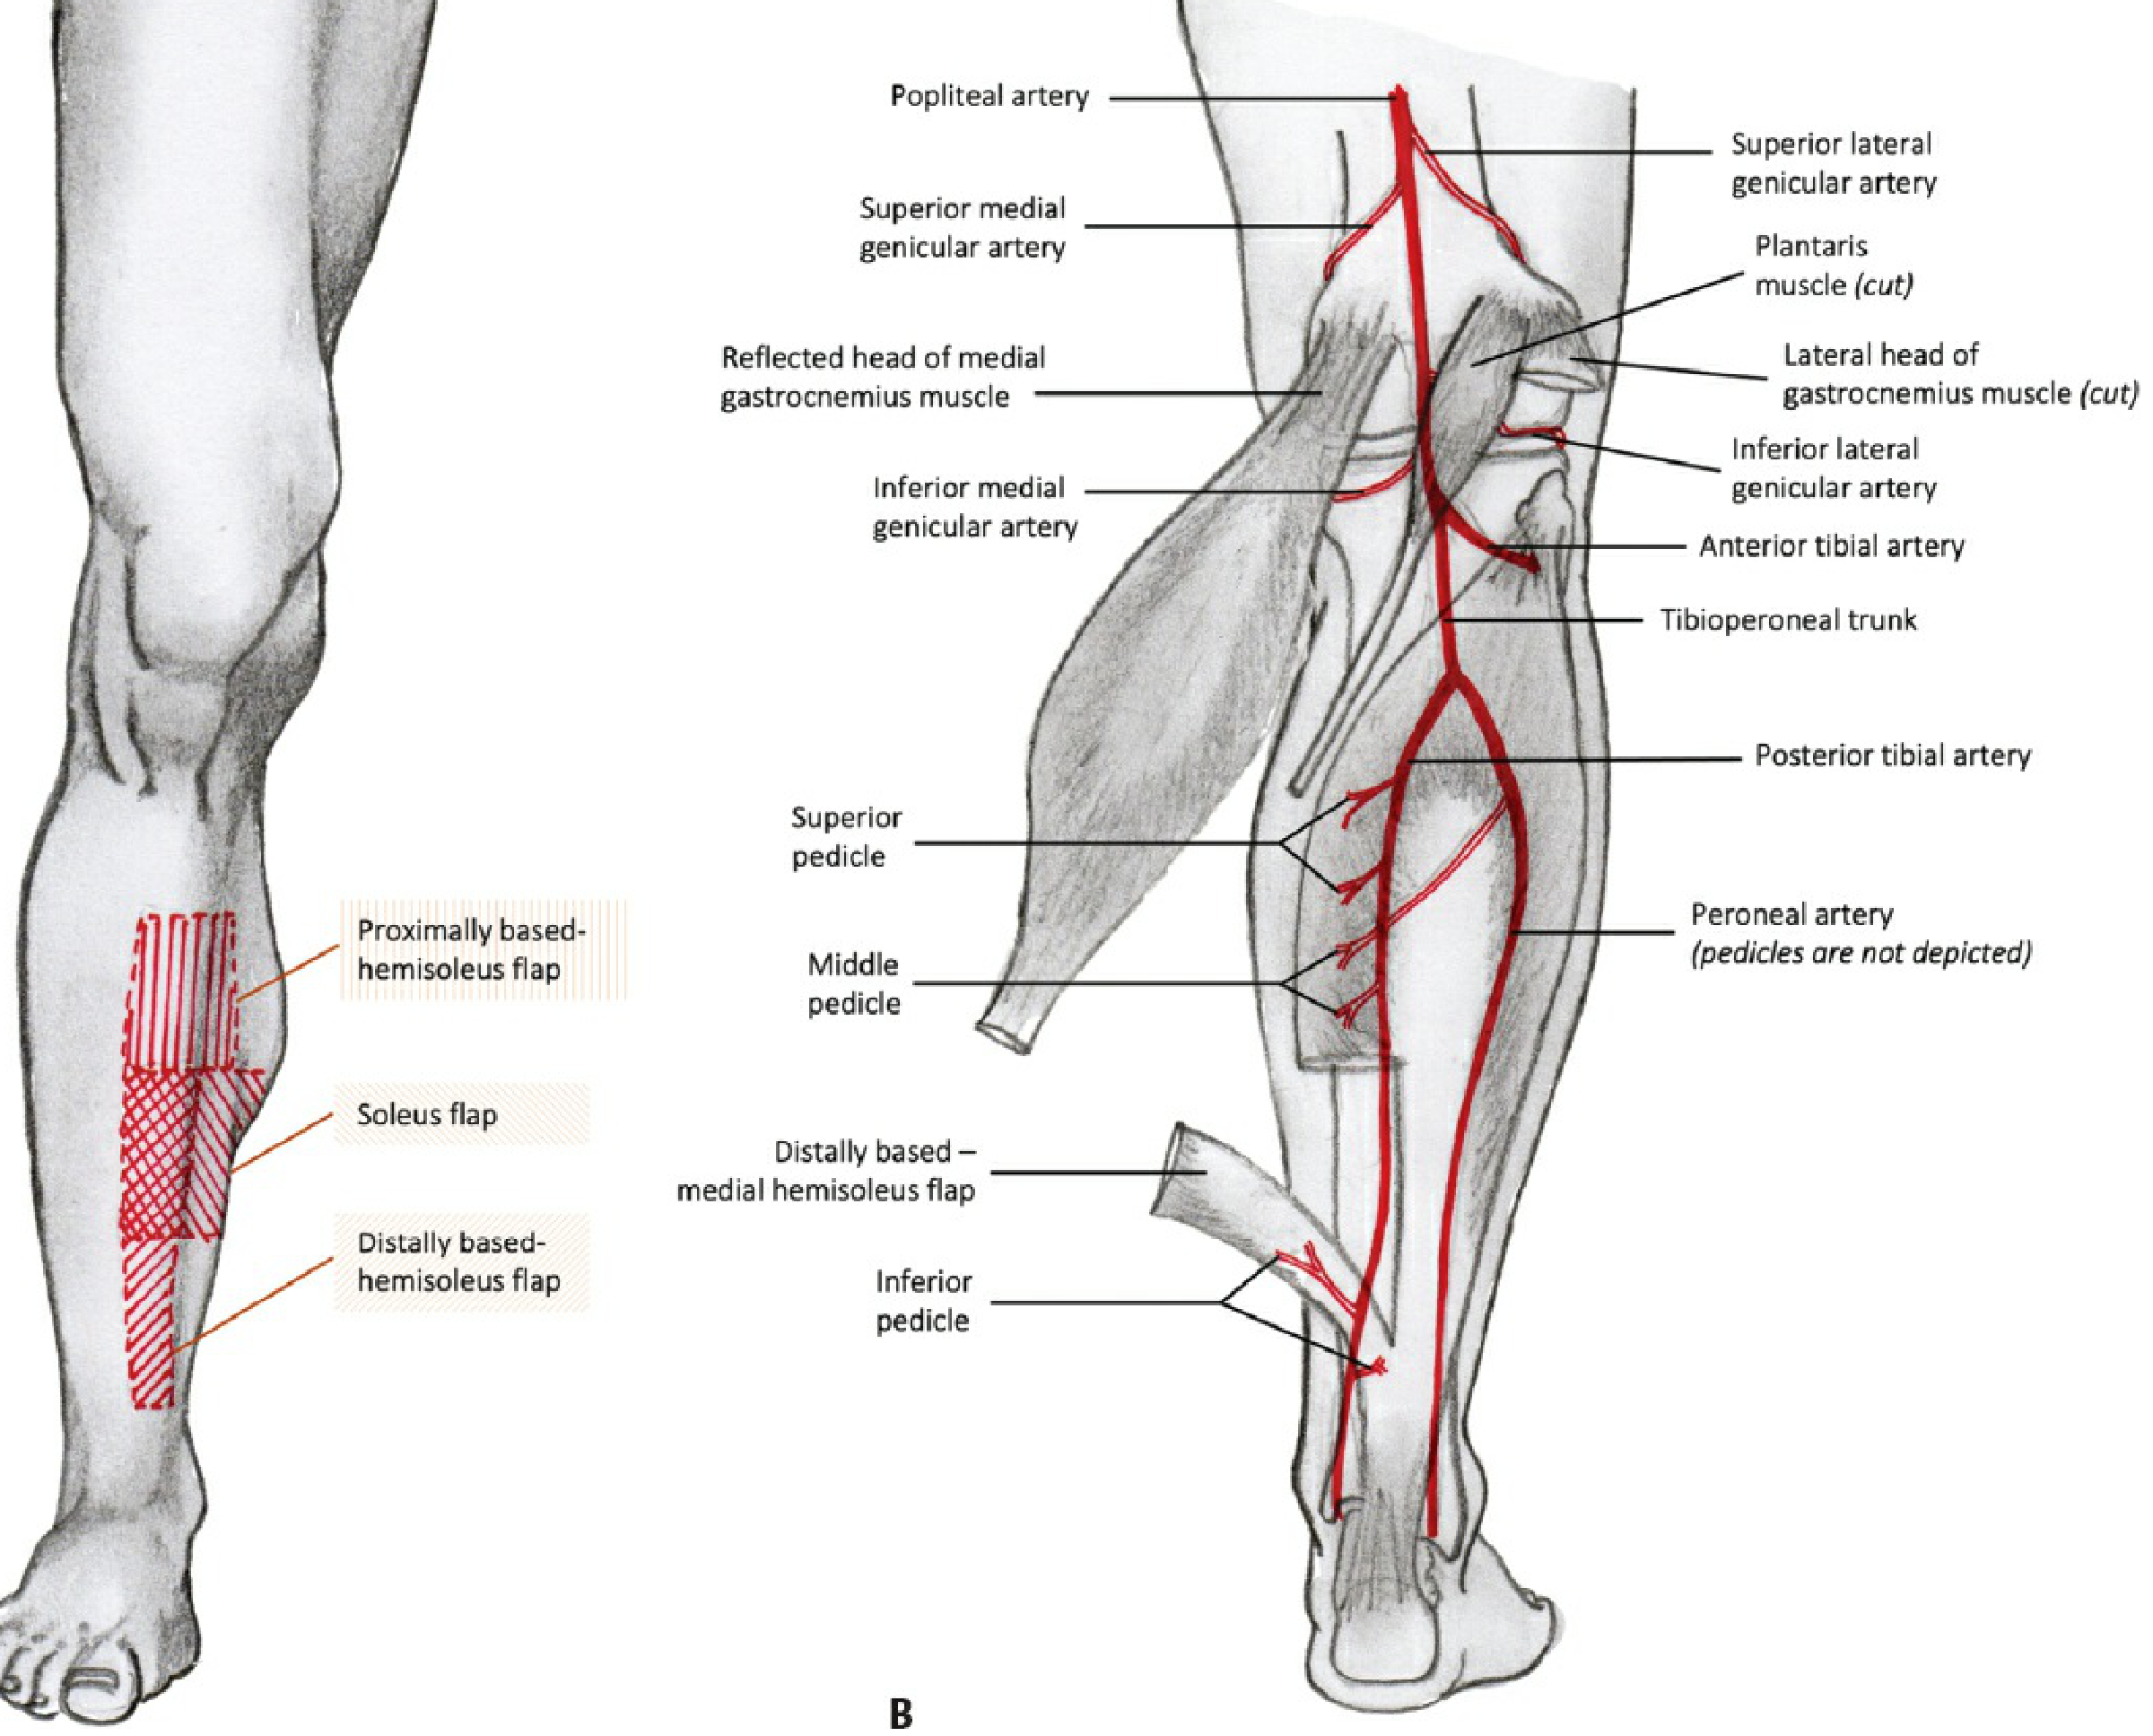
Preoperative Planning
- Patient position: Supine with the hip externally rotated and abducted, knee slightly flexed (a sandbag under the ipsilateral hip helps)
- Tourniquet: Applied to thigh; helps identify pedicles during dissection
- Anesthesia: General or spinal
- Mark the incision: 2 cm posterior and parallel to the medial border of the tibia; the existing wound is incorporated into the incision proximally and distally
- Doppler: Optional but useful to confirm perforators preoperatively
Step-by-Step Operative Technique (Medial Proximally Based Hemisoleus)
Step 1 - Skin Incision
Make a longitudinal skin incision 2 cm posterior to the medial border of the tibia, extending proximally and distally as needed. The incision runs parallel to the tibia through the deep fascia.
Step 2 - Identify and Mobilize the Gastrocnemius
Open the deep fascia in line with the incision. The gastrocnemius is the most superficial muscle. Identify the intermuscular plane between the medial gastrocnemius and the soleus. Blunt dissection with a finger or scissors develops this plane.
Retract the gastrocnemius posteriorly to expose the anterior surface of the soleus.
Step 3 - Identify the Midline Raphe of Soleus
The soleus has a distinct midline fibromuscular raphe separating the medial and lateral halves. This is the key landmark for splitting. Visualize it on the posterior face of the muscle.
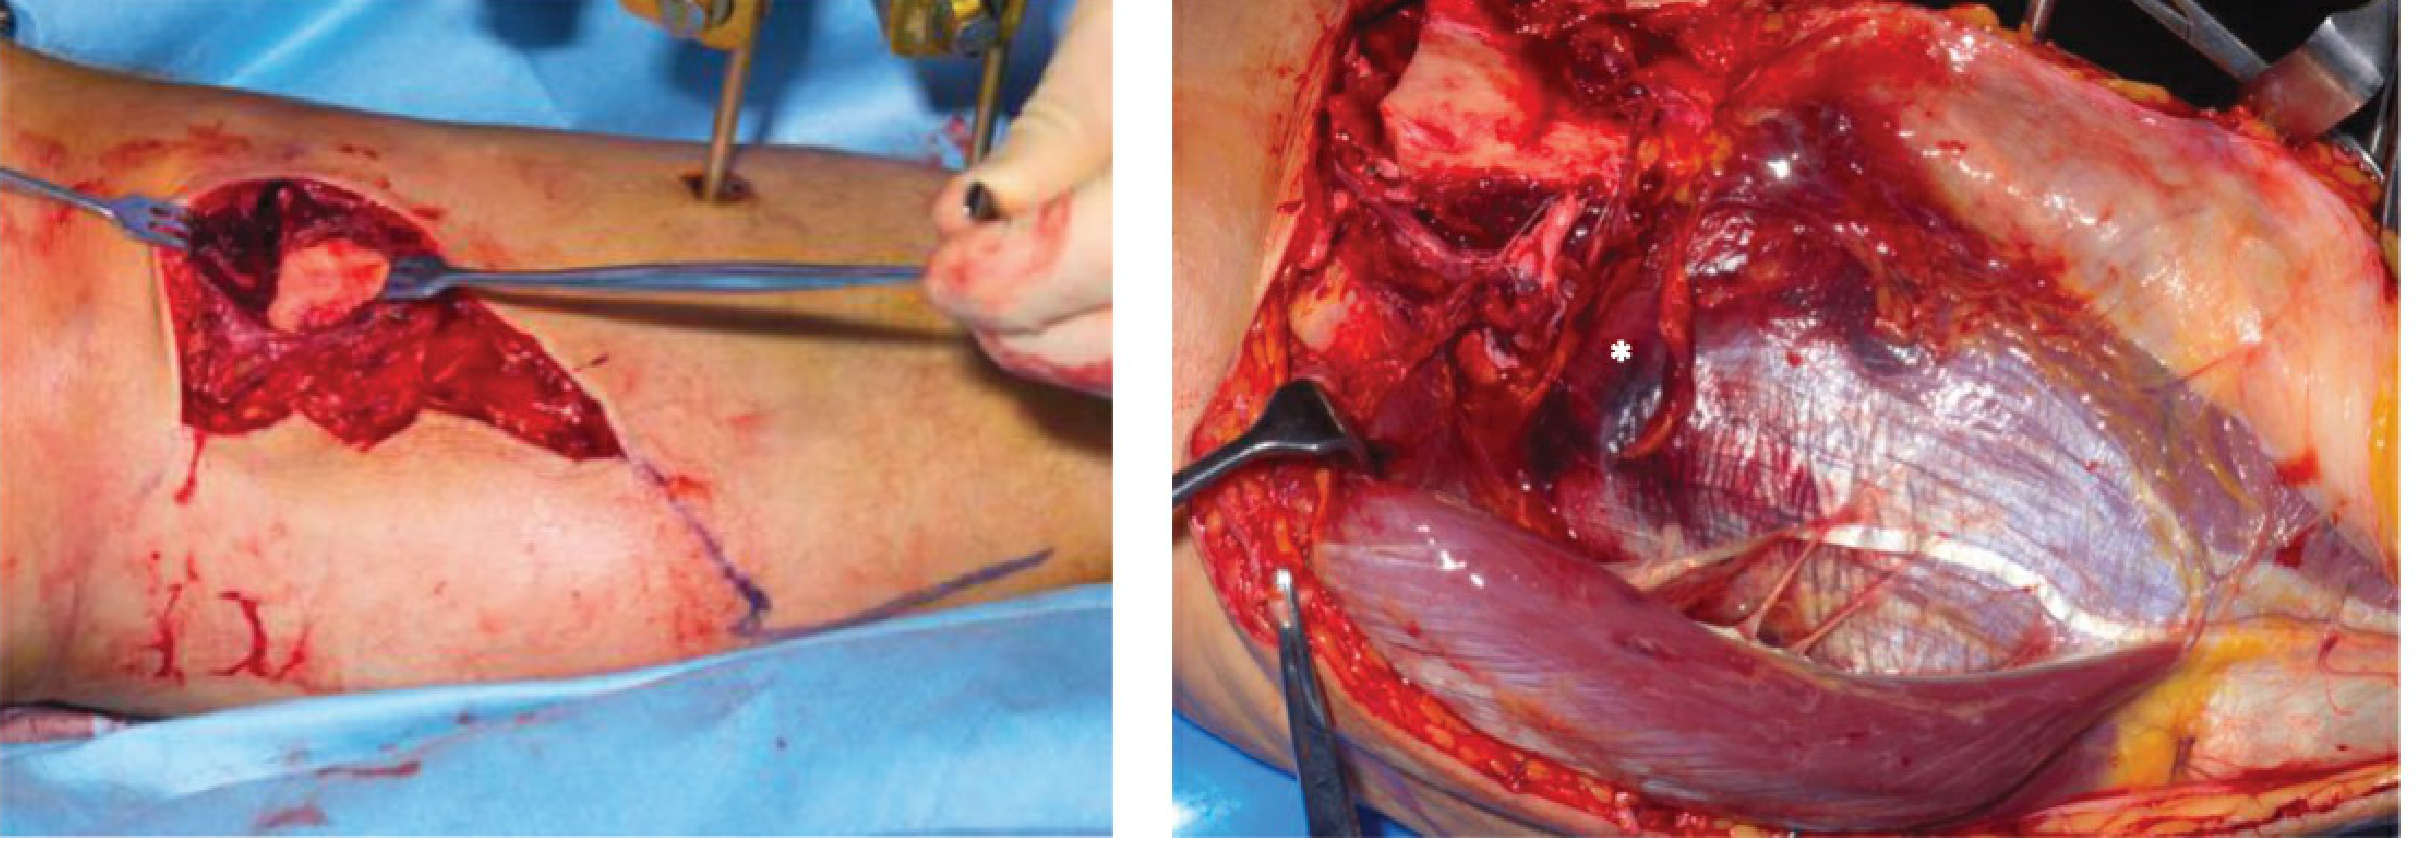
Step 4 - Separate Soleus from Deep Flexors
On the deep (anterior) surface of the soleus, develop the plane between the soleus and the deep flexors (flexor digitorum longus, posterior tibialis, flexor hallucis longus). This plane is relatively avascular. Continue this elevation from distal to proximal.
Step 5 - Identify the Vascular Pedicles
Perforators from the posterior tibial artery enter the medial half of the soleus along its medial border. Identify all perforators carefully:
- Preserve as many perforators as possible to maximize flap vascularity
- Only ligate the most distal perforators that restrict the arc of rotation
- Preserve the dominant middle and superior pedicles
Step 6 - Split the Muscle Longitudinally
Using electrocautery, split the soleus along its midline raphe from distal to proximal. This divides the muscle cleanly into medial and lateral halves. The medial half forms the hemisoleus flap.
Step 7 - Distal Division
Divide the distal attachment of the medial half of the soleus from the Achilles tendon/calcaneus. This is done sharply, leaving a cuff if needed. The flap is now based proximally on the posterior tibial artery pedicles.
Step 8 - Test Arc of Rotation
Gently rotate the mobilized medial hemisoleus flap anteriorly toward the defect. Check that it reaches without tension. If arc of rotation is insufficient, carefully ligate one or two additional distal perforators to extend reach.
Step 9 - Transfer and Inset the Flap
Rotate the flap anteriorly (the medial route passes superficial to the tibia) to cover the tibial defect. The flap is tunnelled subcutaneously if needed. Inset with absorbable sutures (e.g., 2-0 Vicryl) anchoring the muscle to the wound edges.
Step 10 - Skin Graft
The muscle surface is covered with a split-thickness skin graft (STSG), typically harvested from the anterior or lateral thigh at 0.012-0.015 inch thickness. Apply the graft with tie-over bolster dressing or negative-pressure wound therapy (NPWT) to maximize graft take.
Step 11 - Donor Site Closure
The donor site (posterior medial leg) is closed in layers over a suction drain. The skin is approximated if possible; if not, a small STSG may be required.
Step 12 - Splinting / Immobilization
Apply an above-knee plaster of Paris (POP) slab or backslab for approximately 1 week to prevent skin graft loss due to shear from ankle movement.
Distally Based Hemisoleus (for Distal Third Defects)
The technique is similar except:
- The proximal pedicles are ligated and the flap is based on the inferior pedicle from the posterior tibial artery
- Reliability is reduced compared to the proximal variant - careful Doppler assessment preoperatively is mandatory
- Not recommended in smokers or patients with peripheral vascular disease
- The same exposure is used as for posterior tibial vessel dissection (useful as a bail-out if the flap proves unreliable - allows conversion to free flap on the same exposure)
Postoperative Care
| Timepoint | Action |
|---|---|
| Immediate | Limb elevation, above-knee slab, wound monitoring |
| Day 5-7 | First dressing change, check graft take |
| Week 1-2 | Remove slab, initiate gentle mobilization |
| Week 6+ | Weight bearing as permitted by fracture fixation |
Key Points & Pitfalls
- Do not sacrifice both the gastrocnemius AND the whole soleus in the same leg - this causes severe functional deficit
- Zone of injury matters - if the pedicle has been crushed or the muscle belly is contused, the flap will fail; examine muscle actively bleeding and contractility under stimulation before committing
- Arc of rotation is limited - best for defects directly over the middle third tibia; larger or more proximal/distal defects may need free tissue transfer
- Preserve the saphenous vein during medial dissection
- The flap has been shown to cover defects of varying size with high success rates (>90% in most series) and does not significantly impair ankle plantar flexion
This is a shared conversation. Sign in to Orris to start your own chat.