
Cuboital fossa
cubital fossa anatomy diagram contents boundaries
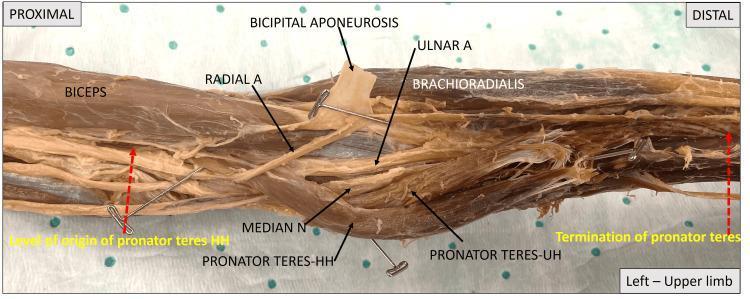
This cadaveric photograph illustrates the gross anatomy of the left cubital fossa and proximal forearm, oriented from proximal (left) to distal (right). Key muscular landmarks include the biceps brachii, brachioradialis, and the two heads of the pronator teres (humeral head - HH and ulnar head - UH). The bicipital aponeurosis is reflected to reveal underlying neurovascular structures. The median nerve (MEDIAN N) is clearly visible traversing the cubital fossa, passing between the humeral and ulnar heads of the pronator teres muscle. Proximally, the brachial artery bifurcation is demonstrated, showing the radial artery (RADIAL A) coursing superficially toward the lateral forearm and the ulnar artery (ULNAR A) diving deeper, posterior to the pronator teres. Red dotted arrows indicate the functional extent of the pronator teres muscle from its origin at the medial epicondyle to its termination on the radius. This image serves as an educational tool for identifying the spatial relationships and potential entrapment sites of the median nerve in the proximal forearm.
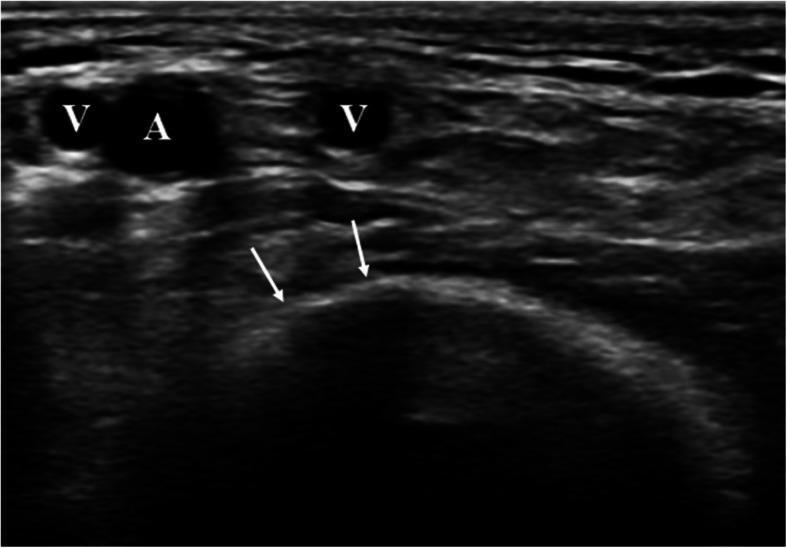
This diagnostic ultrasound image presents a transversal view of the cubital fossa, demonstrating the vascular and bony anatomy relevant for endovascular access. Centrally, the brachial artery (A. brachialis) is identified as an anechoic circular structure labeled 'A'. It is flanked by two brachial veins, labeled 'V', which appear as smaller anechoic lumen. Deep to the vascular bundle, the distal humerus is visualized as a prominent, hyperechoic curvilinear interface indicated by white arrows. This bony surface serves as a mechanical abutment, which is clinically significant for facilitating effective manual compression of the brachial artery following catheterization or needle puncture. The image highlights the utility of ultrasound guidance in identifying optimal puncture sites away from bifurcations and in close proximity to stabilizing skeletal landmarks to minimize access site complications such as hematomas or ischemia.
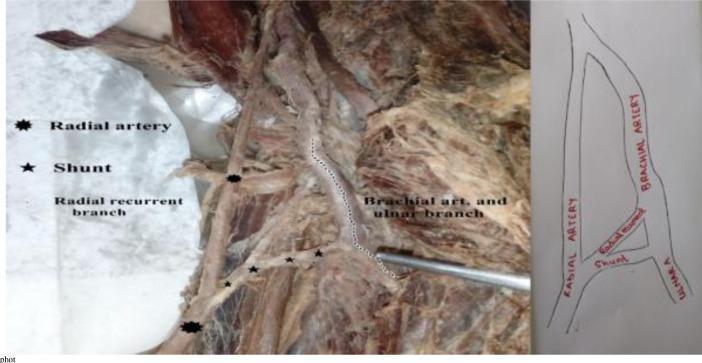
This composite image features a clinical photograph of a human cadaveric dissection (left) and a corresponding schematic diagram (right) of the cubital fossa, illustrating an anatomical variation of the upper limb vasculature. The primary focus is a vascular shunt (anastomosis) connecting the brachial artery to a high-origin radial artery. In this specimen, the radial artery originates proximally to the cubital fossa and descends laterally. The main brachial artery trunk is seen dividing into an ulnar branch medially. A distinct transverse communicating vessel, or shunt, is visible bridging the brachial/ulnar trunk to the radial artery. Notably, a radial recurrent branch is shown arising directly from this shunt rather than from the radial artery itself, traveling proximally toward the interval between the brachialis and brachioradialis muscles. This educational material demonstrates rare vascular patterns and arterial variations of the forearm, providing clinical relevance for surgical procedures, vascular access, and radiological interpretation in the cubital region.
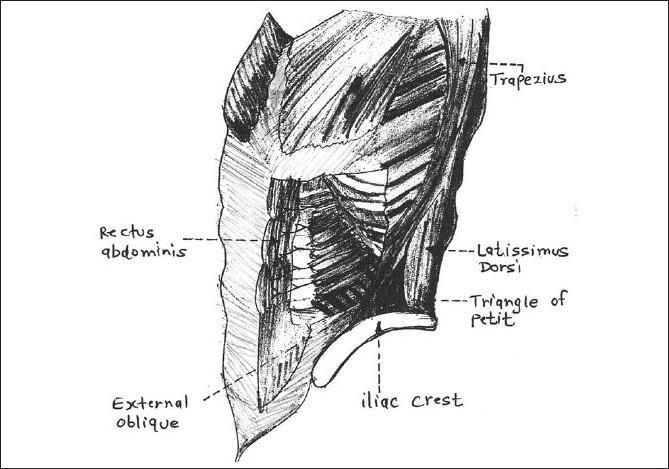
This medical anatomical diagram is a posterior-lateral sketch of the human torso, illustrating the musculature and boundaries of the lumbar triangle, also known as the Triangle of Petit. The diagram highlights the clinical significance of this region for procedures such as the transversus abdominis plane (TAP) block. The anatomical boundaries are clearly labeled: the posterior border is formed by the latissimus dorsi muscle, the anterior border by the external oblique muscle, and the base (inferior border) by the iliac crest. Other visible anatomical landmarks include the rectus abdominis muscle, located medially and anteriorly, and the trapezius muscle superiorly. The illustration demonstrates the convergence of these muscular structures to form a small, triangular area of relative weakness in the abdominal wall, which is a potential site for lumbar hernias. This diagram is designed for educational use in anatomy, regional anesthesia, and general surgery to help students and clinicians identify surface landmarks and deep structural relationships in the lumbar region.
Cubital Fossa
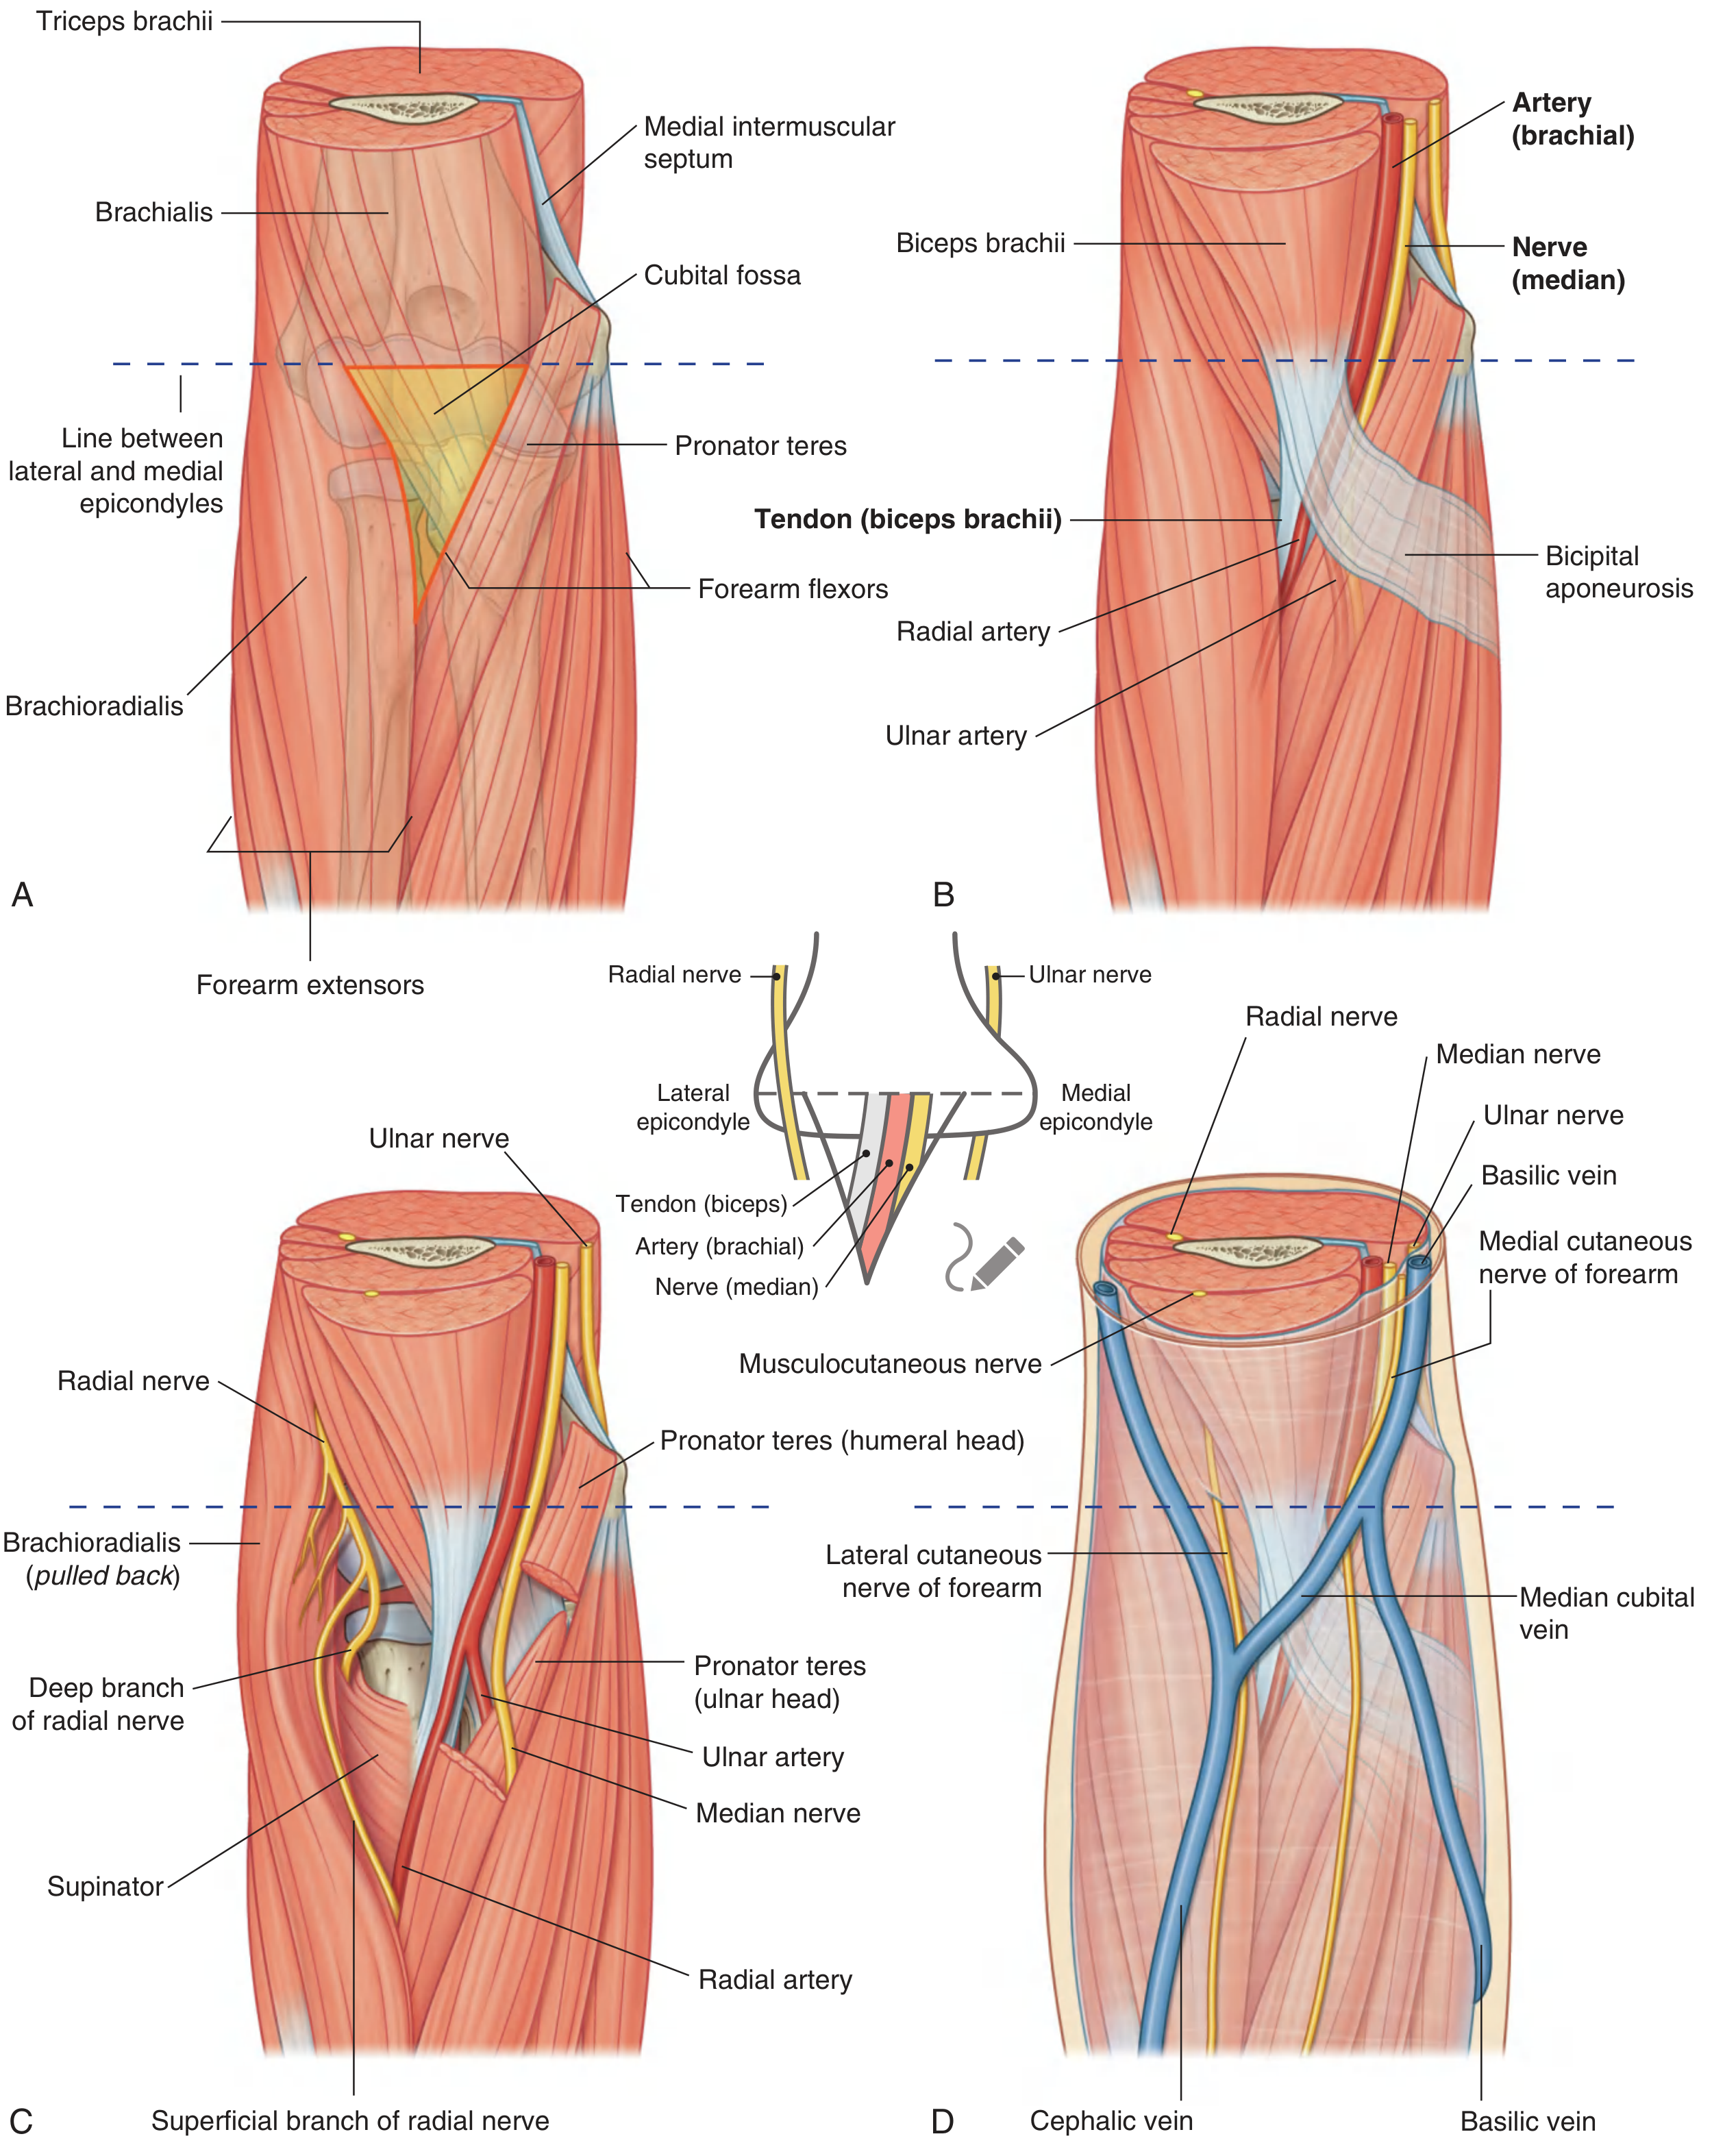
Boundaries
| Boundary | Structure |
|---|---|
| Base (superior) | Imaginary horizontal line connecting the medial and lateral epicondyles of the humerus |
| Lateral border | Brachioradialis muscle (originating from the lateral supraepicondylar ridge) |
| Medial border | Pronator teres muscle (originating from the medial epicondyle) |
| Apex | Where the brachioradialis and pronator teres meet distally |
| Floor (bed) | Mainly brachialis muscle (with supinator contributing laterally) |
| Roof | Deep fascia reinforced by the bicipital aponeurosis (lacertus fibrosus), covered by superficial fascia and skin |
Contents (Lateral to Medial)
- Tendon of biceps brachii - easily palpable; the bicipital aponeurosis sweeps medially from it to cover the brachial artery and median nerve
- Brachial artery - bifurcates into the radial and ulnar arteries at the apex of the fossa (this bifurcation may occasionally occur higher up, even in the axilla)
- Median nerve - lies immediately medial to the brachial artery; exits the fossa by passing between the two heads (humeral and ulnar) of the pronator teres
The Radial Nerve - Special Position
- Superficial branch - continues into the forearm deep to brachioradialis (sensory)
- Deep branch (posterior interosseous nerve) - winds around the radius passing between the two heads of the supinator to reach the posterior compartment of the forearm
The Ulnar Nerve - NOT in the Cubital Fossa
Roof Structures (Superficial)
- Median cubital vein - passes diagonally across the roof, connecting the cephalic vein (laterally) to the basilic vein (medially). This is the most common site for venepuncture and IV cannulation.
- Cephalic vein (lateral)
- Basilic vein (medial)
Clinical Relevance
| Point | Significance |
|---|---|
| Blood pressure measurement | Brachial artery is auscultated/palpated in the cubital fossa with the stethoscope bell |
| Venepuncture | Median cubital vein in the roof is the most accessible vein in the body |
| Median nerve compression | Can be trapped as it passes between the heads of pronator teres (pronator teres syndrome) |
| Posterior interosseous nerve palsy | Deep branch of radial nerve can be compressed at the supinator (radial tunnel syndrome) - causes weakness of wrist and finger extension without sensory loss |
| Brachial artery bifurcation variant | High bifurcation (up to axilla) can complicate arterial access or surgical procedures |
| Cubital fossa approach | Used for cardiac catheterization via the brachial artery (Sones technique) |