
Knee joint hand r and scamatic diagramhand made diagram easy make use simplest English word so ican write in exam
A simple hand-drawn style schematic diagram of the knee joint showing all major parts labeled in simple English. Include: Femur (thigh bone) at top, Tibia (shin bone) at bottom, Fibula (thin bone beside tibia), Patella (kneecap) at front, Medial meniscus and Lateral meniscus (cushion pads), Anterior cruciate ligament ACL and Posterior cruciate ligament PCL (cross ligaments inside), Medial collateral ligament MCL and Lateral collateral ligament LCL (side ligaments), Synovial membrane (inner lining), Joint capsule (outer covering), Articular cartilage (smooth layer on bone ends), Quadriceps tendon (above kneecap), Patellar tendon (below kneecap). Draw in clean black lines on white background, label each part with arrows and simple short text. Style: student anatomy exam diagram, easy to copy by hand.
Knee Joint - Diagram from Gray's Anatomy Textbook
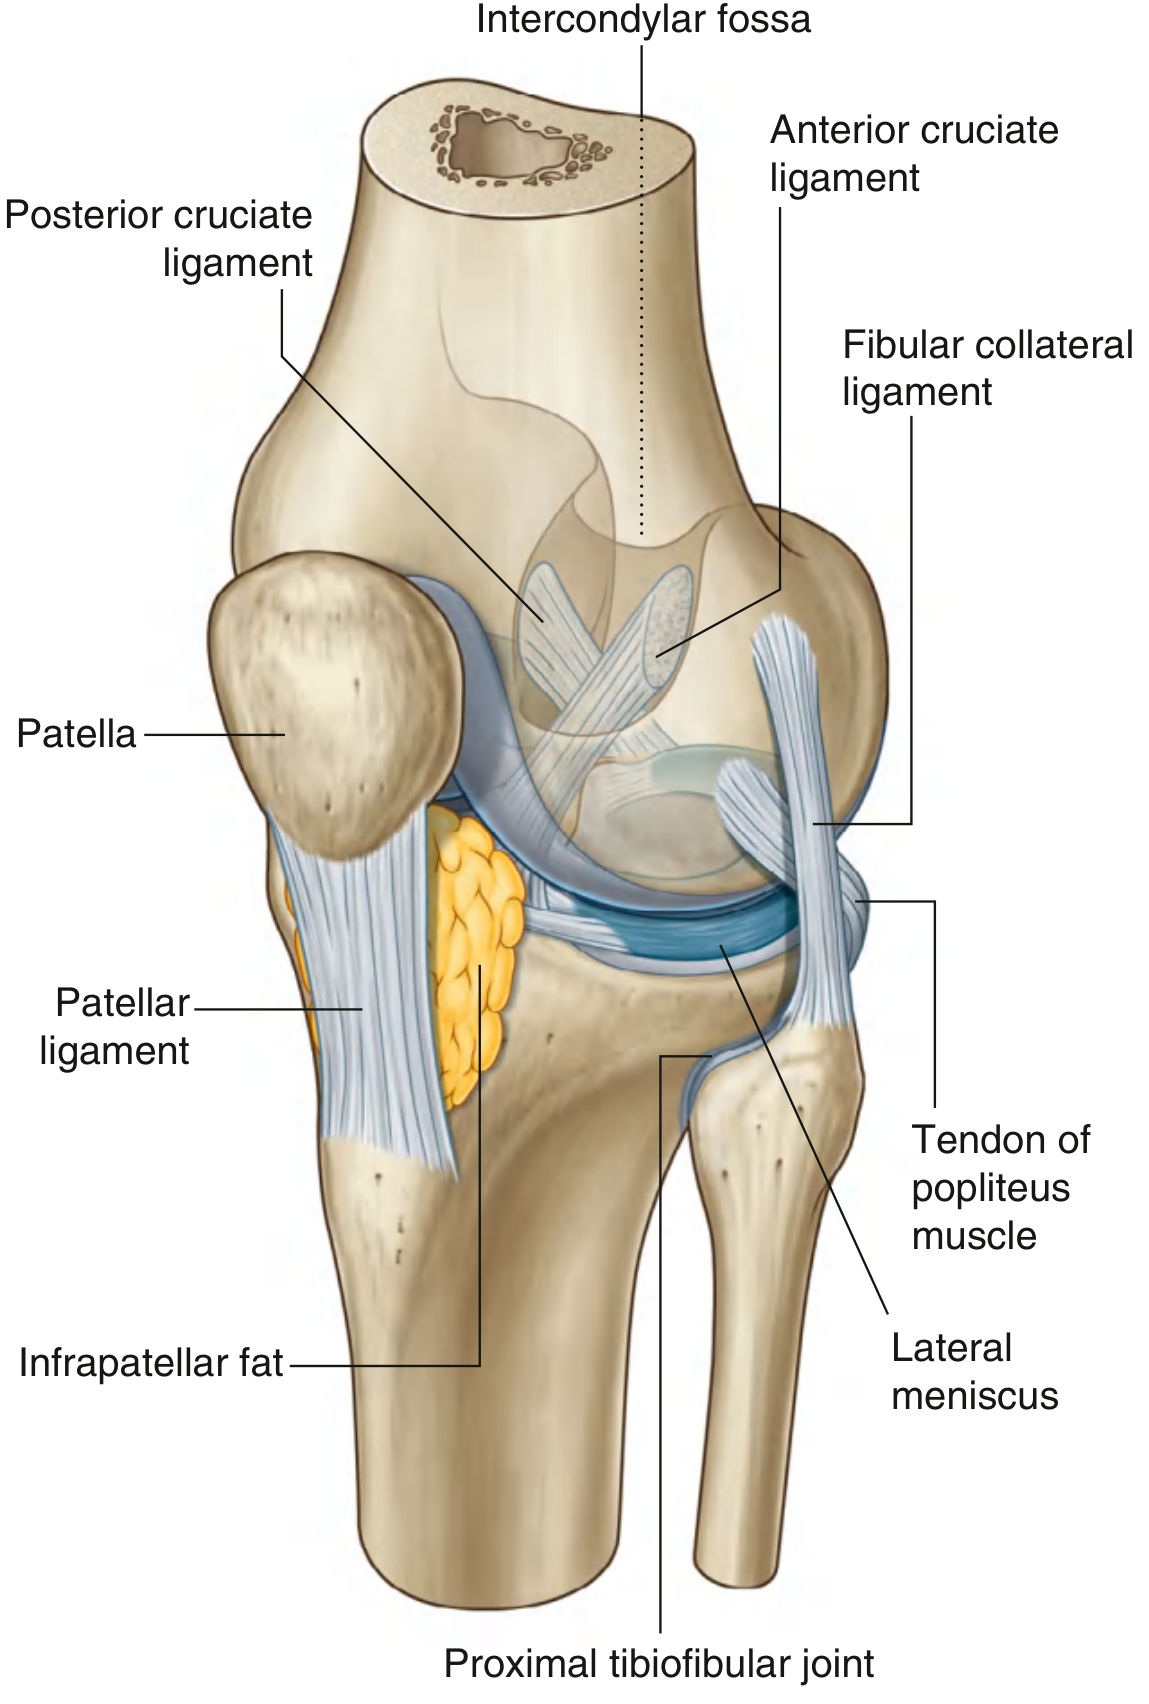
Your Easy Hand-Drawn Schematic Diagram
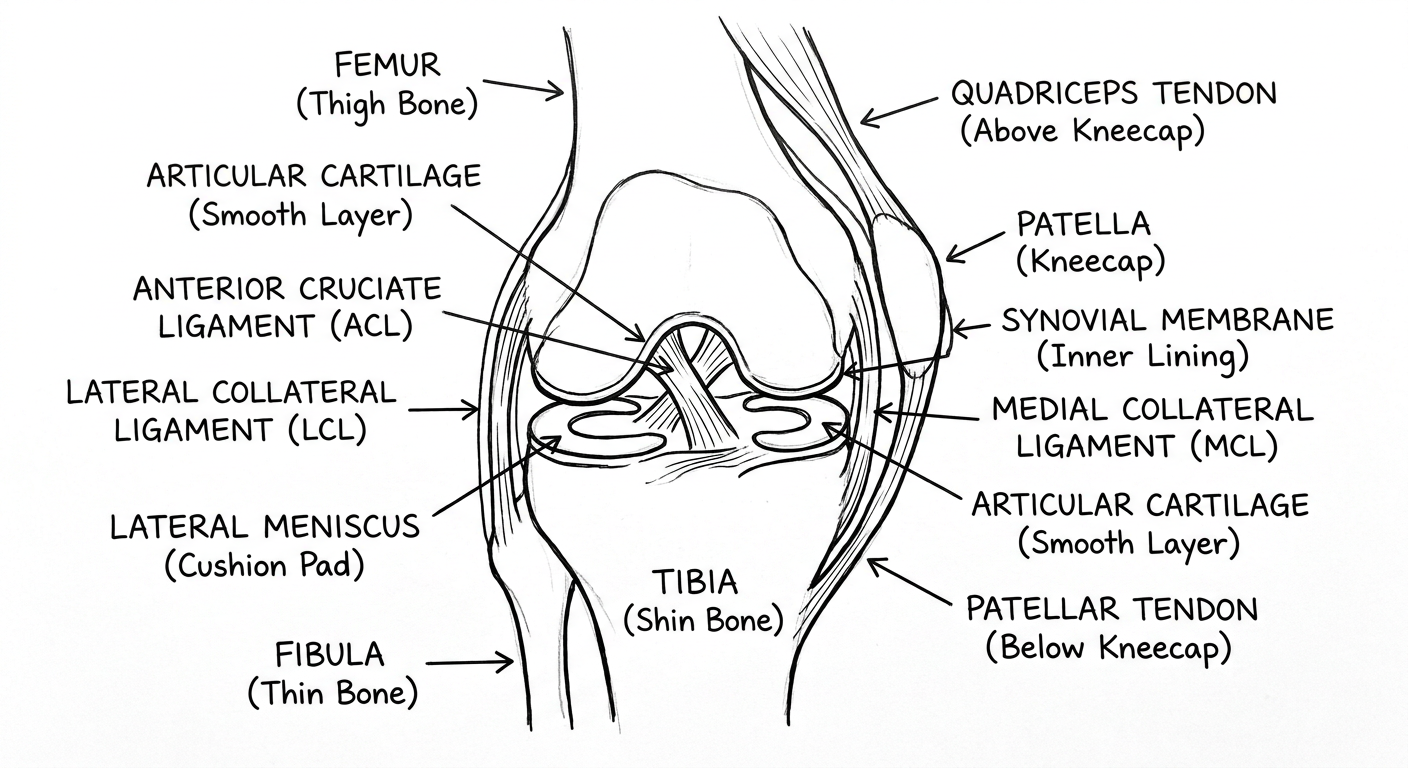
How to Draw the Knee Joint in Exam (Step by Step)
- Draw a wide bone at the top = Femur (thigh bone)
- Draw a wide bone at the bottom = Tibia (shin bone)
- Draw a thin bone on the side = Fibula (small side bone)
- Draw a small oval bone at the front = Patella (kneecap)
- Between femur and tibia, draw two C-shaped pads = Medial Meniscus (inner pad) and Lateral Meniscus (outer pad)
- These act as shock absorbers / cushions
- Draw two lines crossing each other like an X inside the joint = ACL (Anterior Cruciate Ligament - front) and PCL (Posterior Cruciate Ligament - back)
- These hold the bones together from slipping forward or backward
- One line on the inner side = MCL (Medial Collateral Ligament)
- One line on the outer side = LCL (Lateral Collateral Ligament)
- These prevent side-to-side wobble
- A thick band above the kneecap = Quadriceps Tendon (connects thigh muscle to kneecap)
- A thick band below the kneecap = Patellar Ligament / Tendon (connects kneecap to tibia)
- Outer bag around the whole joint = Joint Capsule (protective outer cover)
- Inner lining of the bag = Synovial Membrane (makes the slippery fluid)
- Thin smooth layer on bone ends = Articular Cartilage (reduces friction)
Quick Memory Table for Exam
| Part | Simple Name | Job |
|---|---|---|
| Femur | Thigh bone (top) | Upper bone of joint |
| Tibia | Shin bone (bottom) | Lower bone, carries weight |
| Fibula | Small side bone | Attached on the side |
| Patella | Kneecap | Protects the front |
| Medial Meniscus | Inner cushion pad | Absorbs shock, inner side |
| Lateral Meniscus | Outer cushion pad | Absorbs shock, outer side |
| ACL | Front cross ligament | Stops tibia sliding forward |
| PCL | Back cross ligament | Stops tibia sliding backward |
| MCL | Inner side ligament | Stops knee bending inward |
| LCL | Outer side ligament | Stops knee bending outward |
| Synovial Membrane | Inner joint lining | Makes joint fluid (oil) |
| Articular Cartilage | Bone surface coat | Smooth surface, no friction |
| Patellar Ligament | Tendon below kneecap | Connects kneecap to tibia |
Key Facts to Write in Exam
- The knee is the largest synovial joint in the body
- It is mainly a hinge joint - it bends and straightens
- It has two bones meeting - femur + tibia (and patella at the front)
- Two menisci = C-shaped cartilage pads - act as shock absorbers
- Two cruciate ligaments (ACL + PCL) cross inside the joint like an X
- Two collateral ligaments (MCL + LCL) are on the sides
- Synovial fluid inside the joint keeps it smooth and slippery
- The patella (kneecap) glides in a groove on the femur