
treatment protocol to follow with drugs and dosage in detail for gdv in dogs
GDV gastric dilatation volvulus dogs treatment protocol drugs dosage 2024
https://www.dvm360.com/view/successful-stabilization-patient…
GDV (Gastric Dilatation-Volvulus) Treatment Protocol in Dogs
PHASE 1: IMMEDIATE RESUSCITATION (First 15-30 minutes)
1.1 Vascular Access
- Place two large-bore IV catheters (cephalic + jugular or saphenous) immediately
- Begin oxygen supplementation via mask or flow-by
1.2 Fluid Resuscitation
| Fluid Type | Dose | Rate |
|---|---|---|
| Isotonic crystalloid (Lactated Ringer's or Plasma-Lyte A) | 20-30 mL/kg IV bolus | As fast as possible; repeat to effect |
| Hypertonic saline (7.5%) | 4-5 mL/kg IV slowly | Over 5-10 min (use ONCE, then follow with crystalloids) |
| Synthetic colloid (Hetastarch/Voluven) | 5-10 mL/kg IV | Over 15-20 min, used when crystalloids alone are insufficient |
- Goal: Restore perfusion - target MAP >65 mmHg, heart rate <140 bpm, improved mentation and mucous membrane color
- Once stable, maintenance fluids: 10-20 mL/kg/hr during surgery
PHASE 2: GASTRIC DECOMPRESSION
2.1 Orogastric Intubation (preferred if possible)
- Sedate patient (see below), measure tube from tip of nose to last rib, lubricate
- Pass stomach tube gently past the obstruction - confirms GD vs GDV
- If tube passes: lavage with warm water until fluid runs clear
2.2 Percutaneous Gastrocentesis (if tube cannot pass or patient deteriorating)
- Use a 14-16 gauge needle at the area of maximal tympany on right lateral or dorsal flank
- Relieves acute pressure urgently to allow stabilization before surgery
2.3 Sedation for Decompression
- Butorphanol: 0.2-0.4 mg/kg IV, or
- Hydromorphone: 0.1-0.2 mg/kg IV + Midazolam: 0.2 mg/kg IV
PHASE 3: ANALGESIA
| Drug | Dose | Route | Frequency |
|---|---|---|---|
| Methadone | 0.2-0.3 mg/kg | IV | q4-6h (first 24-48h) |
| Hydromorphone | 0.1-0.2 mg/kg | IV | q4h, or CRI: 0.025 mg/kg/hr |
| Fentanyl (CRI) | 5 mcg/kg/h (loading: 5 mcg/kg IV bolus) | IV CRI | Continue 12-24h post-op |
| Buprenorphine | 0.01-0.02 mg/kg | IV | q6-8h (used in recovery phase) |
| Morphine | 0.5-1 mg/kg | SQ | q4h (moderate-severe pain) |
| Ketamine (adjunct) | 0.15-0.6 mg/kg/hr | IV CRI | With opioids for somatic pain |
| Lidocaine (analgesic adjunct) | 1.5-3 mg/kg/hr | IV CRI | Loading dose = 1 hr dose first |
PHASE 4: ANTI-ARRHYTHMIC THERAPY
- Heart rate >140-160 bpm with VPCs
- R-on-T phenomenon
- Sustained VT
- Hemodynamic compromise
| Drug | Dose | Notes |
|---|---|---|
| Lidocaine 2% | 2 mg/kg IV bolus (may repeat once) | Bolus over 1-2 min; can give up to 8 mg/kg total |
| Lidocaine CRI | 50-80 mcg/kg/min (= ~3-5 mg/kg/hr) | Follow bolus; continue 24-48h post-op if needed |
| Procainamide | 10-15 mg/kg IV slowly | If lidocaine fails; give over 5-10 min |
| Amiodarone | 5 mg/kg IV over 20 min | Refractory cases |
PHASE 5: ANTIBIOTICS
| Drug | Dose | Route | Frequency |
|---|---|---|---|
| Ampicillin-sulbactam | 22 mg/kg | IV | q8h |
| Cefazolin | 22 mg/kg | IV | q8h (peri-operative prophylaxis) |
| Enrofloxacin | 5-10 mg/kg | IV | q24h (add if necrosis/sepsis suspected) |
| Metronidazole | 15 mg/kg | IV | q12h (add for anaerobic coverage) |
PHASE 6: ANESTHESIA FOR SURGERY
Induction Option A (preferred for critical patients):
| Drug | Dose |
|---|---|
| Hydromorphone | 0.1-0.2 mg/kg IV |
| Midazolam | 0.2 mg/kg IV |
| Lidocaine | 1-2 mg/kg IV |
| Then Propofol to effect | 1-4 mg/kg IV slowly (titrate) |
Induction Option B (hemodynamically unstable):
| Drug | Dose | Notes |
|---|---|---|
| Ketamine (100 mg/mL) + Diazepam (5 mg/mL) | 1 mL per 20 lbs body weight of 50:50 mix IV | Add opioid if using this protocol |
PHASE 7: SURGICAL MANAGEMENT
- Derotate the stomach - identify direction of volvulus (usually clockwise when viewed from cranial)
- Assess viability - gastric wall, spleen, and omentum for ischemic necrosis
- Partial gastrectomy if necrotic tissue present
- Splenectomy if splenic thrombosis or avulsion
- Gastropexy (MANDATORY) - right-sided incisional or belt-loop gastropexy to prevent recurrence
- Without gastropexy: 75-80% recurrence rate
- With gastropexy: <5% recurrence rate
PHASE 8: POST-OPERATIVE MANAGEMENT
8.1 Gastroprotectants
| Drug | Dose | Route | Frequency |
|---|---|---|---|
| Omeprazole | 1 mg/kg | IV or PO | q12h (most common; 76/90 cases in studies) |
| Pantoprazole | 1 mg/kg | IV | q12h (IV alternative) |
| Sucralfate | 0.5-1 g | PO | q8h (mucosal protectant; add if mucosal injury suspected) |
8.2 Anti-emetics / Prokinetics
| Drug | Dose | Route | Frequency |
|---|---|---|---|
| Maropitant (Cerenia) | 1 mg/kg | IV | q24h |
| Metoclopramide | 0.2-0.5 mg/kg | IV | q8h, or CRI: 1-2 mg/kg/day |
| Ondansetron | 0.1-0.2 mg/kg | IV | q8-12h |
8.3 NSAIDs (start after stable, hydrated, and eating)
| Drug | Dose | Route | Frequency |
|---|---|---|---|
| Meloxicam | 0.1 mg/kg | IV/SQ/PO | q24h (now preferred over carprofen) |
| Carprofen | 2.2 mg/kg | PO | q12h (alternative) |
8.4 Nutritional Support
- Withhold food 12-24h post-op
- Small amounts of water once GI motility returns
- Begin bland diet in small frequent meals 24-36h post-op
- Consider early enteral nutrition via NJ tube if prolonged ileus
PHASE 9: MONITORING
| Parameter | Target | Frequency |
|---|---|---|
| ECG | No VPCs/VT; HR <140 bpm | Continuous 24-48h, then q8h until 48h post-op |
| Blood pressure (MAP) | >65 mmHg | q1-2h |
| Lactate | <2 mmol/L | q4-6h |
| PCV/TP | PCV >25%, TP >40 g/L | q8-12h |
| Electrolytes (K+, Na+) | Normal range | q6-8h |
| BUN/Creatinine | Monitor for AKI | q12-24h |
| Coagulation (PT/aPTT, ACT) | Normal | At admission and q12h if DIC suspected |
PROGNOSIS
| Factor | Impact |
|---|---|
| Gastric necrosis requiring resection | Mortality rises to 35-60% |
| Splenectomy alone | Less impact on mortality |
| Perioperative cardiac arrest | Very poor prognosis |
| Lactate >6 mmol/L at presentation | Associated with higher mortality |
| Early surgery (<6h from onset) | Best outcomes |
- 130-case GDV analysis, Turin 2011-2024 - drugs and outcomes data
- DVM360 GDV stabilization protocol - anesthesia and fluid dosing
- Frontiers in Veterinary Science - lidocaine CRI in GDV - post-op analgesia and anti-arrhythmic data
Clinical note: All drug doses should be confirmed against current formulary references and adjusted based on individual patient weight, renal/hepatic function, and clinical response. This protocol reflects current evidence-based veterinary emergency practice as of 2024-2026.
Percutaneous Gastrocentesis in full detail
percutaneous gastrocentesis GDV dogs technique step by step procedure needle placement
https://www.merckvetmanual.com/digestive-system/surgical-pro…
percutaneous gastrocentesis GDV dog needle stomach decompression
Two-panel intraoperative fluoroscopic image showing the precise localization of a spinal needle during a percutaneous endoscopic thoracic decompression (PETD) procedure. Panel A displays an Anteroposterior (AP) view of the spine, highlighting the vertebral bodies, pedicles, and spinous processes. A radiopaque spinal needle is seen approaching from the left, with its tip positioned at the medial margin of the facet joint, serving as the target entry point. Panel B shows a lateral view, illustrating the vertical alignment of the vertebral bodies and lucent intervertebral disc spaces. The spinal needle is visible as a horizontal radiopaque line, confirming its trajectory and depth relative to the posterior elements and the dorsal aspect of the spinal canal. These views are essential for ensuring accurate guidewire placement and subsequent working cannula insertion for treating conditions like ossification of the ligamentum flavum (OLF) while minimizing risk to the spinal cord.
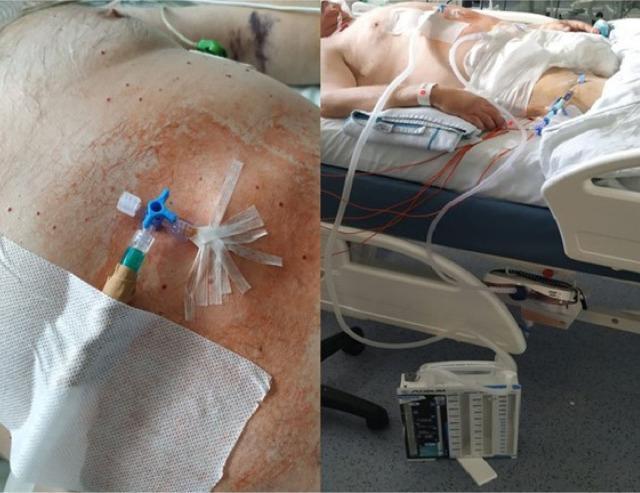
This procedural clinical photograph illustrates an emergency percutaneous needle decompression in an adult male patient, typically performed for conditions like tension pneumoperitoneum or abdominal compartment syndrome. The primary focus is a large-bore (14-G) venous catheter inserted into the distended abdomen, secured with sutures and a transparent dressing. This catheter is attached to a three-way stopcock, which connects via clear tubing to an underwater seal drainage system located on the floor. The drainage system is a multi-chambered container used to facilitate the one-way egress of air or fluid while preventing atmospheric re-entry. The right panel shows the broader clinical context of an Intensive Care Unit (ICU) setting, displaying the patient with multiple monitoring and support devices, including electrocardiogram (ECG) leads on the chest, intravenous access lines in the upper extremities and groin, a blood pressure cuff on the right arm, and dressings indicating recent or ongoing invasive procedures. The image demonstrates the practical setup for bedside abdominal decompression to improve respiratory mechanics and hemodynamic stability in critically ill patients.
This clinical photograph displays a human left lower leg undergoing percutaneous needle decompression (PND), likely for the management of acute compartment syndrome. The image illustrates multiple small, punctate needle entry sites distributed circumferentially and vertically across the mid-calf and lower leg. Active, gradual oozing of blood and serosanguinous fluid is visible from several of these puncture sites. A large, irregularly shaped area of ecchymosis and subcutaneous hematoma is prominent in the mid-calf region, characterized by dark purple, red, and dusky discoloration of the skin. The leg is positioned over a surgical tray containing blood-tinged drainage fluid, consistent with the therapeutic goal of reducing intra-compartmental pressure through multiple micro-perforations. This visual demonstrates a minimally invasive alternative to traditional fasciotomy for compartmental decompression.
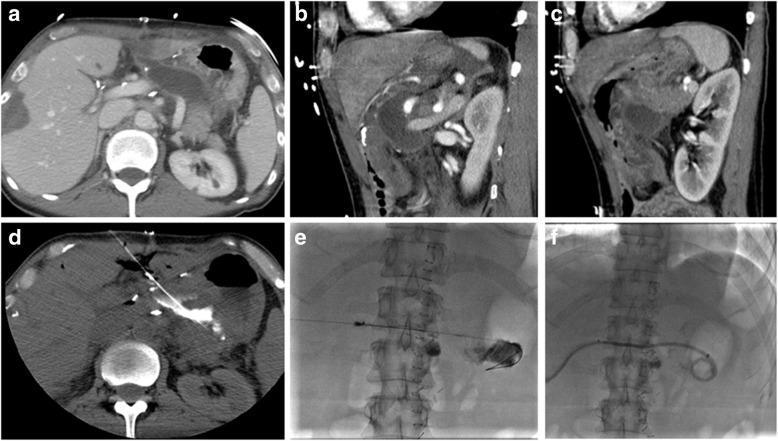
A multi-panel series of clinical images (a-f) illustrating a CT-guided percutaneous drainage procedure for a postoperative fluid collection near the pancreatico-gastric anastomosis following liver surgery. Panels (a-d) represent abdominal Computed Tomography (CT) scans in axial and sagittal planes. They demonstrate a localized hypodense fluid collection surrounded by complex anatomy including the stomach, liver, left kidney, and splenic vasculature. Panel (d) specifically shows CT-fluoroscopic needle tracking, with a hyperdense needle traversing the anterior abdominal wall toward the target collection to avoid critical organs. Panels (e) and (f) demonstrate the transition to digital subtraction angiography (fluoroscopy). Panel (f) shows the final placement of a radiopaque pigtail drainage catheter, with its distal coiled tip successfully positioned within the abscess/collection cavity for decompression. This series demonstrates an advanced interventional radiology workflow using multimodal imaging for safe percutaneous access in anatomically challenging cases.
Percutaneous Gastrocentesis in Dogs with GDV
What It Is and When to Use It
Indications
- Orogastric tube passage has failed (most common in true GDV where the cardia is displaced)
- Patient is too unstable to tolerate the sedation required for orogastric intubation
- Severe gastric distension is causing cardiovascular compromise (compression of the caudal vena cava, reduced venous return, severe hypotension)
- Rapid deterioration before IV access or fluids are established
- As an adjunct to orogastric tubing when distension is extreme
Contraindications / Cautions
- Splenic displacement over the puncture site (must confirm by percussion or ultrasound first)
- Coagulopathy (relative contraindication; proceed anyway in extremis)
- Do not delay fluid resuscitation to perform this procedure
Equipment Required
| Item | Specification |
|---|---|
| Large-bore over-the-needle IV catheter | 14-16 gauge, 2-3 inches long (preferred) |
| Alternatively: hypodermic needle | 14-18 gauge, at least 1.5 inches |
| Clippers (electric) | To clip the fur over the site |
| Antiseptic scrub | Chlorhexidine or povidone-iodine |
| Sterile gloves | |
| Optional: 6 mL syringe | To confirm intragastric placement |
| Optional: ultrasound probe | To identify splenic position |
Patient Positioning
- Sternal recumbency (most practical in the emergency setting - the dog is often unable to stand or lie laterally)
- Standing is also acceptable if the patient is cooperative
- Right lateral recumbency can be used but has a higher risk of spleen interposition on the right side
Anatomical Landmarks - Finding the Correct Site
Primary Site: Right Paracostal Region (most common)
- Location: Right lateral abdominal wall, caudal to the last (13th) rib, ventral to the transverse vertebral processes of the lumbar spine
- The area is roughly a 10 cm x 10 cm zone in the right flank
- In GDV, the pylorus rotates to the left and the fundus remains right - the gas-distended greater curvature often presents on the right
How to Confirm the Site
- Percussion: Flick the abdominal wall firmly with one finger while listening. A hollow, resonant, drum-like tympanic sound = gas-filled stomach. A dull sound = solid organ or fluid.
- Ballottement: Press firmly - gas-filled structures feel tense and tympanic, the spleen feels solid.
- Ultrasound (if available): Use a probe to identify the spleen (avoid it) and confirm gas-distended stomach. This is strongly recommended when time allows. A gas-filled stomach will appear as a strong specular reflector with acoustic shadowing.
If No Tympany on the Right:
- Assess the left paracostal region - in some GDV configurations, the gas pocket is accessible from the left
- Do NOT proceed without confirmed tympany
Step-by-Step Technique
Step 1 - Clip and Prepare
- Clip a generous area (at least 10 x 10 cm) over the tympanic site
- Perform a rapid antiseptic scrub: apply chlorhexidine scrub, wipe with gauze, apply chlorhexidine solution (or povidone-iodine scrub x2-3)
- Don sterile gloves
- No local anesthetic is typically required - the patient is usually obtunded from shock, and the procedure is brief
Step 2 - Confirm Site Again by Percussion
- Immediately before needle insertion, re-percuss to confirm tympany at the exact insertion point
- Avoid any area that sounds dull
Step 3 - Needle/Catheter Insertion
- Hold the over-the-needle catheter (or large needle) perpendicular to the skin surface
- Apply firm, steady pressure - push through the skin, subcutaneous tissue, external and internal abdominal oblique muscles, transversus abdominis, and peritoneum, and finally through the gastric wall
- Total depth: typically 2-5 cm depending on body condition score (deeper in obese dogs)
- You will know you are in the stomach when:
- You hear or feel a rush of gas escaping through the needle hub
- The abdominal wall visibly begins to deflate
- If using a syringe: aspiration yields gas easily
Step 4 - If Using an Over-the-Needle Catheter
- Once gas rushes out, advance the plastic catheter off the stylet (needle) into the stomach
- Remove the stylet/needle
- Allow the catheter alone to remain in place to vent gas - this is safer than leaving a sharp needle in
- The catheter is soft and less likely to lacerate the stomach wall
Step 5 - Allow Decompression
- Hold the catheter in place and allow gas to vent freely
- You may cover the hub loosely - do not occlude it
- Do not insert a syringe and actively aspirate - let gas escape passively under the stomach's own pressure
- Decompression is complete when:
- The abdomen visibly reduces in size
- Tympany is no longer present
- Gas flow stops
Step 6 - Remove the Catheter
- Once decompressed, remove the catheter with one smooth motion
- Apply brief pressure with a gauze square over the insertion site
- No suturing required for the puncture site
After Gastrocentesis
- Immediately attempt orogastric tube passage - successful decompression often allows the tube to pass now, enabling gastric lavage
- Continue aggressive IV fluid resuscitation if not already started
- Proceed to emergency surgery without delay - gastrocentesis is NOT a substitute for surgical correction
- If the stomach re-distends rapidly, a second gastrocentesis may be performed at the same site or an adjacent site
- Monitor for signs of peritoneal contamination (pain, fever, progressive deterioration) if there is concern about organ puncture
Ultrasound-Guided Technique (Advanced)
- Identify the position of the spleen (which migrates unpredictably in GDV)
- Confirm the gas-distended stomach is directly adjacent to the abdominal wall
- Guide needle trajectory in real time
Complications
| Complication | Frequency | Notes |
|---|---|---|
| Splenic puncture | Most feared | Usually minor if small-gauge needle; avoid by confirming tympany |
| Peritoneal contamination | Uncommon | Gastric contents (food, liquid) may leak; worsens peritonitis risk |
| Inadequate decompression | Possible | If needle is too small, clogs with food material; use 14-16g |
| Pneumoperitoneum | Expected | Small amount of air in abdomen is normal and not itself harmful |
| Iatrogenic gastric perforation | Rare | Risk increases with multiple passes; limit to 1-2 per site |
| Local infection | Rare | Proper prep minimizes risk; puncture site is small |
| Re-distension | Common if surgery delayed | Gas reaccumulates; repeat decompression or place indwelling catheter |
Key Points Summary
- Use 14-16g over-the-needle catheter - large bore, advance catheter, remove stylet
- Right paracostal region is the primary site - caudal to last rib, ventral to lumbar transverse processes
- Confirm tympany by percussion before every insertion - avoid the spleen
- Ultrasound guidance is ideal when available
- Perpendicular insertion, firm steady pressure, stop when gas rushes
- This is a bridge procedure - surgery must follow as soon as the patient is stabilized
- No sedation required for gastrocentesis (unlike orogastric tubing)
- Two techniques in clinical use: simple trocarization (needle/catheter) and ultrasound-guided catheter-gastropexy technique for sustained decompression