
Surgical instruments uses topic short note in simple language
surgical instruments classification scalpel forceps retractors
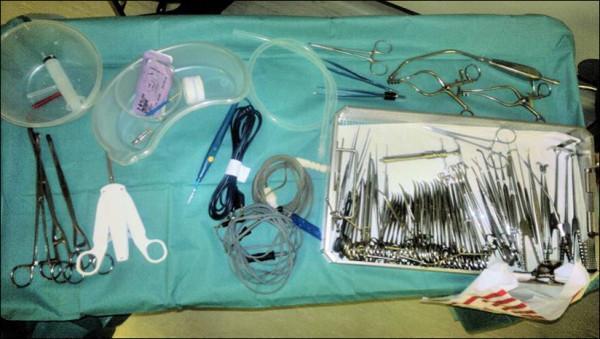
This intraoperative clinical photograph displays a surgical instrument setup on a Mayo stand draped in green sterile fabric, prepared for a thyroid or neck procedure. On the left, a circular basin contains a syringe and needles, while a kidney dish holds gauze and packaged scalpel blades. Below these, long vascular forceps and a three-pronged white self-retaining retractor are visible. The center area contains coiled electrosurgical cords, a blue bovie pen, and suction tubing. The right side features a large, rectangular tray densely packed with specialized surgical tools, including Macindoe scissors, dissection clips, various fine-tipped forceps, and clamps. Additional instruments outside the tray on the upper right include hinged retractors and slender grasping tools. The arrangement illustrates standard operating room protocol for sharp safety, using kidney dishes for transfer and organized trays for instrument management. This visual serves as an educational resource for surgical technology, perioperative nursing, and surgical residency training, emphasizing the organization and nomenclature of head and neck surgical instrumentation.
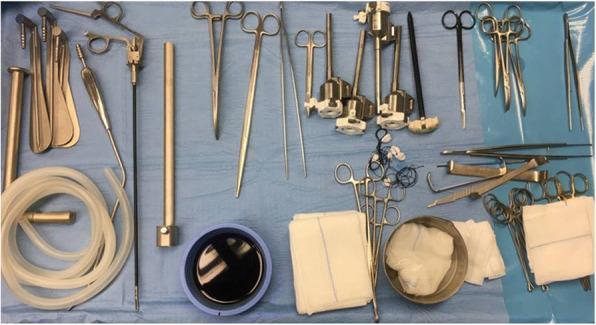
This intraoperative clinical photograph displays a comprehensive instrumentation set organized on a sterile blue drape, prepared for a thyroidectomy or a similar head and neck surgical procedure. The set combines traditional open surgical tools with specialized endoscopic equipment. Key categories of instruments visible include: (1) Dissection and Cutting: Metzenbaum scissors (short and long), a scalpel handle, and monopolar electrocautery with a long tip extension. (2) Grasping and Clamping: Various forceps including DeBakey atraumatic forceps (short and long), Klemmer tissue forceps, and Johann forceps. (3) Retraction: Farabeuf and Langenbeck wound retractors alongside a specialized modified thyroidectomy retractor (Modena retractor) designed for specific working space maintenance. (4) Minimally Invasive/Endoscopic Tools: A 30° endoscopic camera, multiple trocars, a vessel sealing device for hemostasis, and an endoscopic suction/irrigation assembly with flexible tubing. (5) Miscellaneous: Sterile gauze pads and a basin containing surgical solution. This image serves as an educational reference for perioperative nursing and surgical preparation for combined open and endoscopic neck surgery.
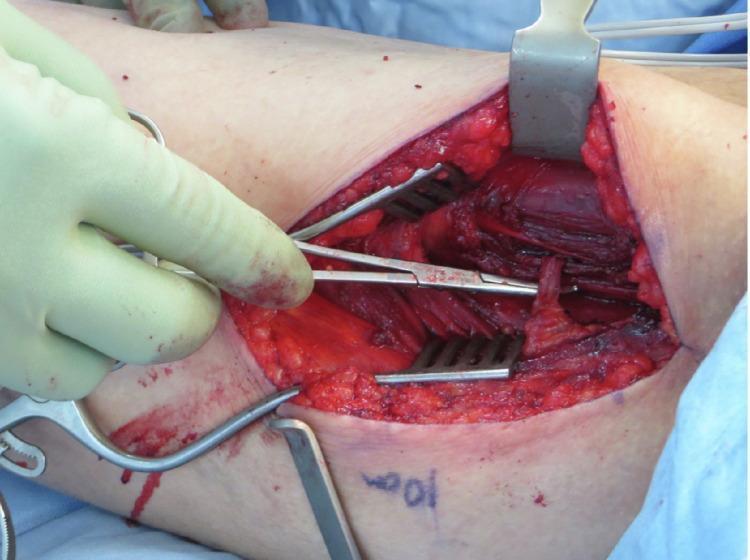
Clinical photograph of an intraoperative field during a reconstructive surgical procedure on the lower limb. The image displays a deep dissection in the medial thigh region. Two self-retaining Weitlaner retractors are positioned to maintain exposure, revealing the subcutaneous adipose tissue (yellow, lobular) and the underlying striated muscle fibers of the adductor magnus. A pair of surgical forceps, held by a gloved surgeon, is used to isolate and retract a vascular pedicle. This pedicle is shown following an atypical, total intramuscular course through the substance of the adductor magnus muscle as it travels toward the gracilis muscle. The surgical field illustrates key anatomical landmarks for free muscle transfer, specifically highlighting the neurovascular supply. Other visible instruments include a scalpel handle in the periphery. This image is used to educate on anatomical variations in vascular supply that are critical for planning soft tissue reconstructions and free flap harvest in orthopedic or plastic surgery.
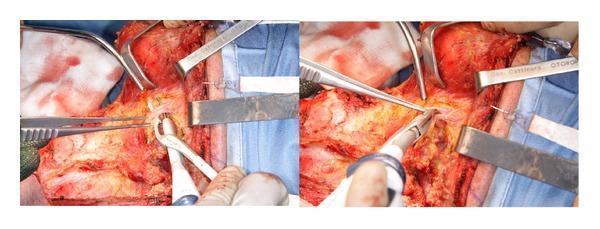
This clinical photograph displays an intraoperative view of a neck dissection, specifically focusing on levels II and III. The image shows a side-by-side comparison of surgical maneuvers using an Ultracision harmonic scalpel. In the surgical field, multiple metal retractors are positioned to provide exposure of the deep cervical structures, including the plane of the internal jugular vein and the sternocleidomastoid muscle. The white, curved-tip harmonic scalpel is seen actively engaging with the facial vessels for ultrasonic sealing and dissection. Forceps are used concurrently for tissue manipulation and tension. The surrounding tissue demonstrates detailed dissection of fibrofatty and muscular layers, with the blue surgical drape defining the sterile perimeter. This visual serves to illustrate advanced hemostatic techniques in otolaryngological surgery, highlighting the replacement of conventional hand-tie ligation with harmonic technology for vessel sealing and tissue coagulation.
scalpel handle blade surgical cutting instrument
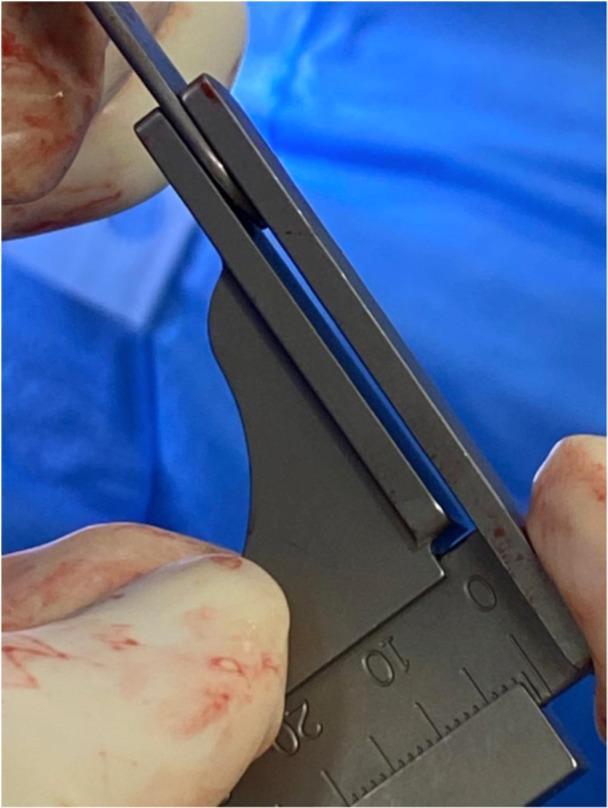
This intraoperative clinical photograph demonstrates a specialized surgical technique used during Total Knee Arthroplasty (TKA). The image shows a stainless steel scalpel handle being used as a reference gauge, positioned against a metallic surgical cutting block or jig. The scalpel handle, which has a known thickness of 2 mm, is oriented diagonally to measure the gap between the surgical instrument and the anatomical site, likely assessing bone resection depth or cartilage loss (Grade 4 wear). The surgical instruments are held by a clinician wearing sterile, blood-stained surgical gloves, highlighting the live procedural context. The cutting block features etched millimeter markings (10, 20) for precise measurement. This visual serves as an educational example of how standard surgical tools can be repurposed as measuring devices to ensure accuracy in restricted inverse kinematic alignment techniques, facilitating proper implant sizing and joint balance without reliance on robotic assistance.
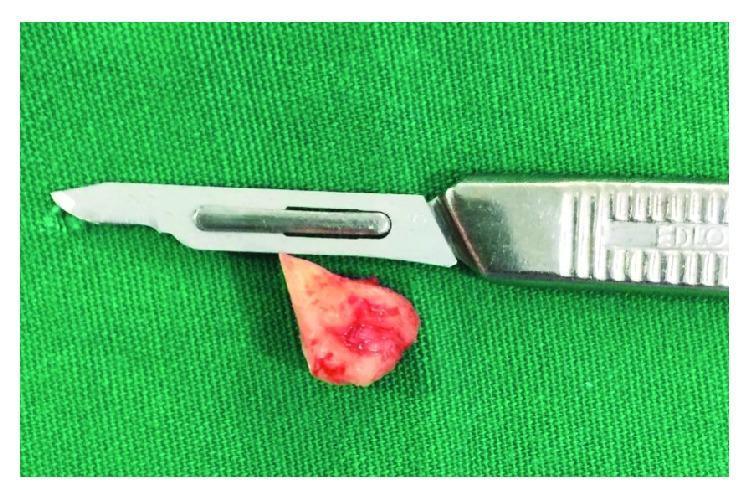
This clinical photograph shows a gross surgical specimen of an extracted mandibular third molar alongside a surgical scalpel, placed on a green sterile surgical drape for size reference. The dental element exhibits a roughly triangular, irregular morphology with a predominant off-white to light pink coloration, interspersed with areas of bright red erythema, consistent with adherent blood and vascularized soft tissue fragments. The scalpel is a standard stainless steel surgical instrument featuring a replaceable blade (likely a #15 or similar small-tip blade) mounted on a textured, ergonomic metallic handle. This visual documents a successful retrieval in a case of iatrogenic displacement of a dental element into the submandibular space. The image is designed for oral and maxillofacial surgery education, illustrating specimen retrieval following extraoral surgical access for the management of intraoperative complications.
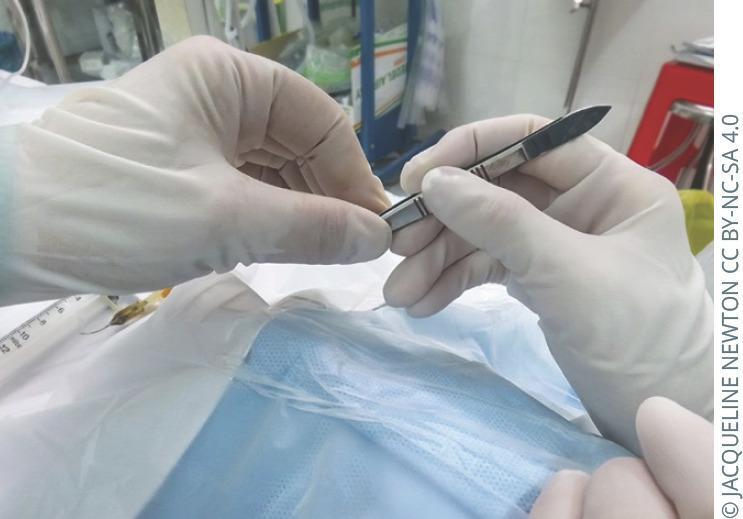
An intraoperative clinical photograph demonstrating the proper technique for passing a sharp surgical instrument between medical personnel. The image shows two pairs of hands wearing white sterile surgical gloves over a sterile surgical field. On the left, a scrub technician or nurse holds a scalpel consisting of a metallic Bard-Parker handle and a sharp surgical blade. The technician grasps the dull, superior edge of the blade, leaving the ridged grip section of the handle completely unobstructed. On the right, the surgeon's hand is shown reaching to grasp the available handle section. This visual illustrates key perioperative safety protocols designed to prevent accidental needle-stick or sharp injuries and ensure the surgeon can immediately establish a functional grip on the tool. The background includes blue sterile draping and other surgical supplies, emphasizing a clinical environment focused on patient safety and procedural efficiency.
needle holder forceps hemostatic clamp surgical instruments labeled
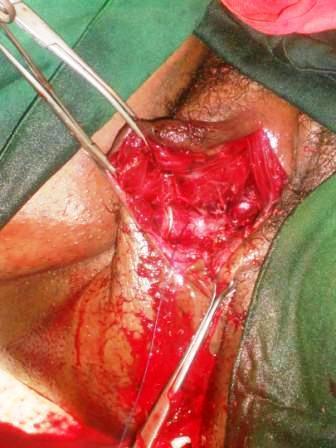
This clinical photograph shows an intraoperative view of the female perineal region following the evacuation of a vulvar hematoma. The image displays an open surgical site with a deep residual cavity between the superficial and deep fascial planes of the perineum. The tissue within the cavity appears saturated with blood, showing various shades of red and clotted material. Metallic surgical instruments are in use: a clamp or forceps is retracting the superior edge of the tissue to improve visualization of the deep space, while a needle holder is visible near the inferior aspect of the wound, likely performing hemostatic suturing. Visible sutures are present within the muscle and connective tissue layers. The surrounding skin is draped with green surgical cloths and shows evidence of blood staining and previous tension. This visual demonstrates the surgical management of a postpartum vulvar hematoma, focusing on the debridement, evacuation of the clot, and preparation for hemostatic closure or dead-space obliterating sutures.
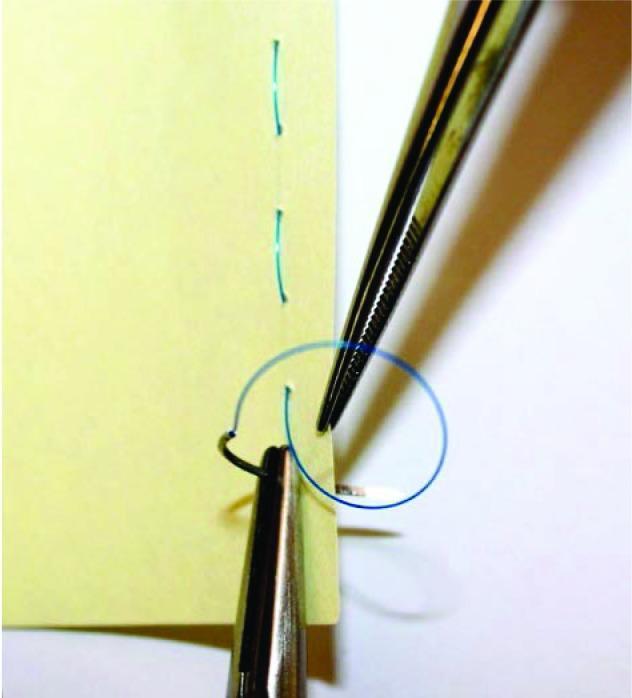
This clinical educational photograph demonstrates basic surgical suturing techniques using a simulated model. The image depicts a yellow synthetic material serving as a tissue analog, showing two parallel lines of previously placed green interrupted sutures. Two primary surgical instruments are visible: a needle holder (hemostat) and a pair of serrated tissue forceps (Adson or similar). The needle holder is shown grasping a curved surgical needle which has passed through the material, trailing a blue monofilament suture. The tissue forceps are positioned to stabilize the edge of the material and manipulate the suture loop to facilitate knot tying. This visual is designed for medical training to illustrate hand-instrument coordination, suture placement, and the mechanics of instrument-assisted knot tying in a controlled, non-biological environment. It serves as a foundational resource for teaching surgical skills and wound closure principles to medical students and surgical residents.
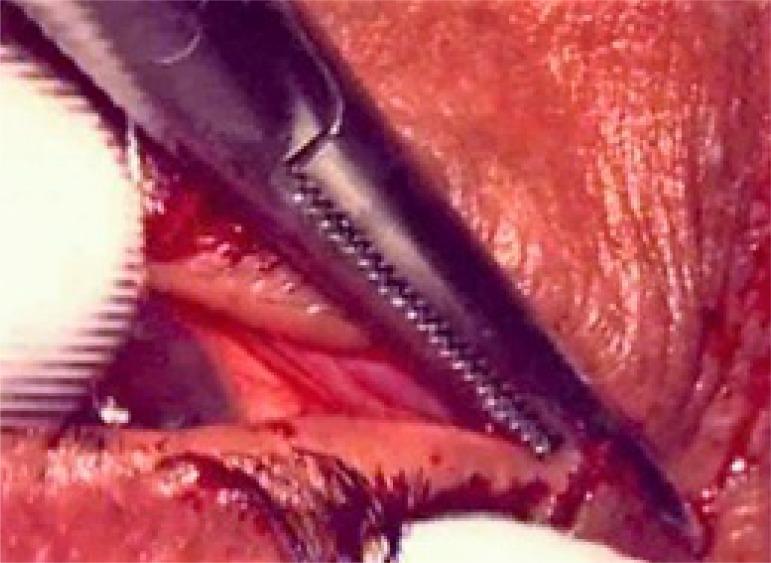
This clinical photograph captures a close-up view of an ophthalmic surgical procedure, specifically a lateral canthotomy. The image demonstrates a metallic surgical instrument, appearing as a dark-colored hemostatic clamp or forceps with distinctive serrated jaws, applied to the lateral canthus of the eye. The instrument is compressing the tissue at the junction of the upper and lower eyelids to achieve hemostasis before a lateral cantholysis or incision. The surrounding periocular tissue is erythematous and moist, with visible anatomical landmarks including the eyelid margins and eyelashes. Minimal surgical bleeding is present in the operative field. This visual serves as an educational example of the initial stages of a lateral canthotomy, a critical procedure for managing orbital compartment syndrome by decompressing the orbit. The focus is on the correct placement and application of surgical instruments to the lateral palpebral ligament area.
Surgical Instruments - Short Note
Classification of Surgical Instruments
1. Cutting and Dissecting Instruments
| Instrument | Description & Use |
|---|---|
| Scalpel (Knife) | The most common cutting tool. Has a handle + detachable blade. Blade #15 is used for skin; blade #10 for larger incisions; blade #11 for stab incisions |
| Scissors | Used to cut tissue, sutures, or dressings. Mayo scissors (heavy) cut tough tissue; Metzenbaum scissors (fine/delicate) cut soft tissue |
| Electrocautery (Bovie) | Uses electric current to cut tissue AND seal bleeding vessels at the same time |
| Laser | CO2 laser used in delicate surgeries (e.g., throat, eye) for precise cutting with minimal damage to nearby tissue |
2. Grasping and Holding Instruments (Forceps)
| Instrument | Use |
|---|---|
| Tissue forceps (DeBakey, Addison) | Hold delicate tissues without crushing them |
| Toothed forceps (Adson) | Grip skin edges during closure |
| Babcock clamp | Gently grasps bowel or fallopian tube without injury |
| Allis clamp | Grips stronger tissue edges |
| Kocher clamp | Holds tough tissue; has teeth at the tip |
3. Hemostatic (Bleeding Control) Instruments
| Instrument | Use |
|---|---|
| Mosquito clamp | Small, fine clamp; clamps tiny blood vessels |
| Kelly clamp | Medium-sized; clamps blood vessels and tissue |
| Right angle clamp | Passes around vessels to place ties/ligatures |
| Foerster clamp (Lung clamp) | Holds large tissue pedicles |
4. Retracting Instruments
| Instrument | Use |
|---|---|
| Deaver retractor | Large, curved retractor; retracts abdominal organs |
| Army-Navy retractor | Hand-held; general wound retraction |
| Langenbeck retractor | Flat; used in bone and soft tissue surgery |
| Vein retractor | Gently retracts blood vessels |
| Self-retaining retractors (Adson-Beckman, Lone Star) | Stay in position on their own without an assistant holding them |
5. Suturing Instruments
| Instrument | Use |
|---|---|
| Needle holder (Hegar, Mayo-Hegar) | Grips the curved needle to drive sutures through tissue |
| Suture scissors | Cut sutures after tying |
| Skin stapler | Quick skin closure using metal staples |
Common Scissors in Surgery
| Type | Heavy or Fine? | Use |
|---|---|---|
| Mayo scissors | Heavy | Cut sutures, fascia, tough tissue |
| Metzenbaum scissors | Fine/delicate | Dissect and cut soft tissue |
| Suture scissors | Medium | Cut suture material only |
How Instruments Are Named
- DeBakey forceps - named after Dr. Michael DeBakey (cardiac surgeon)
- Kelly clamp - named after Dr. Howard Kelly (gynecologist)
- Kocher clamp - named after Dr. Emil Theodor Kocher (Swiss surgeon)
- Metzenbaum scissors - named after Dr. Myron Metzenbaum
Key Points for Exams
- Scalpel blade #10 - large incisions; blade #15 - fine/skin incisions; blade #11 - stab/pointed incisions
- Metzenbaum = fine dissecting scissors; Mayo = heavy scissors for tough tissue
- Mosquito clamp = smallest hemostatic clamp (for tiny vessels)
- Self-retaining retractors hold themselves open - no assistant needed
- Instruments are sterilized by autoclaving (steam under pressure) before use
- Instrument count (sponge and instrument count) is done before and after every operation to prevent leaving anything inside the patient
Instrument Setup - Standard Basic Set
- Retractors: Deaver, Vein retractor, Army-Navy
- Tissue forceps: DeBakey, Addison
- Hemostatic clamps: Mosquito clamps, Babcock, right angle clamps
- Scissors: Metzenbaum, Mayo
- Scalpel handles with blades (#10, #15)
- Needle holder
- Suction tip
Summary Table
| Category | Examples | Main Use |
|---|---|---|
| Cutting | Scalpel, scissors, electrocautery | Cut tissue |
| Grasping | DeBakey forceps, Babcock, Allis | Hold tissue |
| Hemostatic | Mosquito, Kelly, right angle clamp | Stop bleeding |
| Retracting | Deaver, Army-Navy, Langenbeck | Expose surgical field |
| Suturing | Needle holder, suture scissors | Close wounds |
Surgical instruments in simple language explain Shortly
Surgical Instruments - Simple & Short Explanation
5 Types Based on Use
🔪 1. Cutting Instruments
| Instrument | Simple Use |
|---|---|
| Scalpel | Like a sharp knife - makes the first cut on skin |
| Scissors (Mayo) | Heavy scissors - cut tough tissue & sutures |
| Scissors (Metzenbaum) | Fine scissors - cut soft/delicate tissue |
| Electrocautery (Bovie) | Electric pen - cuts AND burns to stop bleeding |
Remember: Blade #10 = big cuts | Blade #15 = small/fine cuts | Blade #11 = stab cuts
✋ 2. Grasping / Holding Instruments
| Instrument | Simple Use |
|---|---|
| DeBakey Forceps | Like tweezers - hold delicate tissue gently |
| Toothed Forceps (Adson) | Hold skin edges - has tiny teeth for grip |
| Babcock Clamp | Gently holds bowel or tubes without injury |
| Allis Clamp | Grips stronger tissue edges |
🩸 3. Hemostatic Instruments
| Instrument | Simple Use |
|---|---|
| Mosquito Clamp | Tiny clamp - clamps small bleeding vessels |
| Kelly Clamp | Medium clamp - clamps medium vessels |
| Right Angle Clamp | Goes around blood vessels to tie them off |
These have a ratchet lock so they stay clamped without the surgeon holding them.
🔓 4. Retracting Instruments
| Instrument | Simple Use |
|---|---|
| Deaver Retractor | Large curved retractor - pulls abdominal organs aside |
| Army-Navy Retractor | General purpose - held by assistant |
| Langenbeck Retractor | Flat - used in bone surgery |
| Self-Retaining Retractor | Stays open on its own - no assistant needed |
🪡 5. Suturing Instruments
| Instrument | Simple Use |
|---|---|
| Needle Holder | Holds the curved needle to push through tissue |
| Suture Scissors | Cut the suture thread after tying knot |
| Skin Stapler | Fast way to close skin using metal staples |
Quick Memory Summary
Cut    → Scalpel, Scissors, Electrocautery
Hold   → Forceps, Babcock, Allis
Bleed  → Mosquito clamp, Kelly clamp
See    → Retractors (Deaver, Army-Navy)
Close  → Needle holder + Sutures
3 Important Exam Points
- Mosquito clamp = smallest clamp for tiny vessels
- Metzenbaum = fine scissors (soft tissue); Mayo = heavy scissors (tough tissue/sutures)
- Always handle needles with needle holder only - never bare fingers (prevents needlestick injury)
Give every instrument with its image
scalpel handle with blade surgical knife
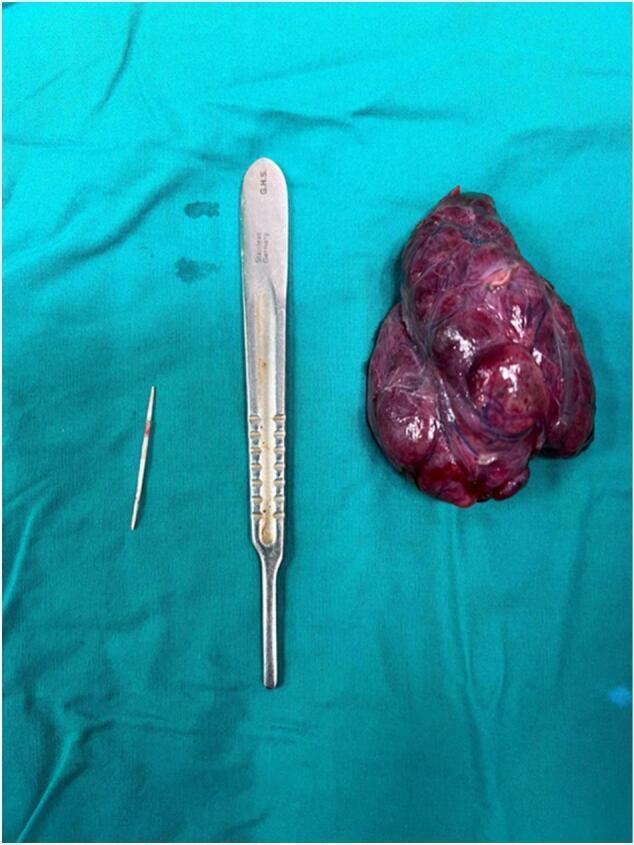
This clinical photograph shows a gross specimen comparison following a surgical neck exploration and hemithyroidectomy. Placed on a green surgical drape are three items: an excised tissue mass, a metal scalpel handle for scale, and a foreign body. The tissue specimen is a left thyroid lobe, appearing as a lobulated, deep red-to-purple mass with an irregular, nodular surface texture consistent with a multinodular goiter or highly vascularized tissue. To the left of the scalpel handle is the offending foreign body: a slender, elongated, pointed object (identified as a fishbone). The fishbone is off-white and translucent with minor blood staining. It measures significantly less than half the length of the scalpel blade. This image demonstrates a rare clinical scenario where an ingested foreign body migrated from the hypopharynx to become lodged within the thyroid parenchyma, necessitating surgical intervention to prevent further inflammatory reaction or vascular injury. It serves as an educational example of aerodigestive tract foreign body complications and thyroid surgical pathology.
This clinical photograph shows a gross surgical specimen of an extracted mandibular third molar alongside a surgical scalpel, placed on a green sterile surgical drape for size reference. The dental element exhibits a roughly triangular, irregular morphology with a predominant off-white to light pink coloration, interspersed with areas of bright red erythema, consistent with adherent blood and vascularized soft tissue fragments. The scalpel is a standard stainless steel surgical instrument featuring a replaceable blade (likely a #15 or similar small-tip blade) mounted on a textured, ergonomic metallic handle. This visual documents a successful retrieval in a case of iatrogenic displacement of a dental element into the submandibular space. The image is designed for oral and maxillofacial surgery education, illustrating specimen retrieval following extraoral surgical access for the management of intraoperative complications.
Mayo scissors surgical heavy scissors
This intraoperative clinical photograph displays a surgical instrument setup on a Mayo stand draped in green sterile fabric, prepared for a thyroid or neck procedure. On the left, a circular basin contains a syringe and needles, while a kidney dish holds gauze and packaged scalpel blades. Below these, long vascular forceps and a three-pronged white self-retaining retractor are visible. The center area contains coiled electrosurgical cords, a blue bovie pen, and suction tubing. The right side features a large, rectangular tray densely packed with specialized surgical tools, including Macindoe scissors, dissection clips, various fine-tipped forceps, and clamps. Additional instruments outside the tray on the upper right include hinged retractors and slender grasping tools. The arrangement illustrates standard operating room protocol for sharp safety, using kidney dishes for transfer and organized trays for instrument management. This visual serves as an educational resource for surgical technology, perioperative nursing, and surgical residency training, emphasizing the organization and nomenclature of head and neck surgical instrumentation.
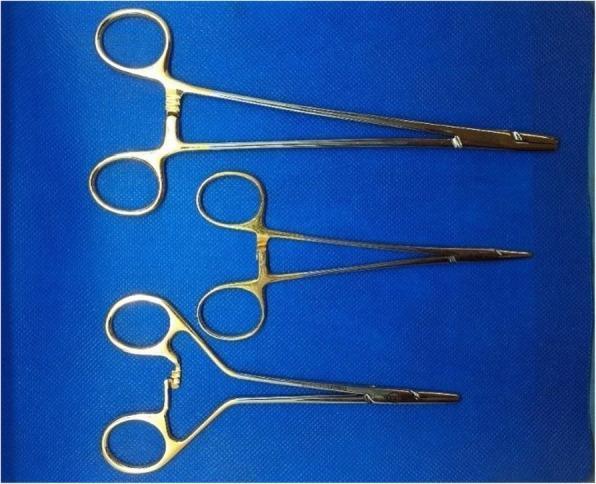
A clinical photograph of three different surgical needle holders used in specialized suturing procedures, displayed against a blue surgical drape. All three instruments are made of stainless steel with a metallic finish and feature ratcheted locking mechanisms and slender jaws designed for gripping suture needles. The top instrument is a 20.5 cm Stille Mayo-Hegar Needle Holder (LMH), a standard larger-format instrument for heavy tissue suturing. The middle instrument is a 16 cm Stille Mayo-Hegar Needle Holder (SMH), providing a more compact profile for refined manipulation. The bottom instrument is a 15 cm Stille Frimand Duo-Grip Needle Holder (FR), which distinguishes itself through a unique ergonomic handle design; it features offset finger rings and a curved lever arm leading to the ratchet, intended to enhance grip control and tactile feedback. These instruments represent various mechanical designs optimized for surgical anastomoses, where precise control over needle placement is critical.
Metzenbaum scissors fine delicate dissecting scissors
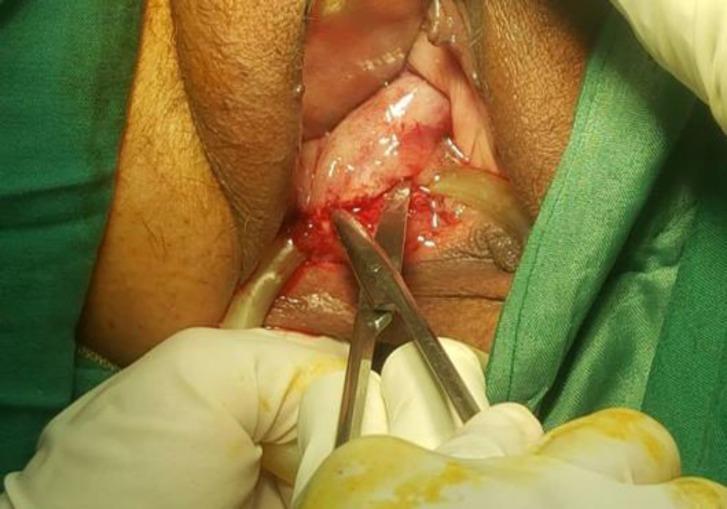
This clinical photograph displays an intraoperative view of a gynecological surgical procedure within the vaginal canal. The primary focus is the dissection of an impacted ring pessary from the vaginal mucosa. Metzenbaum (Metz) scissors are being utilized to excise thick, pale, fibrotic bundles of tissue that have formed over and entrapped the pessary. The vaginal mucosa appears thin, erythematous, and atrophic, consistent with severe urogenital atrophy. There is moderate bleeding at the surgical site where the fibrotic tissue is being incised. A portion of the pessary ring is visible near the lateral wall of the vagina, and a flexible drainage tube or catheter is positioned within the field. The surgical site is bordered by the labia and draped with green sterile cloths, with the surgeon's gloved hands visible at the bottom of the frame. This image demonstrates the clinical complication of pessary impaction and the necessary surgical intervention to release the device from hypertrophic vaginal scarring.
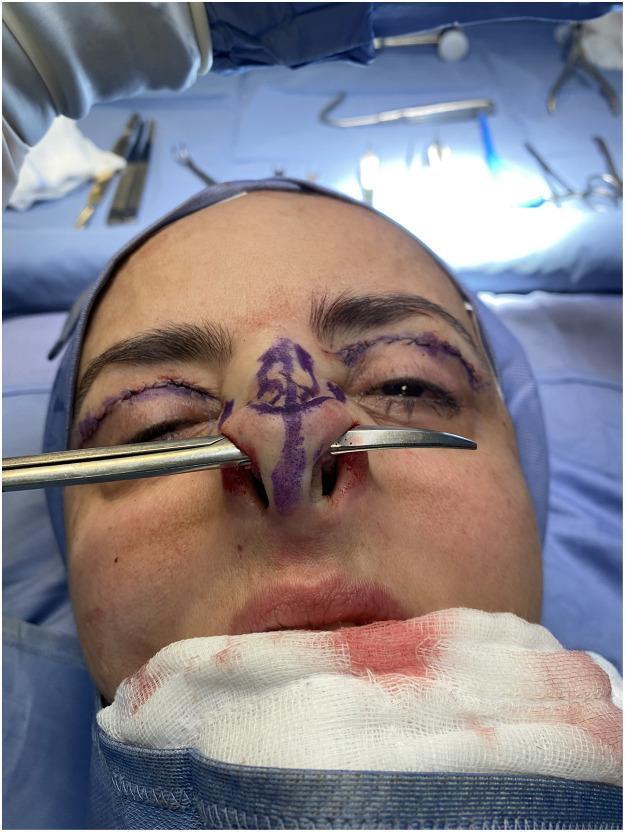
This intraoperative clinical photograph captures a surgical maneuver during a closed rhinoplasty and concurrent blepharoplasty. The primary focus is the intraoperative assessment of nasal symmetry. Straight Metzenbaum scissors are inserted through bilateral transcartilaginous incisions, passing over the residual lower lateral (alar) cartilages. This technique is used to evaluate the symmetry and height of the cartilaginous arches following the resection of their cephalic portions. Purple surgical markings are visible on the nasal dorsum and tip, outlining the pre-operative plan. Additionally, the patient exhibits fresh sutured incisions on the upper eyelids consistent with a blepharoplasty procedure. The surgical field includes sterile blue drapes, a blood-stained gauze at the chin, and various surgical instruments in the background. This image serves as an educational tool for plastic surgery trainees to understand intraoperative quality control and the anatomical landmarks involved in refining the nasal tip and maintaining structural symmetry.
electrocautery bovie pen electrosurgical unit
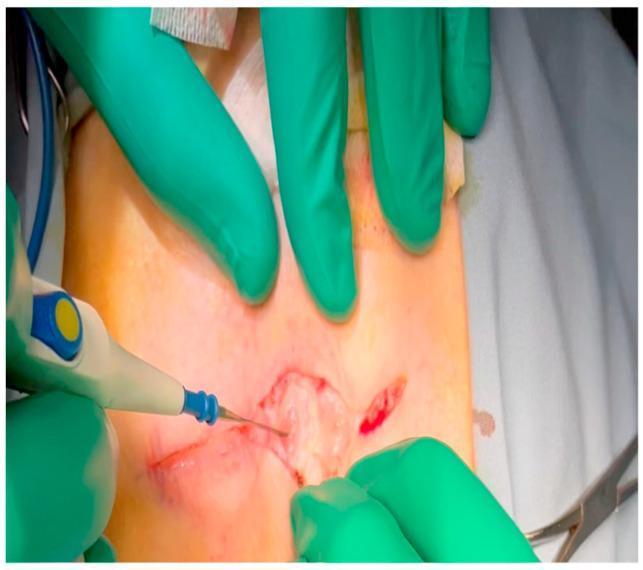
This clinical photograph captures a surgical procedure in progress, specifically the initial stages of a mini-thoracotomy. The image shows a transverse incision being made through the subcutaneous tissue layer using an electrocautery pen (Bovie). The surgical site is located just inferior to the axillary fold. The subcutaneous tissue is visible within the wound, characterized by its pale yellow color and lobulated, fatty texture. Surgeons wearing green sterile gloves are seen retracting the skin and superficial fascia to expose the underlying tissue layers and maintain the surgical field. A pair of surgical scissors is partially visible in the bottom right corner. The electrocautery tip is in contact with the tissue, demonstrating the thermal dissection used to minimize bleeding while progressing through the chest wall layers. This visual is used in medical education to illustrate surgical access, tissue handling, and the use of electrosurgical instruments in cardiothoracic or general surgery.
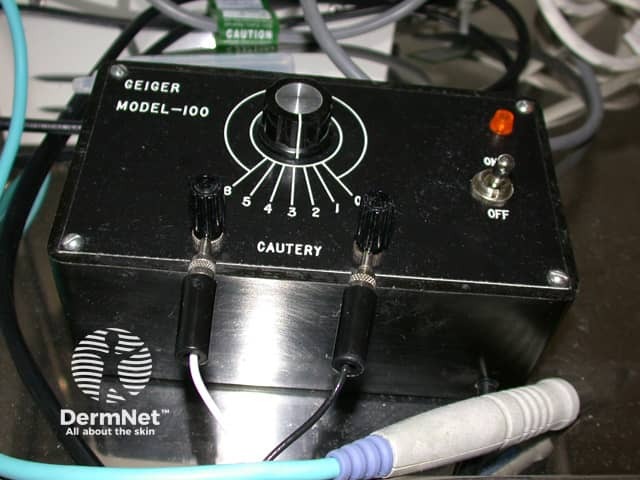
This image is a clinical photograph of an electrosurgical unit (electrocautery generator) used for cauterization and hemostasis during dermatologic or minor surgical procedures. It shows a front/anterolateral view of a portable black metal box labeled Geiger Model-100, with a large central dial and two rocker-style control knobs. The central knob is surrounded by white indicator lines, suggesting adjustable energy output. The panel bears the words CAUTION and CAUTERY, plus an ON/OFF switch with an orange status light, indicating power to the device. Two insulated handpiece leads exit the front lower panel, each connected to individual connectors; color-coded cables (blue/white) and a separate large-diameter connector likely attach to patient-side active electrodes or grounding pads, consistent with monopolar or bipolar configurations. The unit appears designed for dermatosurgical use in a clinic or operating room. The dial markings range from 2 to 8, implying variable power or waveform settings; the central control suggests adjustment of current, voltage, and pulse mode. This photograph emphasizes equipment literacy, safety labeling, and ergonomic arrangement of the unit for rapid activation during procedures. Relevance: educational reference for medical students, residents, nurses, and technicians to recognize electrocautery apparatus, standard labeling, energy-control interfaces, and to discuss device-safe operation, energy settings, and potential complications such as thermal injury or unintended burns.
DeBakey forceps tissue forceps surgical tweezers
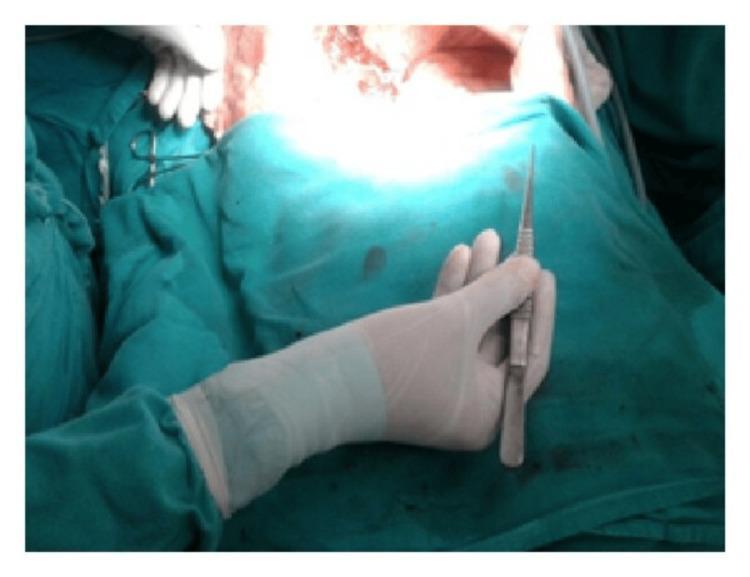
A clinical photograph depicting the correct ergonomic handling of DeBakey forceps within a sterile surgical field. The image shows a surgeon's hand, encased in a sterile white surgical glove, utilizing a pencil-style grip to hold the metallic forceps. The thumb and index finger are positioned on the textured handle area to provide fine motor control, maintaining a neutral wrist posture to minimize surgeon fatigue and enhance precision. The surgical environment is defined by green sterile drapes covering the patient, with exposed, out-of-focus reddish anatomical tissue visible in the background indicating the active operative site. The DeBakey forceps are characterized by their long, slender profile, specifically designed for atraumatic handling of delicate vascular or soft tissues. This visual serves as an educational tool for medical students and surgical residents to understand proper instrument ergonomics and the maintenance of a sterile field during invasive procedures.
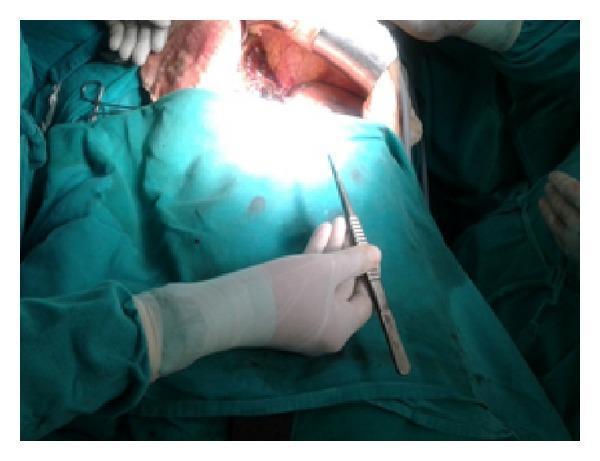
This clinical photograph captures a surgeon's gloved right hand holding a DeBakey forceps during an intraoperative procedure, specifically a liver parenchyma transection. The image highlights surgical ergonomics, demonstrating a neutral wrist posture where the forearm, wrist, and hand are aligned in a straight line without flexion or extension. The DeBakey forceps are held in an inward orientation, with the tips directed towards the operative site. The surgical field is prepared with green sterile drapes, and the exposed tissue of the liver is visible under surgical lighting. This visual serves as an educational comparison between ergonomic instrument handling (DeBakey forceps) and less ergonomic alternatives like the Kelly clamp, emphasizing the reduction of musculoskeletal strain on the surgeon during complex abdominal surgery. Key elements include the neutral joint alignment, proper instrument grip, and the clinical context of hepatobiliary surgery.
Babcock clamp intestinal bowel grasping clamp
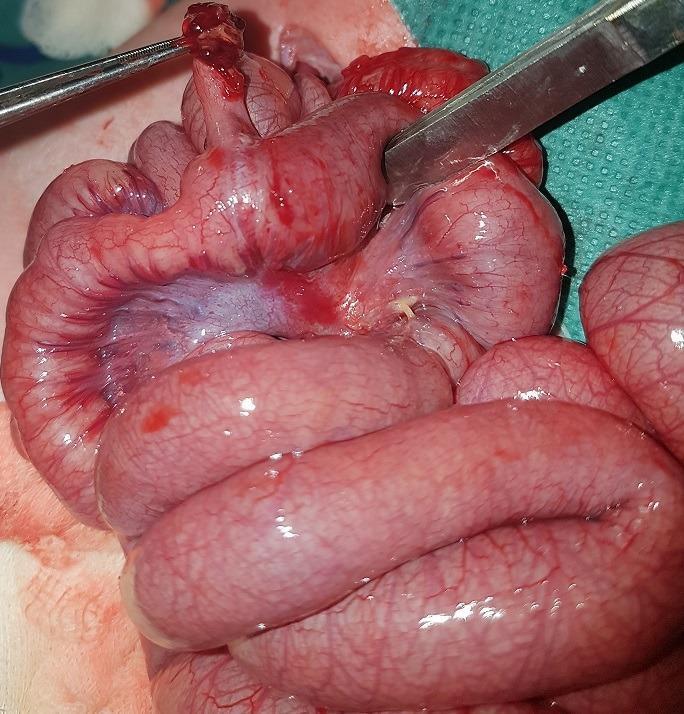
Clinical intraoperative photograph during an exploratory laparotomy, demonstrating a Meckel's diverticulum causing a small bowel obstruction. The image shows several loops of markedly dilated, erythematous small intestine with prominent surface vascularization and subserosal congestion, indicative of acute obstruction and inflammatory changes. A surgical clamp is positioned at the superior aspect of the field, grasping the tip of the Meckel's diverticulum, which appears dark red and engorged. A second surgical instrument (forceps or retractor) is visible to the right, manipulating the mesentery and adjacent bowel wall. The serosal surface of the bowel appears taut and shiny, suggesting significant intraluminal distension and mural edema. This case illustrates a common pediatric surgical emergency where a congenital remnant leads to mechanical volvulus or internal herniation. This image is relevant for surgical training in identifying congenital gastrointestinal anomalies and the physical manifestations of neonatal intestinal obstruction.
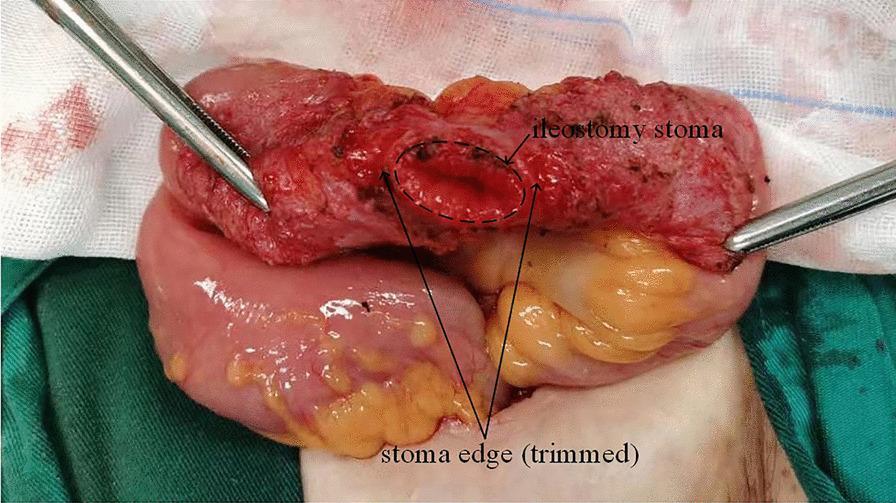
This clinical photograph captures an intraoperative view of an ileostomy stoma revision or reversal procedure. The image depicts a fully mobilized intestinal segment being held taut by two surgical forceps (likely Allis or Babcock clamps). The ileostomy stoma is centrally located on the freed bowel loop, with its edge clearly trimmed to remove adherent skin and scar tissue, exposing the healthy, deep-red mucosal lining. The intestinal wall exhibits a reddish-purple, hyperemic appearance with a granular surface texture, characteristic of stomal tissue. Visible mesenteric fat (yellowish lobulated tissue) is attached to the underside of the bowel loop. The surgical field includes sterile green drapes and white gauze. This visual demonstrates a critical step in stoma preparation—ensuring a viable, healthy intestinal wall before resection or anastomosis in colorectal surgery. Key educational concepts include surgical mobilization of the bowel, stoma edge debridement, and assessment of tissue perfusion.
mosquito hemostat clamp small hemostatic
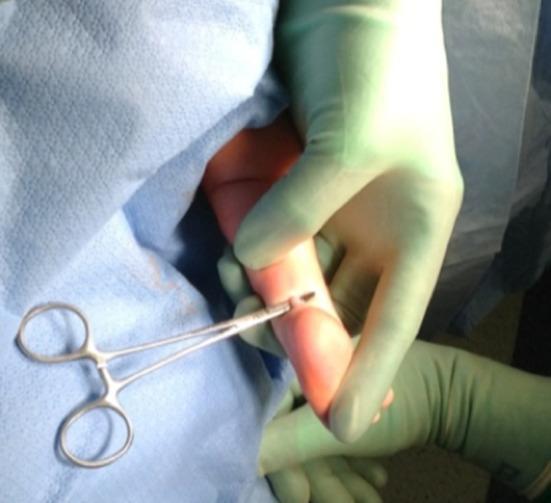
This clinical photograph captures a key intraoperative step of a mini-open Achilles tendon lengthening (TAL) procedure, typically performed as part of the Ponseti method for treating idiopathic clubfoot. The image shows a small, sterile surgical field draped in light blue cloth. A surgeon's hands, donned in green sterile gloves, are seen manipulating the posterior aspect of an infant's heel. A small (approximately 10 mm) medial incision has been made through which a metallic hemostat (mosquito clamp) is inserted. The clamp is positioned beneath the Achilles tendon, elevating and delivering it from the wound to allow for direct visualization. This step is critical to ensure the tendon is isolated from surrounding neurovascular structures, such as the tibial nerve and posterior tibial artery, prior to performing the tenotomy. The pale, fibrous texture of the tendon is visible at the tip of the instrument. The focus is on pediatric orthopedic surgical technique, emphasizing safety and direct visualization to prevent vascular or nerve injury during tendon release.
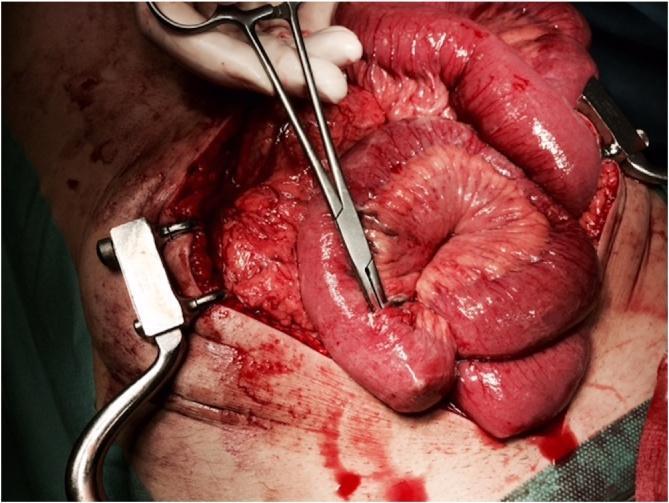
This clinical photograph captures an intraoperative view during an emergent laparotomy for blunt abdominal trauma. The image shows a loop of small bowel (jejunum/ileum) exteriorized through a midline incision. A surgical clamp (hemostat) is positioned to identify and isolate a traumatic perforation located at the mesenteric border of the intestine. The affected bowel segment appears hyperemic and erythematous (reddish-pink), with a moist, glistening serosal surface. Visible within the surgical field are self-retaining retractors maintaining the abdominal opening, along with surrounding skin and subcutaneous tissue. Areas of localized hemorrhage are visible on the serosa and within the mesentery, consistent with high-energy blunt trauma. The image serves as a clinical demonstration of a Grade II small bowel injury and highlights the surgical challenge of identifying mesenteric-side perforations compared to more visible antimesenteric lesions.
Deaver retractor abdominal wound retractor
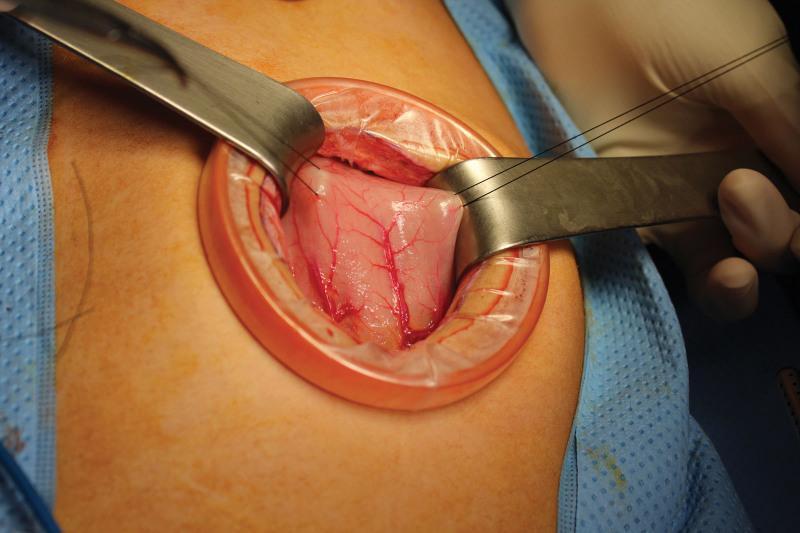
This clinical photograph captures an intraoperative view of a mini-laparotomy. A circular plastic wound retractor is positioned within the abdominal incision to provide circumferential exposure and protect the wound edges. Centered within the retractor, the anterior wall of the stomach is visible, characterized by a smooth, moist, pinkish-white serosal surface with prominent, branching intramural vascular structures. Two metallic hand-held retractors are used to further elevate and stabilize the gastric tissue. Two interrupted black silk stay sutures have been placed through the seromuscular layer of the stomach wall, serving as traction points to facilitate surgical manipulation and prepare for gastrotomy. The surrounding field is draped with sterile blue surgical covers. This image demonstrates standard surgical techniques for organ exposure and stabilization during a procedure such as a gastric trichobezoar removal.
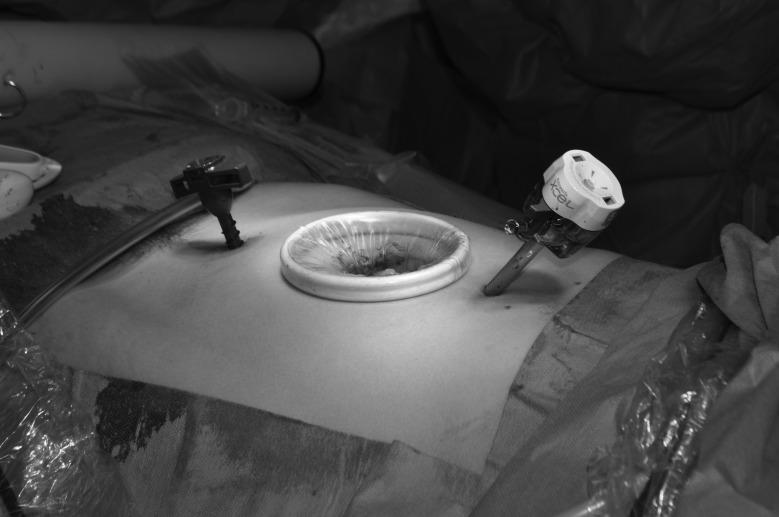
This clinical photograph displays a surgical field during a laparoscopic procedure, specifically focusing on an abdominal port site. A centrally positioned Alexis wound retractor is seen inserted into an extended port site incision. The retractor consists of a rigid, white circular outer ring resting on the skin surface, connected to a translucent cylindrical sheath that lines the incision and keeps the wound edges retracted. Flanking the central retractor are two laparoscopic trocars: one black trocar on the left and one larger trocar with a white, labeled head (Ethicon Endopath Xcel) on the right, both angled toward the surgical target. The image demonstrates a technique for specimen extraction or stoma site preparation where atraumatic retraction is required. This visual is relevant for general and colorectal surgery educational modules, illustrating wound protection and the maintenance of pneumoperitoneum during complex abdominal surgery.
needle holder surgical suturing instrument
A clinical photograph of three different surgical needle holders used in specialized suturing procedures, displayed against a blue surgical drape. All three instruments are made of stainless steel with a metallic finish and feature ratcheted locking mechanisms and slender jaws designed for gripping suture needles. The top instrument is a 20.5 cm Stille Mayo-Hegar Needle Holder (LMH), a standard larger-format instrument for heavy tissue suturing. The middle instrument is a 16 cm Stille Mayo-Hegar Needle Holder (SMH), providing a more compact profile for refined manipulation. The bottom instrument is a 15 cm Stille Frimand Duo-Grip Needle Holder (FR), which distinguishes itself through a unique ergonomic handle design; it features offset finger rings and a curved lever arm leading to the ratchet, intended to enhance grip control and tactile feedback. These instruments represent various mechanical designs optimized for surgical anastomoses, where precise control over needle placement is critical.
This clinical educational photograph demonstrates basic surgical suturing techniques using a simulated model. The image depicts a yellow synthetic material serving as a tissue analog, showing two parallel lines of previously placed green interrupted sutures. Two primary surgical instruments are visible: a needle holder (hemostat) and a pair of serrated tissue forceps (Adson or similar). The needle holder is shown grasping a curved surgical needle which has passed through the material, trailing a blue monofilament suture. The tissue forceps are positioned to stabilize the edge of the material and manipulate the suture loop to facilitate knot tying. This visual is designed for medical training to illustrate hand-instrument coordination, suture placement, and the mechanics of instrument-assisted knot tying in a controlled, non-biological environment. It serves as a foundational resource for teaching surgical skills and wound closure principles to medical students and surgical residents.
skin stapler surgical wound closure stapler
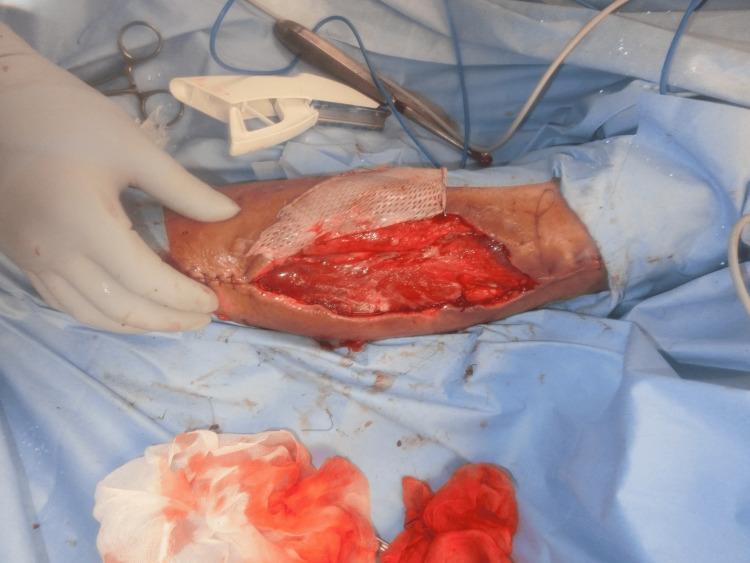
This clinical photograph captures an intraoperative view of a skin grafting procedure on the right upper extremity following the removal of a subcutaneous hematoma. The surgical site consists of a large, longitudinal open wound revealing deep red, viable-appearing underlying tissue and muscle fascia. A white, meshed skin graft is being applied to the wound bed, partially covering the proximal portion of the defect. Surgical staples and interrupted sutures are visible along the wound margins, securing the edges. Visible in the sterile field are essential surgical tools, including a white plastic skin stapler, metal forceps, and blood-soaked gauze sponges, indicating active hemostasis and wound closure. The image demonstrates the management of skin necrosis and large soft-tissue defects using split-thickness skin grafting techniques in a clinical setting related to compartment syndrome or deep dissecting hematoma (DDH).
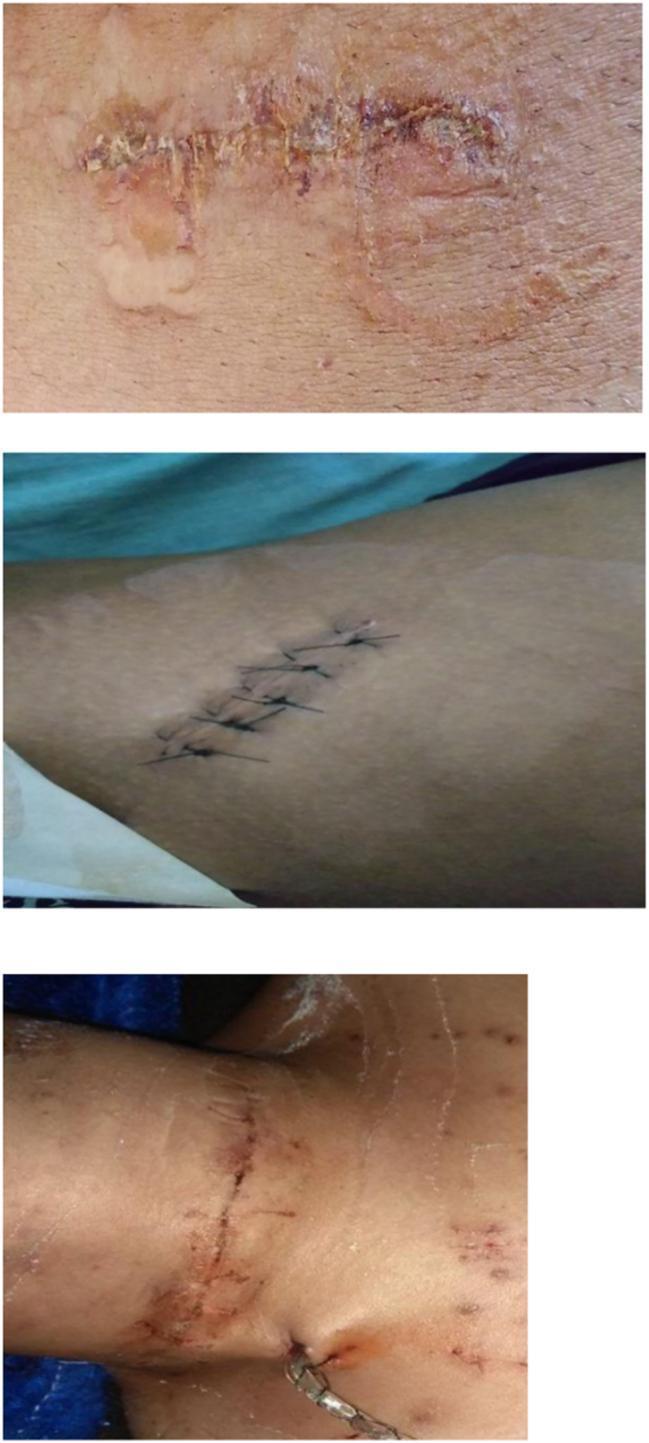
This composite of clinical photographs illustrates various methods of surgical wound closure and their immediate post-operative outcomes. The top image shows a wound closed with topical skin adhesive (cyanoacrylate). The closure exhibits a linear scar with irregular edges, localized erythema, and residual adhesive material on the surrounding skin. The middle image demonstrates a wound closed using a traditional interrupted suture pattern with non-absorbable black sutures. The wound edges are well-approximated with minimal periwound inflammation, signifying primary intention healing. The bottom image shows a linear surgical incision, likely on the neck or torso, also closed with sutures, accompanied by a surgical drain emerging from the inferior aspect of the wound. The surrounding skin displays minor petechiae and moderate post-operative inflammation. These images are used in medical education to compare cosmetic outcomes, healing progress, and complications such as dehiscence or infection between tissue glues and suturing techniques.
Surgical Instruments with Images
🔪 GROUP 1 - CUTTING INSTRUMENTS
1. Scalpel (Surgical Knife)
- Blade #10 = large cuts | Blade #15 = small/fine cuts | Blade #11 = stab cuts
2. Metzenbaum Scissors
3. Electrocautery Pen (Bovie)
4. Electrosurgical Unit (Cautery Machine)
✋ GROUP 2 - GRASPING / HOLDING INSTRUMENTS
5. DeBakey Forceps
6. Babcock / Allis Clamp
🩸 GROUP 3 - HEMOSTATIC (BLEEDING CONTROL) INSTRUMENTS
7. Mosquito Clamp (Hemostat)
🔓 GROUP 4 - RETRACTING INSTRUMENTS
8. Wound Retractor
9. Complete Surgical Instrument Tray
🪡 GROUP 5 - SUTURING INSTRUMENTS
10. Needle Holder
11. Needle Holder in Action (Suturing)
12. Skin Stapler
Quick Summary
| # | Instrument | Group | Job |
|---|---|---|---|
| 1 | Scalpel | Cutting | Makes first incision |
| 2 | Metzenbaum scissors | Cutting | Cut soft tissue |
| 3 | Electrocautery pen | Cutting | Cut + stop bleeding |
| 4 | DeBakey forceps | Grasping | Hold delicate tissue |
| 5 | Babcock/Allis clamp | Grasping | Hold bowel/tissue |
| 6 | Mosquito clamp | Hemostasis | Clamp tiny vessels |
| 7 | Retractor | Retracting | Keep wound open |
| 8 | Needle holder | Suturing | Drive needle through tissue |
| 9 | Skin stapler | Suturing | Close skin fast |