
General Surgical Instruments: Identification and usage of basic surgical tools
basic surgical instruments identification scalpel forceps scissors retractor
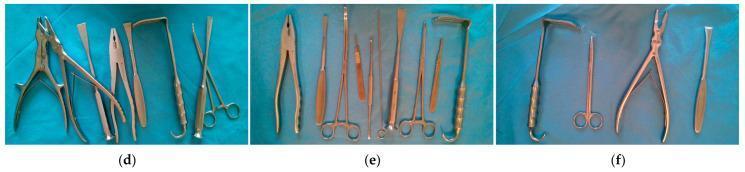
A series of three intraoperative clinical photographs (d, e, f) demonstrating various orthopedic surgical instruments arranged on a sterile blue drape to illustrate spatial configurations for medical object recognition systems. Image (d) displays a set of instruments, including bone forceps, tissue forceps, surgical clamps, and a periosteal elevator, arranged in a crossed and overlapping manner. Image (e) illustrates a densely packed but non-overlapping arrangement of tools such as multiple forceps types, surgical scissors, a thyroid retractor, and a scalpel handle. Image (f) shows a sparse, non-overlapping configuration featuring a thyroid retractor, surgical scissors, bone forceps, and a spreader. The collection highlights key morphological features of common surgical tools, emphasizing differences in head shapes, sizes (e.g., vascular forceps), and handle types used in basic orthopedic procedures. These images serve as educational examples for surgical tray organization and the development of automated instrument counting and identification algorithms in a clinical setting.
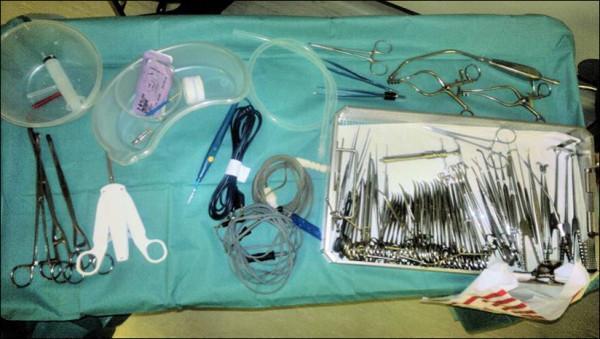
This intraoperative clinical photograph displays a surgical instrument setup on a Mayo stand draped in green sterile fabric, prepared for a thyroid or neck procedure. On the left, a circular basin contains a syringe and needles, while a kidney dish holds gauze and packaged scalpel blades. Below these, long vascular forceps and a three-pronged white self-retaining retractor are visible. The center area contains coiled electrosurgical cords, a blue bovie pen, and suction tubing. The right side features a large, rectangular tray densely packed with specialized surgical tools, including Macindoe scissors, dissection clips, various fine-tipped forceps, and clamps. Additional instruments outside the tray on the upper right include hinged retractors and slender grasping tools. The arrangement illustrates standard operating room protocol for sharp safety, using kidney dishes for transfer and organized trays for instrument management. This visual serves as an educational resource for surgical technology, perioperative nursing, and surgical residency training, emphasizing the organization and nomenclature of head and neck surgical instrumentation.
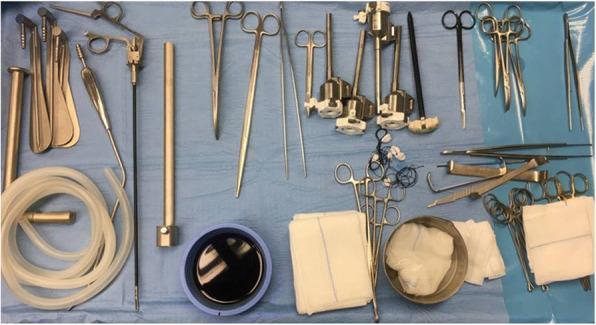
This intraoperative clinical photograph displays a comprehensive instrumentation set organized on a sterile blue drape, prepared for a thyroidectomy or a similar head and neck surgical procedure. The set combines traditional open surgical tools with specialized endoscopic equipment. Key categories of instruments visible include: (1) Dissection and Cutting: Metzenbaum scissors (short and long), a scalpel handle, and monopolar electrocautery with a long tip extension. (2) Grasping and Clamping: Various forceps including DeBakey atraumatic forceps (short and long), Klemmer tissue forceps, and Johann forceps. (3) Retraction: Farabeuf and Langenbeck wound retractors alongside a specialized modified thyroidectomy retractor (Modena retractor) designed for specific working space maintenance. (4) Minimally Invasive/Endoscopic Tools: A 30° endoscopic camera, multiple trocars, a vessel sealing device for hemostasis, and an endoscopic suction/irrigation assembly with flexible tubing. (5) Miscellaneous: Sterile gauze pads and a basin containing surgical solution. This image serves as an educational reference for perioperative nursing and surgical preparation for combined open and endoscopic neck surgery.
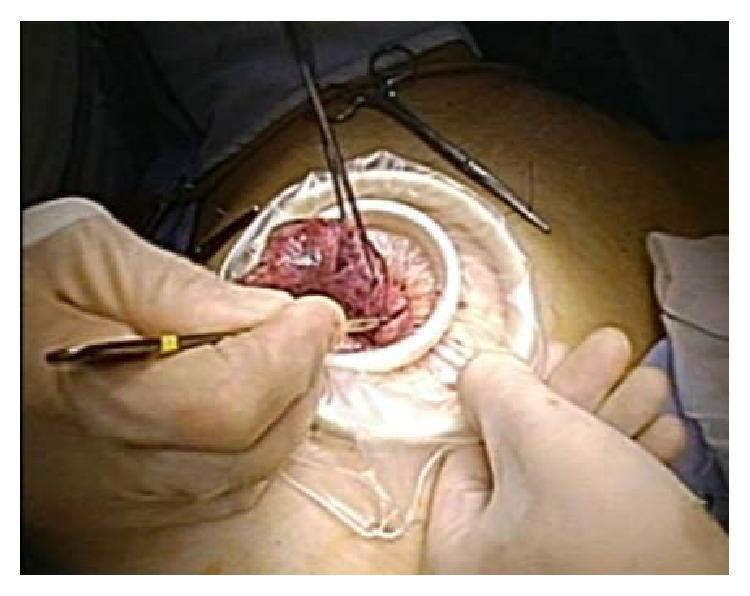
This clinical photograph captures a surgical scene during a Laparo-Endoscopic Single-Site (LESS) procedure, specifically illustrating the extracorporeal manual morcellation of a uterine myoma. The surgical field features an Alexis wound retractor positioned within an umbilical incision, providing stable access and protection of the wound edges. Inside the retractor, an Endocatch II retriever bag contains the excised tissue, which is being manually morcellated using a number 11 surgical scalpel blade held by a gloved hand. The tissue mass appears solid with irregular, reddish-brown surfaces, consistent with a necrotized subserosal myoma. Additional instrumentation, including surgical forceps and scissors, is visible in the periphery. This technique demonstrates a protective method for tissue extraction designed to prevent intraperitoneal dissemination and port-site seeding of potentially malignant or fragmented tissue. The educational focus is on gynecological surgical techniques for minimally invasive tumor retrieval and safety protocols for manual morcellation.
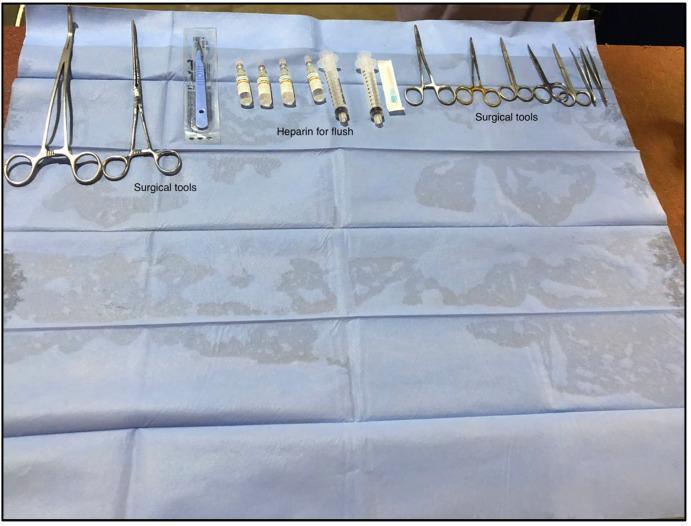
This intraoperative clinical photograph displays a sterile-draped workbench organized for surgical organ retrieval, specifically in an experimental or translational research setting. The instruments are laid out in a linear, structured arrangement on a blue sterile field. On the far left, two large long-reach curved hemostatic clamps (forceps) are placed, used for heavy tissue manipulation or vessel clamping. To their right, a sterile-packaged scalpel and four glass ampules of heparin are visible, the latter designated for preparing heparinized saline flushes to prevent thrombosis in harvested vasculature. Adjacent to these are two plastic syringes and a hypodermic needle. On the far right, a variety of stainless steel precision instruments are organized by size, including multiple pairs of surgical scissors, finer hemostats, and anatomical forceps (tweezers) for delicate dissection of small vessels and ligaments. The setup demonstrates the standard clinical requirements for identifying and resecting key anatomical structures such as the hepatic artery and portal vein during organ isolation.
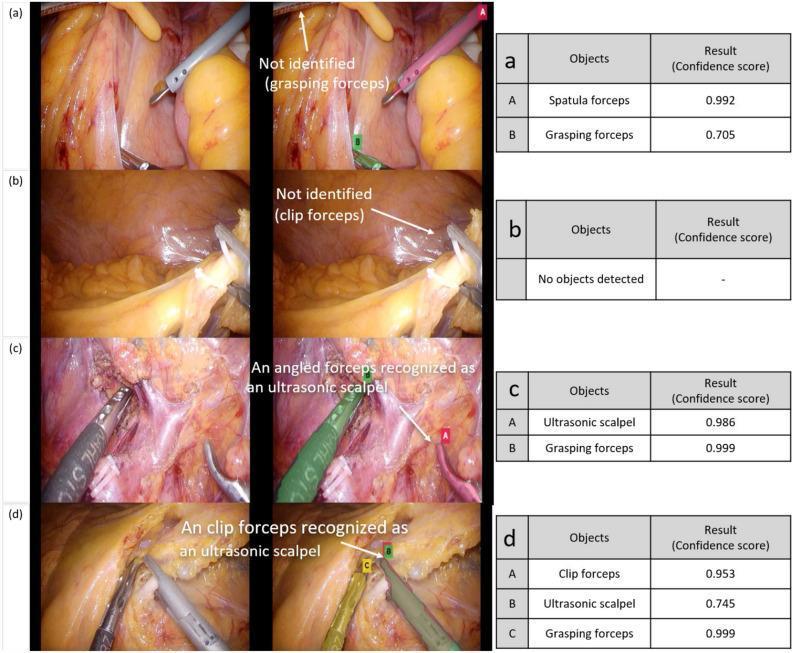
This composite educational image showcases four sets of intraoperative laparoscopic photographs (a-d) paired with AI detection results, illustrating challenges in automated surgical tool identification. The surgical field displays abdominal anatomy including yellow adipose tissue, reddish muscle fibers, and connective fascia. Row (a) demonstrates a spatula forceps and a grasping forceps, with one partially obscured grasping forceps labeled as 'Not identified'. Row (b) shows a clip forceps that failed detection, likely due to visual interference from shiny peritoneal surfaces. Row (c) depicts an angled forceps being misidentified as an ultrasonic scalpel, highlighting morphology-based classification errors. Row (d) features multiple overlapping instruments—a clip forceps, ultrasonic scalpel, and grasping forceps—where a single instrument is simultaneously identified as both a clip forceps and an ultrasonic scalpel. Accompanying tables provide confidence scores (ranging from 0.705 to 0.999) for the detected objects. This image serves as a clinical reference for computer-aided detection (CAD) limitations in laparoscopic surgery, specifically focusing on occlusion, instrument overlap, and morphological similarities between tools.
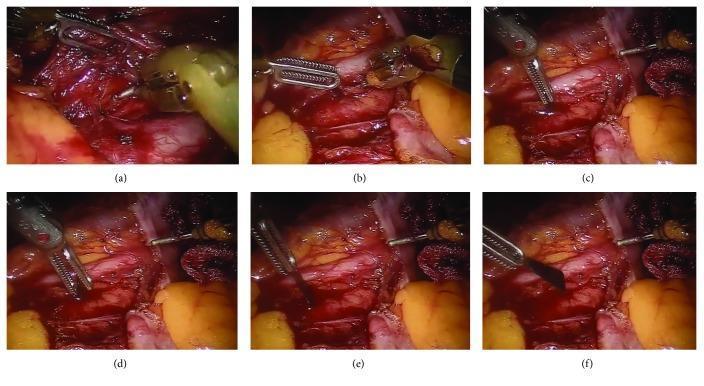
Six sequential intraoperative clinical photographs (a–f) documenting a robot-assisted laparoscopic retrieval of a broken scalpel blade. The images show a deep dissection of the retroperitoneal space, with key anatomical landmarks including the abdominal aorta and the bifurcation near the left common iliac artery. Robotic surgical instruments, including bipolar Cadier forceps and monopolar scissors, are used to carefully manipulate the retroperitoneal tissue. The sequence illustrates the localization of the foreign body (a–c), followed by the careful grasping and extraction of the sharp blade fragment (d–f) away from critical vascular structures. The surgical field displays a combination of retroperitoneal fat, vascular adventitia, and loop of bowel retracted to maintain exposure. This series highlights the management of intraoperative complications (retained foreign body) and the utility of robotic platforms for delicate dissection in close proximity to major vessels.
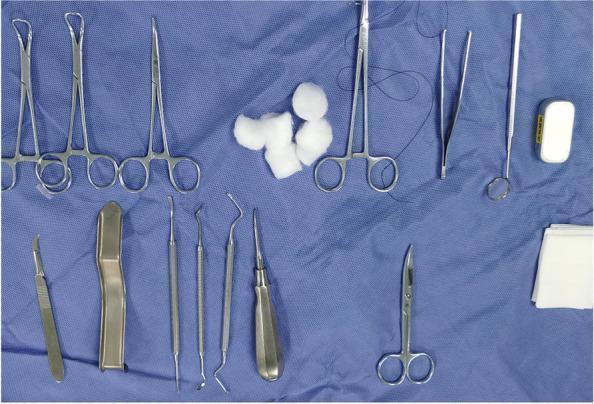
A top-down clinical photograph displays a standardized preoperative surgical tray for an oral and maxillofacial procedure, specifically a third molar extraction. The instruments are arranged on a sterile blue surgical drape. Visible metallic instruments include towel clamps (Backhaus), various hemostatic forceps (mosquito or Kelly style), and needle holders, one of which is loaded with a black silk or synthetic suture. Specialized dental instruments include a periosteal elevator, dental explorers, a mouth mirror, and a straight root elevator with a thick ergonomic handle. Additionally, a surgical scalpel with a #15 blade and a pair of curved Iris or Metzenbaum-style scissors are present. Consumable supplies include several cotton wool rolls and a stack of folded sterile gauze pads. The set demonstrates the essential armamentarium for achieving flap reflection, bone removal, tooth sectioning, and soft tissue closure in dental surgery.
scalpel handle blade surgical knife cutting incision
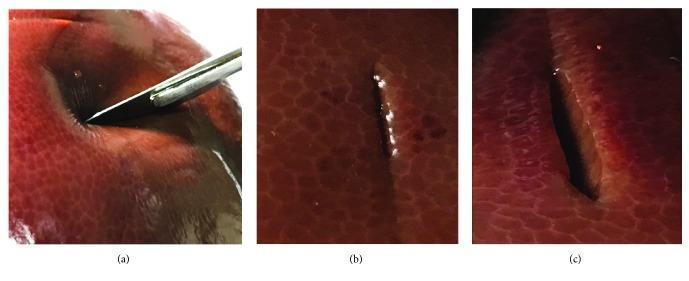
This sequence of clinical photographs illustrates the physical dynamics of surgical incision on parenchymal soft tissue, specifically a liver specimen. The image is divided into three stages: (a) initial penetration where a metal scalpel blade enters the tissue, showing visible elastic deformation and focal compression around the point of entry; (b) a small, linear incision demonstrating neat, closely apposed edges with minimal tissue gaping and a moist, glistening surface; and (c) a larger, deeper incision showing significant separation of the wound edges. This final stage reveals the internal parenchymal structure and a darker void representing the depth of the cut. The series demonstrates the biomechanical transition from energy accumulation during initial contact to the release of intrinsic energy during fracture, resulting in the formation of smooth, distinct surgical planes. This content is relevant for surgical training, demonstrating real-world tissue response to mechanical cutting compared to virtual simulations.
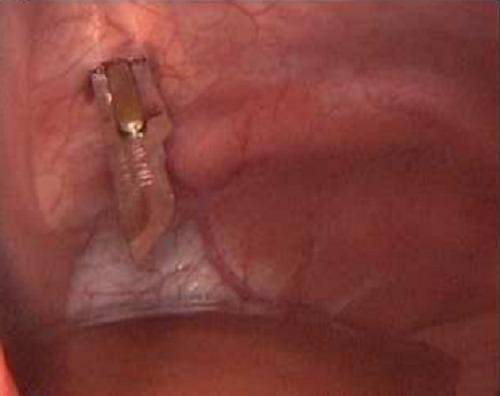
A laparoscopic clinical photograph showing a procedural view of a controlled stab incision through the internal abdominal wall. A specialized surgical instrument, identified as an ophthalmic surgical knife, is visible as it penetrates the peritoneal lining. The instrument features a metallic, silver-colored handle with ribbed texture for grip and a sharp, semi-translucent blade with a yellowish-tan hue. The surrounding anatomical field consists of the parietal peritoneum, which appears as moist, reddish-pink vascularized tissue. Fine branching subperitoneal blood vessels are clearly visible across the surgical site. The image illustrates the precise entry of a secondary trocar or instrument during a minimally invasive surgical procedure, demonstrating the relationship between the surgical tool and the abdominal wall layers.
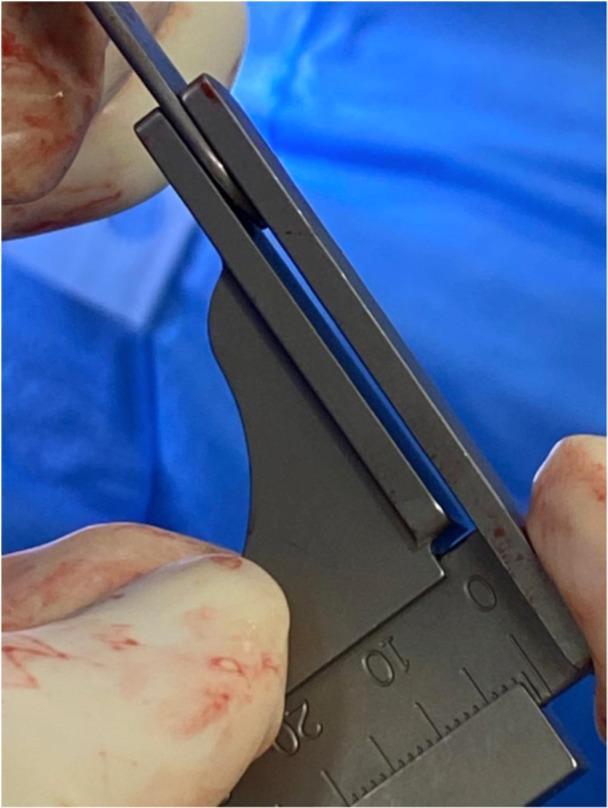
This intraoperative clinical photograph demonstrates a specialized surgical technique used during Total Knee Arthroplasty (TKA). The image shows a stainless steel scalpel handle being used as a reference gauge, positioned against a metallic surgical cutting block or jig. The scalpel handle, which has a known thickness of 2 mm, is oriented diagonally to measure the gap between the surgical instrument and the anatomical site, likely assessing bone resection depth or cartilage loss (Grade 4 wear). The surgical instruments are held by a clinician wearing sterile, blood-stained surgical gloves, highlighting the live procedural context. The cutting block features etched millimeter markings (10, 20) for precise measurement. This visual serves as an educational example of how standard surgical tools can be repurposed as measuring devices to ensure accuracy in restricted inverse kinematic alignment techniques, facilitating proper implant sizing and joint balance without reliance on robotic assistance.
surgical forceps hemostatic clamp tissue grasping
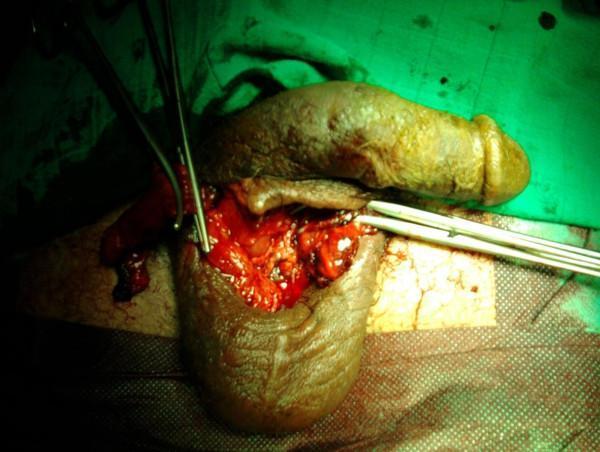
This clinical intraoperative photograph documents a surgical procedure in the male urogenital region, specifically focusing on the ligation of the spermatic cords following traumatic scrotal injury. The image shows an open scrotal wound with raw, erythematous tissue and visible hemorrhage. Two stainless steel surgical instruments are in use: a hemostatic clamp is seen grasping a dark red tubular structure, identified as the spermatic cord, to achieve hemostasis, while a second instrument (surgical probe or forceps) is positioned to manipulate the surrounding tissue. The penis and remaining scrotal skin are visible, showing significant ecchymosis and traumatic disruption. The procedure is being performed under sterile conditions, as indicated by the green surgical drapes. This visual demonstrates the surgical management of severe scrotal trauma and the anatomical localization required for ligating vascular and ductal structures in the perineal region.
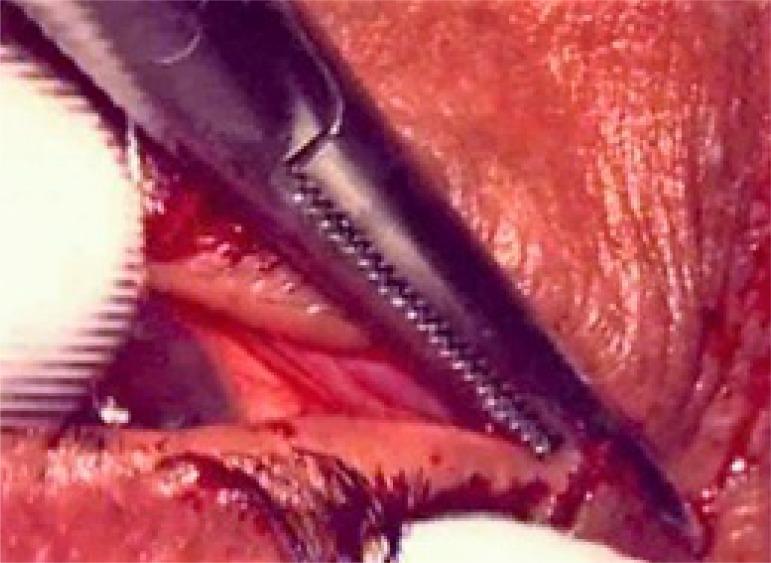
This clinical photograph captures a close-up view of an ophthalmic surgical procedure, specifically a lateral canthotomy. The image demonstrates a metallic surgical instrument, appearing as a dark-colored hemostatic clamp or forceps with distinctive serrated jaws, applied to the lateral canthus of the eye. The instrument is compressing the tissue at the junction of the upper and lower eyelids to achieve hemostasis before a lateral cantholysis or incision. The surrounding periocular tissue is erythematous and moist, with visible anatomical landmarks including the eyelid margins and eyelashes. Minimal surgical bleeding is present in the operative field. This visual serves as an educational example of the initial stages of a lateral canthotomy, a critical procedure for managing orbital compartment syndrome by decompressing the orbit. The focus is on the correct placement and application of surgical instruments to the lateral palpebral ligament area.
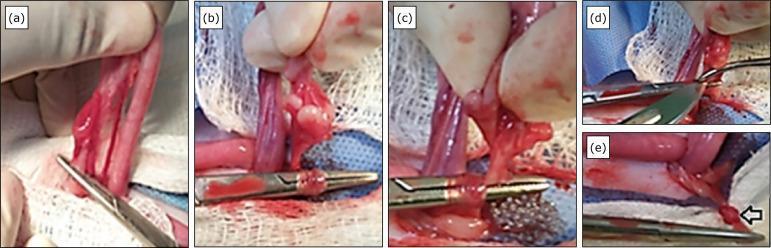
This sequence of five clinical photographs (labeled a-e) illustrates a surgical knot-making technique on the ovarian arteriovenous complex (OAVC), typically performed during feline ovariohysterectomy. Panel (a) shows the initial clamping and preparation of the suspensory ligament. In panel (b), a curved Halsted hemostatic forceps is used to rotate the OAVC on its own axis, creating the structure for an autologous knot. Panel (c) demonstrates the use of the clamp tip to secure and complete the knotting maneuver. In panel (d), a scalpel is visible performing the section of the ovarian pedicle distal to the knot. The final panel (e) shows the completed, secure knot (indicated by an arrow), providing hemostasis for the remaining pedicle stump without the need for traditional suture material. The images highlight the interaction between metal surgical instruments and the vascular tissue, demonstrating the deformation and compression necessary to achieve mechanical occlusion of the vessels.
surgical scissors Metzenbaum Mayo dissecting cutting
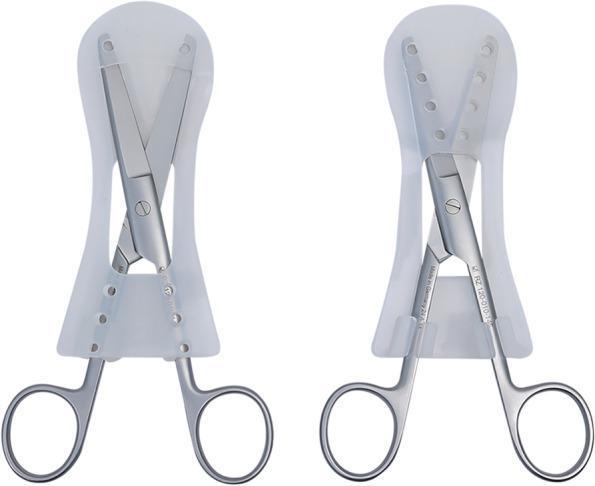
This clinical product image displays two views of a 'Scissor-Tip-Separator', a medical device designed for surgical instrument sterilization and protection. The device is constructed from translucent, flexible medical-grade silicone and features a distinctive inverted U-shaped silhouette with a widened base. The image demonstrates a pair of stainless steel surgical scissors inserted into the separator. In the front view (left), the scissor blades are held in an open, divergent position within a protective safeguard dome. In the back view (right), the mechanism is further detailed, showing the scissor shanks secured by integrated locking handles and arms. Multiple small circular ventilation holes are visible along the upper portion of the device, designed to facilitate steam penetration during autoclaving while preventing the sharp cutting edges of instruments like Mayo or Metzenbaum scissors from sustaining damage. The device serves an essential role in Central Sterile Supply Department (CSSD) workflows by ensuring aseptic handling and maintaining instrument integrity.
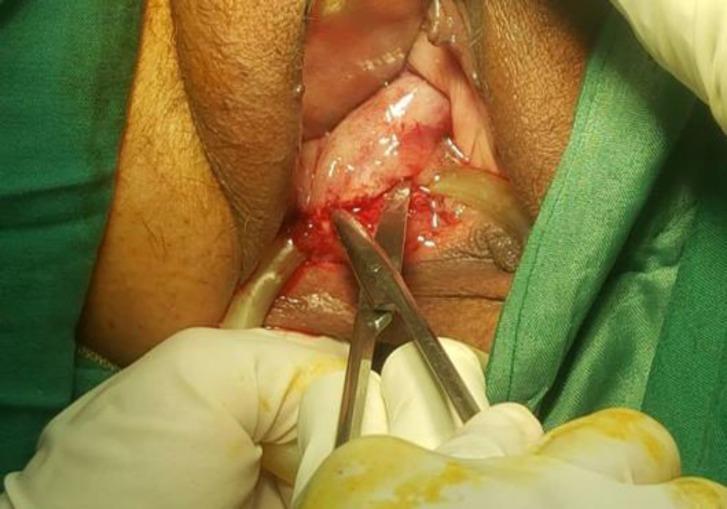
This clinical photograph displays an intraoperative view of a gynecological surgical procedure within the vaginal canal. The primary focus is the dissection of an impacted ring pessary from the vaginal mucosa. Metzenbaum (Metz) scissors are being utilized to excise thick, pale, fibrotic bundles of tissue that have formed over and entrapped the pessary. The vaginal mucosa appears thin, erythematous, and atrophic, consistent with severe urogenital atrophy. There is moderate bleeding at the surgical site where the fibrotic tissue is being incised. A portion of the pessary ring is visible near the lateral wall of the vagina, and a flexible drainage tube or catheter is positioned within the field. The surgical site is bordered by the labia and draped with green sterile cloths, with the surgeon's gloved hands visible at the bottom of the frame. This image demonstrates the clinical complication of pessary impaction and the necessary surgical intervention to release the device from hypertrophic vaginal scarring.
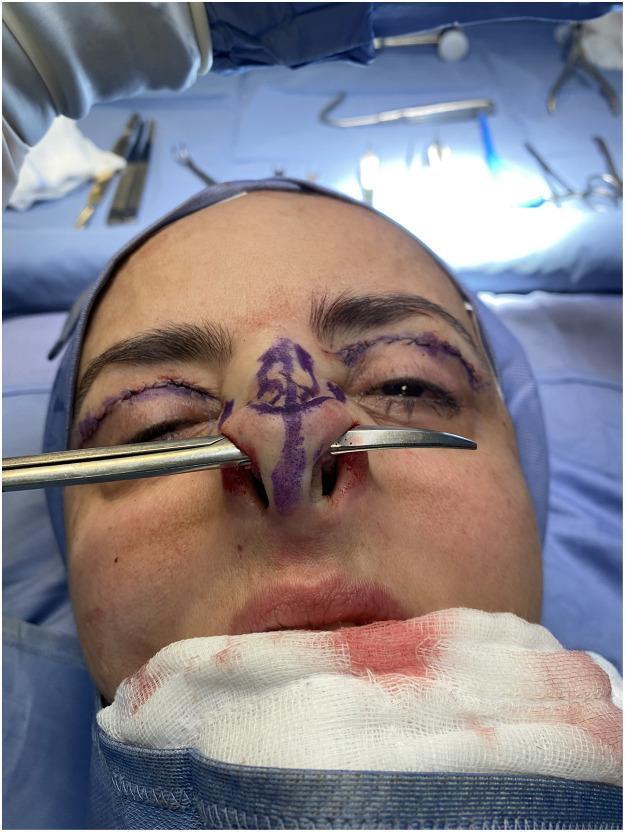
This intraoperative clinical photograph captures a surgical maneuver during a closed rhinoplasty and concurrent blepharoplasty. The primary focus is the intraoperative assessment of nasal symmetry. Straight Metzenbaum scissors are inserted through bilateral transcartilaginous incisions, passing over the residual lower lateral (alar) cartilages. This technique is used to evaluate the symmetry and height of the cartilaginous arches following the resection of their cephalic portions. Purple surgical markings are visible on the nasal dorsum and tip, outlining the pre-operative plan. Additionally, the patient exhibits fresh sutured incisions on the upper eyelids consistent with a blepharoplasty procedure. The surgical field includes sterile blue drapes, a blood-stained gauze at the chin, and various surgical instruments in the background. This image serves as an educational tool for plastic surgery trainees to understand intraoperative quality control and the anatomical landmarks involved in refining the nasal tip and maintaining structural symmetry.
surgical retractor wound exposure self-retaining Balfour
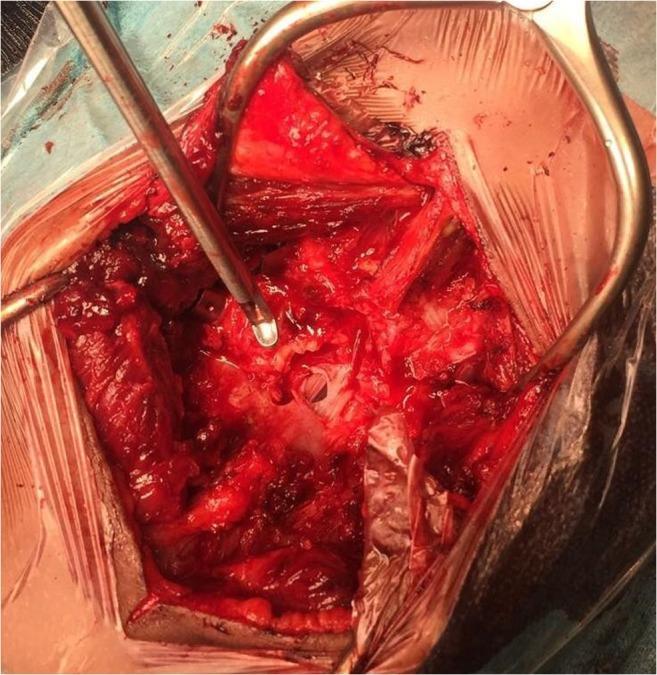
This clinical photograph captures an intraoperative view of a surgical field in the lower lumbar spine (L4-L5 level). A self-retaining retractor is used to maintain exposure of the paravertebral musculature, which shows signs of traumatic disruption and surgical dissection. Following a laminectomy and ligamentum flavum decompression, the central focus of the image is a clear dural laceration, appearing as a white, glistening membrane defect. A metallic surgical suction tip is positioned within the wound to maintain a clear field by removing blood and cerebrospinal fluid. The operative site demonstrates disrupted anatomical structures including the bone margins of the laminae and surrounding soft tissue. This image illustrates the surgical management of a traumatic spinal injury and the visualization of the underlying dura mater prior to primary repair. Key educational concepts include surgical anatomy of the lumbar spine, intraoperative identification of dural defects, and the application of neurosurgical decompression techniques.
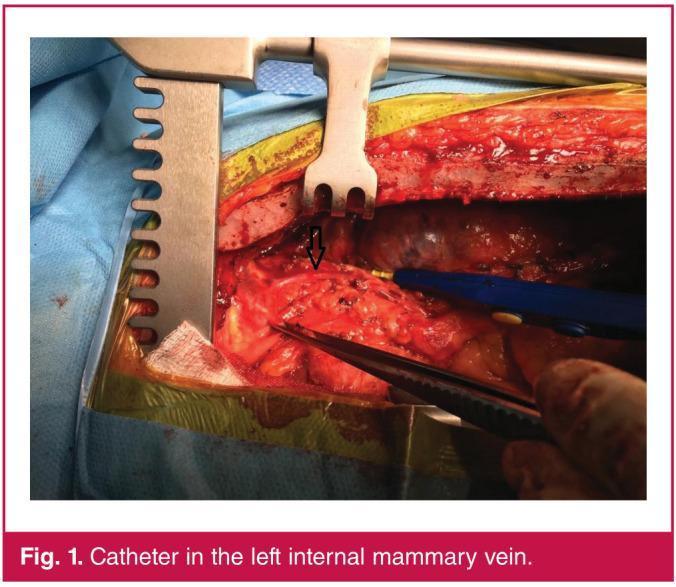
This clinical photograph shows an intra-operative view of a surgical field during a cardiothoracic procedure, specifically depicting the dissection of the left internal mammary artery (LIMA) area. A large, metallic self-retaining retractor is used to provide exposure of the surgical site, with yellow adhesive surgical drapes visible at the wound margins. The anatomical focus is the internal mammary vascular bundle. A black arrow points to a triple-lumen central venous catheter that has been inadvertently malpositioned into the left internal mammary vein (LIMV) rather than following the intended internal jugular pathway. Visible surgical instruments include a blue electrosurgical (cautery) pencil, surgical scissors, and a toothed forceps/pickup held by a surgical gloved hand, which are being used to navigate the red, fibrous, and adipose-rich tissues of the thoracic wall. This image serves as a clinical teaching example for identifying catheter malposition and verifying vascular integrity during open surgical dissection.
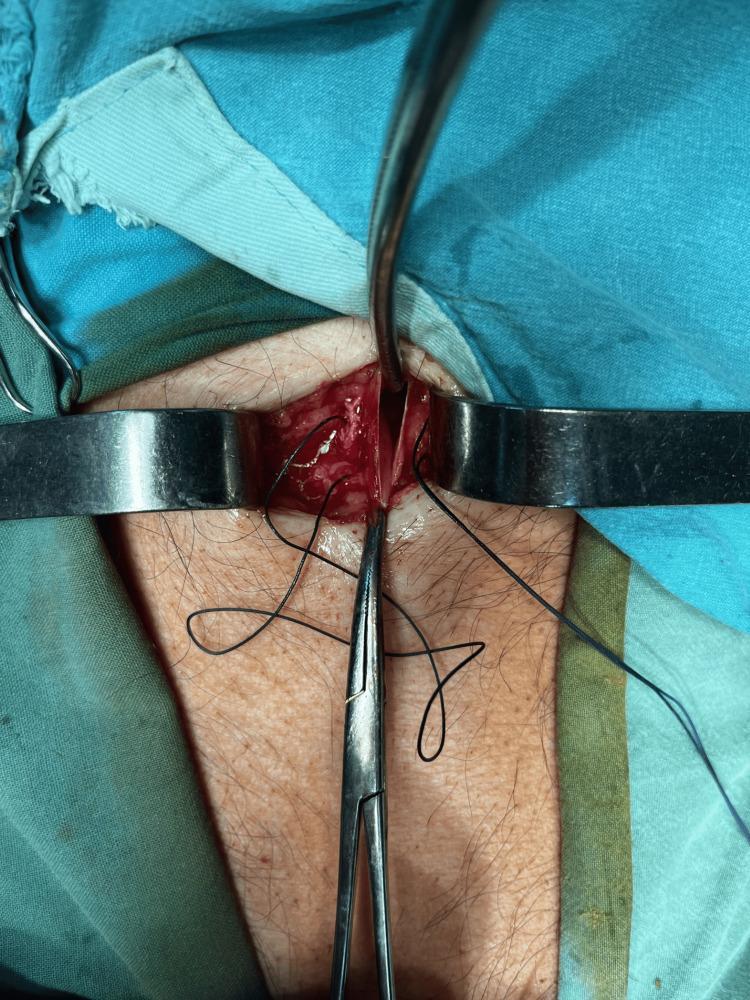
This clinical photograph provides an intraoperative view of a 20-mm vertical subxiphoid incision during a surgical procedure for catheter placement. The surgical field is prepared with sterile teal and light-green drapes, exposing a small area of skin with visible terminal hair. A metallic self-retaining retractor is positioned horizontally to maintain lateral traction, widening the incision and providing access to the underlying subcutaneous tissue. A surgical needle holder is oriented vertically at the inferior aspect of the wound, currently being used to manipulate dark, non-absorbable sutures that are pre-placed along the incision edges. The image demonstrates the technique for creating access to the abdominal cavity under local anesthesia, specifically for the induction of preoperative progressive pneumoperitoneum in cases of giant inguinal hernias with loss of domain. This visual emphasizes surgical site exposure, instrument handling, and the application of stay sutures in a controlled, minor surgical approach.
General Surgical Instruments: Identification and Usage
Surgical Instrument Tray - Overview
1. Cutting Instruments
Scalpels
| Handle | Description | Best Use |
|---|---|---|
| #3 (flat, standard) | Durable, inexpensive, most common | Majority of cutaneous and general procedures |
| #7 handle | Thinner, longer, grooved | Improved precision and grip |
| Siegel handle | Thin, round, knurled, well-balanced | Mohs micrographic surgery; can be rolled with fingertips for fine angle adjustments |
| Beaver handle | Small, rolled with fingertips | Delicate work around the eye and ear |
| Blade | Shape | Primary Use |
|---|---|---|
| #10 | Wide, gently curved (large) | Thick dermis (back), large skin incisions |
| #15 | Gently curved (smaller) | Most popular; majority of skin surgery |
| #11 | Tapered to a sharp point | Stab incisions, drainage procedures, milia removal, "through-and-through" excisions - used cutting-edge-up |
| #20, 21, 22 | Long straight cutting edge | Skin graft harvesting |
| #64 (Beaver mini) | Rounded tip | Work around the eye (eyelid surgery) |
"The #15 blade is the most popular blade. It is gently curved and is appropriate for the majority of skin surgery." - Dermatology 2-Volume Set 5e
Scissors
"Surgical scissors are required for cutting skin, undermining the subcutis and deeper fascial layers, cutting sutures, and removing wound dressings." - Dermatology 2-Volume Set 5e
| Scissors | Characteristics | Use |
|---|---|---|
| Mayo scissors | Heavy, thick blades; straight or curved | Cutting dense fascia, sutures, and tough tissue |
| Metzenbaum scissors | Longer handles, finer blades; curved | Delicate dissection and undermining in deeper tissue planes |
| Iris scissors | Small, short, fine-tipped; sharp | Precise tissue cutting, skin tag removal, delicate facial work |
| Westcott / Castroviejo scissors | Spring-loaded, very sharp tips | Oculoplastic and eyelid surgery; small delicate sites |
| Suture scissors | Large, inexpensive | Cutting sutures only - tissue scissors must never be used for this |
| Suture removal scissors | Half-moon hook on lower blade | Safe removal of sutures by hooking the loop |
| Undermining scissors | Blunt-tipped, longer handles | Subcutaneous dissection; blunt tips reduce risk of vascular injury |
2. Grasping and Holding Instruments
Tissue Forceps (Pickups / Thumb Forceps)
| Forceps | Features | Use |
|---|---|---|
| Adson forceps | Standard large, toothed (1×2 teeth) | Excisional surgery on trunk and proximal extremities |
| Bishop-Harmon | Very fine-tipped, lightweight | Delicate work on face and hands |
| Castroviejo forceps | Suturing platform + fine tip + sturdy build | Precise suture placement; oculoplastic work |
| DeBakey forceps | Atraumatic, serrated jaw | Vascular and bowel surgery - avoids tissue crushing |
| Russian forceps | Spoon-shaped, rounded tips | Holding larger tissue |
| Jeweler's / Epilating forceps | Very fine sharp points | Suture removal; hair transplant work |
Hemostats (Artery Forceps / Clamps)
"Hemostats are used to grasp bleeding vessels prior to ligation. The most popular hemostat is the Halsted Mosquito model which is available in 3.5-inch and 5-inch lengths, either curved or straight." - Dermatology 2-Volume Set 5e
| Hemostat | Size | Use |
|---|---|---|
| Mosquito (Halsted) | Small (3.5-5") | Clamping small bleeding vessels; fine tissue work |
| Kelly clamp | Medium | Clamping medium-sized vessels; general hemostasis |
| Crile clamp | Medium-large | General-purpose vessel clamping |
| Rochester-Pean | Large | Heavy tissue and large vessel clamping |
| Allis clamp | Medium; jaws with opposing sharp teeth | Grasping and holding tough tissue (cyst wall, fascia) - teeth can devitalize tissue, so only use on tissue to be excised |
Needle Holders (Needle Drivers)
"Needle holders for facial and hand surgery are small and light with narrow, fine jaws, while larger needle holders with wide sturdy jaws are designed for work on the trunk and proximal extremities." - Dermatology 2-Volume Set 5e
| Needle Holder | Jaw | Best For |
|---|---|---|
| Webster / Halsey (4.5-5") | Smooth or delicately serrated, tapered | Fine needles (P-3), 5-0 to 6-0 suture; facial surgery |
| Mayo-Hegar | Large, serrated jaws | Large needles (PS-2, FS-2), 2-0 to 4-0 suture; trunk/extremities |
| Castroviejo needle driver | Fine, spring-loaded | Microsurgery and ophthalmic surgery |
3. Retracting Instruments
Hand-held Retractors
| Retractor | Type | Use |
|---|---|---|
| Langenbeck | L-shaped blade, smooth | General wound retraction |
| Farabeuf | Double-ended, S-shaped | Skin and soft tissue retraction |
| Army-Navy (USA) | Double-ended, curved blade each end | General superficial tissue retraction |
| Richardson | Right-angle blade; various sizes | Abdominal wound retraction |
| Deaver | Long, curved, thin blade | Deep abdominal/pelvic retraction |
| Skin hook | Single or multiple fine prongs | Minimal-trauma flap elevation; dermis retraction |
Self-Retaining Retractors
| Retractor | Mechanism | Common Use |
|---|---|---|
| Weitlaner | Ratcheted, hinged arms | Superficial wound exposure |
| Gelpi | Sharp-pronged, ratcheted | Spinal, orthopedic surgery |
| Balfour | Table-mounted; lateral blades + center blade | Abdominal surgery |
| Bookwalter | Modular frame fixed to table | Major abdominal surgery |
| Finochietto (rib spreader) | Ratcheted spreading arms | Thoracic surgery |
4. Suction Instruments
| Device | Use |
|---|---|
| Yankauer (tonsil) sucker | Oral/pharyngeal suctioning; airway clearance |
| Frazier suction tip | Fine, angled tip for delicate areas (spinal, ENT, neurosurgery) |
| Pool/Poole suction | Wide-bore for rapid removal of blood/fluid from body cavities |
5. Diathermy / Electrosurgical Instruments
| Instrument | Mode | Function |
|---|---|---|
| Monopolar bovie / diathermy pencil | Cut / coagulate | Dissect tissue; cauterize bleeding points; most common intraoperative hemostasis tool |
| Bipolar forceps | Coagulate only | Precise hemostasis between the two tips; safer near nerves and delicate structures |
6. Towel Clamps and Draping Instruments
| Instrument | Use |
|---|---|
| Backhaus (towel clamp) | Holds sterile drapes in position around the operative field |
| Mayo stand | Mobile instrument trolley kept beside the scrub nurse/technician |
Instrument Handling - Key Rules
- Palmar grip (ring and middle fingers in rings, thumb in opposite ring) - correct for scissors and hemostats when actively cutting or clamping
- Pencil grip - for needle holders and fine forceps when suturing
- Never pass sharps hand-to-hand - place in a neutral zone on the tray
- Tissue scissors ≠ suture scissors - using tissue scissors on suture dulls them irreversibly
- Blades on and off with instruments - never touch a blade with bare fingers
- Count instruments before and after every procedure - retained instruments are a serious patient safety event
Quick Reference Table: Categories at a Glance
| Category | Examples | Primary Purpose |
|---|---|---|
| Cutting | Scalpel (#3/#7 handle, #10/#15/#11 blade), Mayo scissors, Metzenbaum scissors | Incise and divide tissue |
| Grasping | Adson forceps, DeBakey forceps, Allis clamp | Hold, manipulate, or stabilize tissue |
| Hemostatic | Mosquito, Kelly, Rochester-Pean clamps | Occlude bleeding vessels |
| Needle driving | Webster, Mayo-Hegar needle holders | Drive suture needles |
| Retracting | Langenbeck, Deaver, Balfour, Weitlaner | Expose operative field |
| Suction | Yankauer, Frazier | Remove blood and fluid |
| Electrosurgery | Monopolar bovie, bipolar forceps | Cut and coagulate with electrical energy |
| Draping | Backhaus clamps | Secure sterile field |