
Lumber puncture step
lumbar puncture technique procedure steps spinal needle
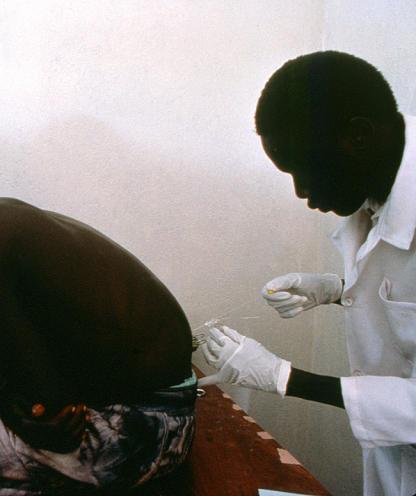
A clinical photograph depicting a healthcare professional performing a lumbar puncture (spinal tap) on a patient in a clinical setting. The patient is positioned in a lateral decubitus posture, lying on their side with the spine flexed and knees drawn toward the chest to increase the interspinous space. The healthcare worker, wearing a white lab coat and sterile gloves, is shown inserting a spinal needle into the lumbar region, specifically targeting the subarachnoid space to collect cerebrospinal fluid (CSF). The visual captures the precise manual technique required for this invasive procedure. Contextually, this diagnostic maneuver is illustrated here as a critical step in staging African Sleeping Sickness (Human African Trypanosomiasis) to detect central nervous system involvement. This image serves as a teaching tool for neuro-diagnostic procedures and clinical manifestations of tropical diseases in resource-limited environments.
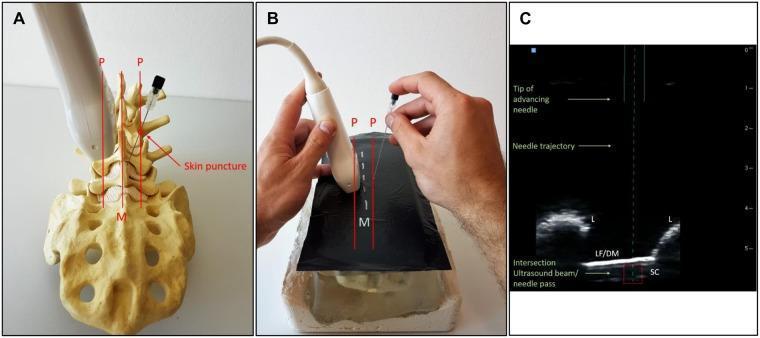
This composite educational graphic illustrates a real-time ultrasound-guided spinal puncture procedure using a paramedian sagittal oblique (PSO) approach. Panel A shows an anatomical model of the lumbar spine and sacrum, demonstrating the transducer and needle placement at the paramedian (P) markers, roughly 1 cm lateral to the midline (M) with medial angulation. Panel B depicts the clinical setup on a phantom model, showing hand placement for the needle-guidance system. Panel C is a paramedian sagittal ultrasound scan used for needle tracking. Key anatomical landmarks include the hyperechoic laminae (L) with acoustic shadowing, the ligamentum flavum/dura mater complex (LF/DM) appearing as a bright linear structure, and the underlying spinal canal (SC). The display features an augmented reality overlay: a dotted line representing the predicted needle trajectory and a solid line indicating the actual advancing needle. A red square designates the target intersection where the needle is expected to enter the spinal canal between adjacent laminae. This illustrates a neuraxial anesthesia or lumbar puncture technique optimized for medical training and procedural accuracy.
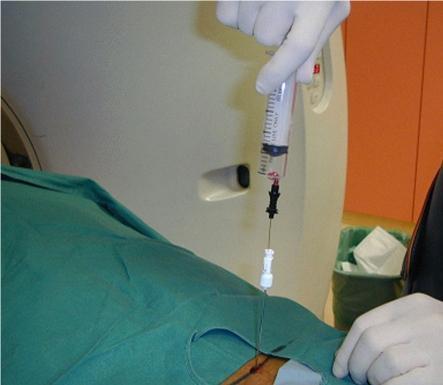
This clinical photograph illustrates the coaxial needle technique used during a CT-guided percutaneous biopsy of the lumbar spine. A patient is positioned on a CT table, covered with a green sterile surgical drape featuring a small central aperture for the procedure site. The primary visual focus is the needle assembly: a larger-bore Ostycut trephine needle, identified by its white hub, serves as an outer cannula. Inserted through this is a finer-gauge Chiba aspiration needle, distinguished by its black hub and an attached syringe held by a gloved operator. This coaxial arrangement allows for multiple tissue samples to be obtained through a single puncture tract, minimizing trauma. The procedure is performed in an interventional radiology suite, with the CT gantry visible in the background. The setup demonstrates standard sterile technique and the use of specialized interventional equipment for spinal pathology investigation.
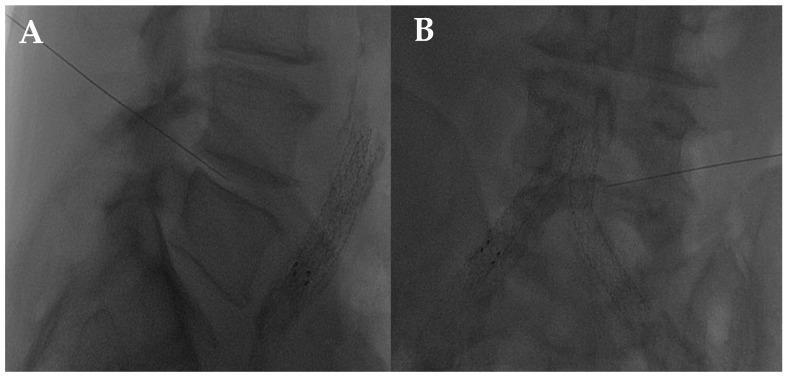
This diagnostic fluoroscopic image set illustrates a lumbar intersomatic disc puncture procedure using a 22G needle, commonly performed for intradiscal injections such as oxygen-ozone (O2-O3) therapy. Image A presents a lateral view of the lumbar spine, demonstrating the needle's trajectory from a posterior-lateral entry point. The needle tip is clearly visualized penetrating the intervertebral disc space between two lumbar vertebrae, positioned centrally within the disc. Image B shows the frontal (anteroposterior) view of the same procedure, highlighting the needle traversing toward the radiolucent gap representing the disc space. The stacked vertebral bodies and their respective endplates serve as critical anatomical landmarks for verifying correct needle placement. Of note, radiopaque vascular stents are visible in the foreground, indicating the patient's comorbidities. This visual serves as an educational guide for image-guided spinal interventions, focusing on the transforaminal or lateral approach to the nucleus pulposus for treating chronic low back pain or disc herniation.
Lumbar Puncture (Spinal Tap) - Step-by-Step
Indications
- Suspected meningitis/encephalitis
- Subarachnoid hemorrhage (CT negative)
- Guillain-Barre syndrome, MS diagnosis
- Intrathecal drug administration (antibiotics, chemotherapy)
- Normal-pressure hydrocephalus, neurosyphilis
- Myelography/cisternography
Contraindications
| Type | Condition |
|---|---|
| Absolute | Local skin infection at site |
| Absolute | Raised ICP with mass lesion (midline shift, posterior fossa mass) |
| Relative | Coagulopathy (INR >1.4, platelets <20,000) |
| Relative | Anticoagulated patient |
| Relative | Uncooperative / hemodynamically unstable patient |
Note: The absence of papilledema does not rule out raised ICP - papilledema takes >48 hours to develop and may be absent in up to 15% of adults with raised ICP. If meningitis is suspected, do NOT delay antibiotics waiting for CT results.
Equipment (Standard Spinal Tray)
- Povidone-iodine swabs and alcohol swab
- Sterile gloves and fenestrated drape
- 1% lidocaine (3 mL)
- 25-27 gauge skin needle + 3 mL syringe
- 20-22 gauge spinal needle (Quincke bevel) + a spare
- Manometer + three-way stopcock
- 4 numbered, capped collection tubes
- Sterile dressing
Step-by-Step Technique
Step 1 - Pre-procedure evaluation
- In patients with focal neuro deficits, altered consciousness, immunocompromise, papilledema, or suspected SAH: get CT head first before proceeding.
- Obtain informed consent. Discuss risks: post-LP headache, infection, bleeding, nerve injury.
Step 2 - Positioning
- Lateral decubitus: Patient on edge of bed, knees drawn to abdomen, chin tucked to chest ("fetal position"). Shoulders and hips must be exactly perpendicular to the bed - no forward or backward tilt.
- Sitting: Patient sitting up, hunched forward, arms crossed over pillow on lap.
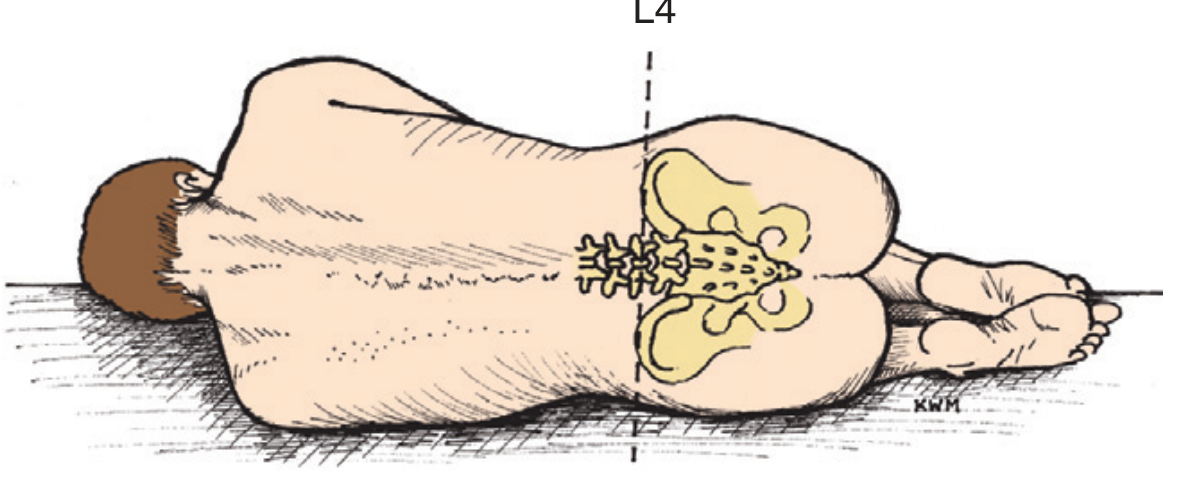
Step 3 - Identify the landmark (Tuffier's Line)
Key: The spinal cord ends at L1-L2 in adults (conus medullaris), so needle entry at or below L3-L4 is safe - you are entering the cauda equina, not the cord.
Step 4 - Sterile preparation
- Open tray in sterile fashion, don sterile gloves
- Prep skin with povidone-iodine over the selected interspace and one level above and below (~10 cm diameter)
- Apply fenestrated drape
- Pre-assemble manometer onto the three-way stopcock; open numbered collection tubes
Step 5 - Local anaesthesia
- Draw up 3 mL of 1% lidocaine
- Using the fine (25-27g) needle, raise a skin wheal at the midline of the chosen interspace
- Then infiltrate deeper along the needle tract into the interspinous ligament, injecting as you advance
- Wait ~1-2 minutes for full effect
Step 6 - Needle insertion (midline approach)
- Hold the spinal needle like a pencil, bevel parallel to the long axis of the spine (reduces dural fiber cutting, lowers headache risk)
- Insert at the midline, angled slightly cephalad (10-15 degrees toward the umbilicus)
- Advance slowly through: skin → subcutaneous fat → supraspinous ligament → interspinous ligament → ligamentum flavum → epidural space → dura mater (a characteristic "pop" or decrease in resistance is felt here) → subarachnoid space
- Skin
- Subcutaneous fat
- Supraspinous ligament
- Interspinous ligament
- Ligamentum flavum
- Epidural space
- Dura mater ("pop" felt here)
- Arachnoid mater
- Subarachnoid space - CSF flows
Step 7 - Confirm placement and measure opening pressure
- Remove the stylet and confirm CSF flow (clear, colorless normally)
- Attach the manometer via three-way stopcock to measure opening pressure
- Normal opening pressure: 70-180 mmH₂O (patient in lateral decubitus, relaxed legs)
- Record the opening pressure
Step 8 - Collect CSF samples
| Tube | Test |
|---|---|
| 1 | Bacteriology (culture, Gram stain) |
| 2 | Biochemistry (glucose, protein) |
| 3 | Haematology (cell count, RBCs) |
| 4 | Special tests (cytology, virology, cryptococcal antigen, etc.) |
Tubes 1 and 3 are compared for RBC count to distinguish traumatic tap from true subarachnoid haemorrhage (in traumatic tap, RBCs decrease tube 1→3; in SAH they remain equal).
Step 9 - Withdraw and dress
- Replace the stylet before withdrawing the needle (reduces post-LP headache risk)
- Apply sterile dressing
- Keep patient flat for ~1 hour post-procedure (evidence for benefit is debated, but commonly practiced)
Post-Procedure
Post-LP Headache
- Occurs in 10-25% of patients
- Characteristically postural - worse sitting/standing, better lying flat
- Usually self-limited (days); 90% occur within 48 hours, may last up to 14 days
- Treatment: rest, hydration, caffeine, NSAIDs
- Refractory: epidural blood patch (highly effective)
- Reduced by: using pencil-point (atraumatic) needle, bevel parallel to spine, using smaller gauge (22-25g)
Other Complications
- Infection / meningitis (rare with sterile technique)
- Spinal epidural haematoma (rare but catastrophic - suspect if back pain + new neurological deficit post-LP, especially in anticoagulated patients)
- Cerebral herniation (if raised ICP not identified pre-procedure)
- Radicular symptoms (transient)
Lateral (Paramedian) Approach
- Enter 1.5-2 cm lateral to midline, angling ~15° cephalad and ~20° toward midline
- Bypasses supraspinous/interspinous ligaments; enters via paraspinous muscles → ligamentum flavum → subarachnoid space
Paediatric Notes
- Preferred position: sitting with mild neck flexion (avoid overflexion - risk of hypoxia in infants)
- Preoxygenate neonates/premature infants with 100% O₂ for 2-5 min
- Use 20-22g, 1.5-inch needle for infants; 3.5-inch for children >12 years
- "Pop" may NOT be felt in young infants
- Always use local anaesthetic - pain perception is present even in premature neonates