
from Guyton and Hall textbook of medical physiology, 4th South Asia edition, write a 5-mark short note on Types of Nerve Damage
Seddon classification nerve injury neuropraxia axonotmesis neurotmesis diagram
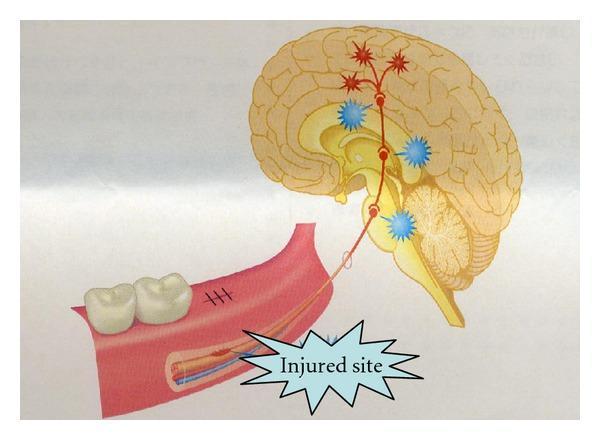
A medical illustration depicting the pathophysiology of nerve injury and central sensitization. The diagram shows a sagittal section of the human brain and a cross-section of the mandible. In the mandible, the inferior alveolar nerve is shown within the mandibular canal; a callout labeled 'Injured site' highlights a mechanical disruption (neurotmesis or axonotmesis) of the nerve fibers, while an adjacent vessel remains intact. A neural pathway is traced from this peripheral injury site, ascending through the trigeminal ganglion toward the central nervous system. Within the brainstem, midbrain, and thalamic regions, blue burst icons symbolize neuronal activation or modification along the second-order neuron pathway. The pathway terminates in the somatosensory cortex, marked by red starburst symbols and radiating lines, illustrating cortical reorganization or the perception of neuropathic pain. The illustration serves as an educational tool for understanding the retrograde effects of peripheral nerve trauma on central processing and chronic pain development.
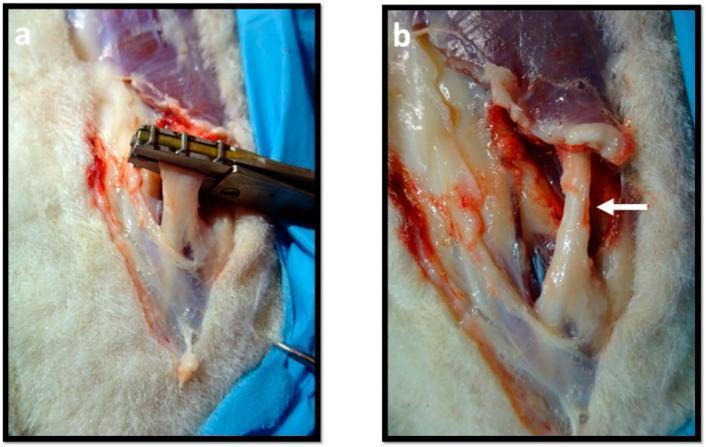
This clinical photograph set illustrates the induction of an experimental axonotmesis (crush injury) on a peripheral nerve, likely the common peroneal nerve. Panel (a) shows the intraoperative procedure where a specialized metallic, non-serrated clamp with a flat crushing surface is applied perpendicular to the long axis of a taut, whitish nerve bundle. The clamp is used to apply a controlled compressive force to disrupt the axons while maintaining the continuity of the connective tissue sheaths (epineurium and perineurium). Panel (b) depicts the nerve immediately after the removal of the instrument. A white arrow highlights the resulting pathology: a distinct, flattened, and narrowed region corresponding to the crush site. This morphology demonstrates the visual characteristics of a Seddon's second-degree nerve injury. The surgical site shows surrounding muscular tissue and minor hemorrhage, providing a clear demonstration of nerve trauma models used to study peripheral nerve regeneration and functional recovery.
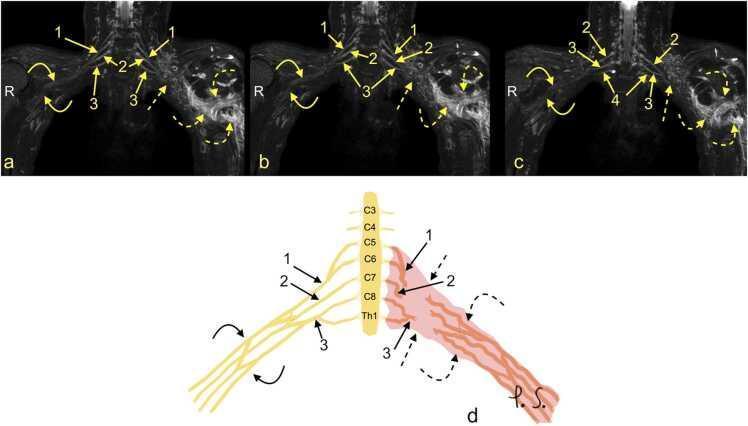
This composite educational resource comprises three Magnetic Resonance Neurography (MRN) coronal views (a, b, c) and a correlating schematic anatomical diagram (d) illustrating a severe traumatic brachial plexus injury. The right side of the images displays normal brachial plexus anatomy, with continuous nerve structures including the upper trunk (1), middle trunk (2), C8 root (3), and Th1 root (4). In contrast, the left side demonstrates a total rupture of the brachial plexus (dashed arrows). This injury is characterized by the complete discontinuity of the neural trunks and cords, accompanied by a large axillary cavity hematoma (curved dashed arrows). The schematic (d) highlights the side-to-side difference, showing the organized right-sided roots (C5-Th1) and trunks versus the disorganized, hemorrhagic area on the left. This material is designed for advanced medical education in radiology and neurosurgery, focusing on diagnostic imaging features of high-grade nerve trauma, specifically Seddon grade 3-5 injuries (neurotmesis) and the identification of postganglionic plexopathy.
Types of Nerve Damage (Seddon's Classification)
1. Neuropraxia (First-Degree / Grade I)
- Cause: Transient compression, mild stretch, ischemia, or blunt trauma (e.g., "Saturday night palsy")
- Pathology: Only the myelin sheath is affected (focal demyelination). The axon, endoneurium, perineurium, and epineurium all remain intact
- Clinical features: Complete motor paralysis of the affected muscles, but some sensation and autonomic function may be preserved (due to large myelinated fibers being more vulnerable than thin C-fibers)
- Recovery: Complete and spontaneous once the causative factor is removed. Recovery takes days to several weeks and does NOT follow a proximal-to-distal pattern (since no axonal regrowth is needed)
- Example: Radial nerve compression against the humerus causing wrist drop
2. Axonotmesis (Second-Degree / Grade II)
- Cause: Severe blunt trauma, crush injury, traction, or fractures (e.g., radial nerve injury in humeral shaft fracture)
- Pathology: Axonal continuity is lost. Wallerian degeneration occurs distal to the site of injury (and for a short distance proximally). The endoneurial tubes remain intact, providing a scaffold for regeneration
- Clinical features: Complete loss of motor, sensory, and autonomic function distal to the lesion
- Recovery: Good prognosis. Axons regenerate along the intact endoneurial tubes at a rate of 1-2 mm/day (or 1-4 mm/day by some sources), reconnecting with the same end organs. Recovery progresses in a proximal-to-distal pattern. Functional recovery is eventually near normal
3. Neurotmesis (Fifth-Degree / Grade V)
- Cause: Sharp lacerations, high-energy traction injuries, intraneural drug injection, severe ischemia
- Pathology: All structural elements of the nerve are disrupted. Wallerian degeneration occurs throughout the distal stump. Even if the nerve appears grossly in continuity, the internal architecture is completely disorganized
- Clinical features: Complete loss of all modalities (motor, sensory, autonomic) distal to the lesion. Tinel's sign may be elicited
- Recovery: Spontaneous recovery is impossible. Surgical repair (primary neurorrhaphy or nerve grafting) is required. Even after microsurgical repair, regenerating axons may enter incorrect endoneurial tubes and reconnect with wrong muscles or sensory organs, leading to synkinesis and incomplete functional recovery. Recovery is never normal
Sunderland's Classification (Extended)
| Sunderland | Seddon | Structures Damaged |
|---|---|---|
| Grade I | Neuropraxia | Myelin only |
| Grade II | Axonotmesis | Axon + myelin; endoneurium intact |
| Grade III | Axonotmesis | Axon + endoneurium; perineurium intact |
| Grade IV | Axonotmesis | Axon + endo + perineurium; epineurium intact |
| Grade V | Neurotmesis | All layers disrupted |
Summary Table
| Feature | Neuropraxia | Axonotmesis | Neurotmesis |
|---|---|---|---|
| Axon | Intact | Disrupted | Disrupted |
| Endoneurium | Intact | Intact | Disrupted |
| Wallerian degeneration | Absent | Present | Present |
| Motor loss | Complete | Complete | Complete |
| Sensory loss | Partial | Complete | Complete |
| Recovery | Complete, spontaneous | Good, proximal-to-distal | Poor; needs surgery |
| Rate of recovery | Days-weeks | 1-2 mm/day | Incomplete even after repair |