
Separation of blood components
Separation of blood components in blood bank
blood component separation centrifugation blood bank
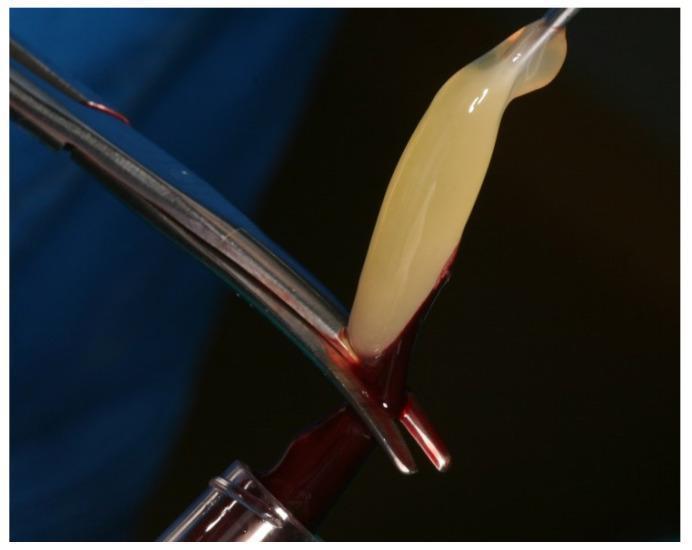
This clinical photograph captures an intraoperative procedure demonstrating the manual separation of platelet-rich fibrin (PRF) from a concentrated red blood cell (RBC) clot. The PRF component is visualized as a yellowish-white, translucent, gelatinous fibrin matrix, which is held securely by metallic atraumatic tweezers. Positioned immediately below it is the dense, dark-red erythrocyte-rich clot. A sharp metallic surgical blade is shown performing the excision at the junction of the two layers to isolate the PRF for clinical use. This process follows a standardized centrifugation protocol of autologous venous blood, typically used in regenerative medicine for applications such as sinus augmentation, implant dentistry, or wound healing. The visual highlights the distinct textural and color differences between the concentrated leukocyte-platelet-rich fibrin and the remaining hematoma components, emphasizing the precision required for autologous graft preparation.
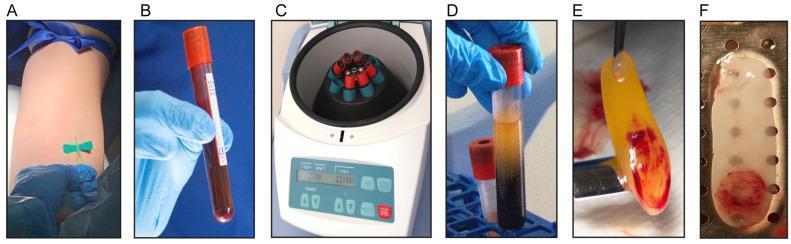
This clinical photograph panel illustrates the sequential clinical and laboratory steps for isolating Leukocyte- and Platelet-Rich Fibrin (L-PRF) for regenerative medicine. Panel A shows venous blood harvesting using a butterfly needle and tourniquet. Panel B displays a collected whole blood sample in a silica-coated glass tube. Panel C depicts the centrifugation process in a laboratory centrifuge (Hettich EBA-200), essential for component separation without anticoagulants. Panel D shows the post-centrifugation blood tube demonstrating distinct stratification: an upper layer of acellular plasma, a concentrated L-PRF clot in the middle, and packed red blood cells at the bottom. Panel E captures the manual isolation of the dense, yellowish L-PRF clot using sterile forceps. Finally, Panel F shows the resulting L-PRF membrane after mechanical compression in a surgical box, appearing as a flattened, whitish, resilient fibrin scaffold. This series serves as a protocol guide for clinicians in dental, maxillofacial, and orthopedic specialties to prepare autologous bioactive membranes for wound healing and tissue engineering.
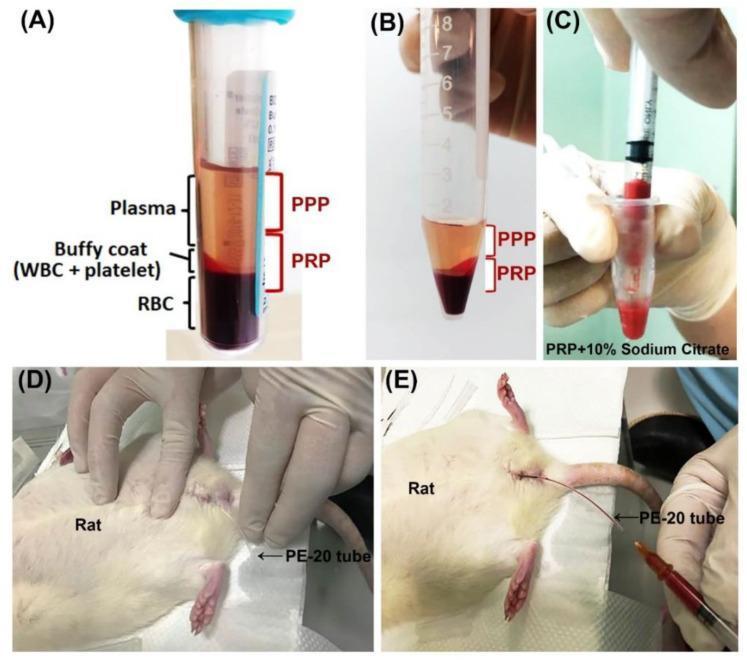
This composite figure illustrates the laboratory protocol for preparing and administering platelet-rich plasma (PRP) in a translational research model. Panel (A) shows a primary blood collection tube after initial centrifugation, demonstrating the separation of whole blood into three distinct layers: the straw-colored plasma at the top, a thin whitish buffy coat containing white blood cells (WBC) and platelets in the middle, and dense red blood cells (RBC) at the bottom. Panel (B) depicts a conical tube after secondary centrifugation, further partitioning the plasma into platelet-poor plasma (PPP) at the top and platelet-rich plasma (PRP) at the base. Panel (C) captures the mixture of PRP with sodium citrate, which serves to maintain the plasma in a liquid state for therapeutic use. Panels (D) and (E) demonstrate the clinical application phase, showing a rat under anesthesia where a PE-20 tube is inserted for intravesical (bladder) instillation of the prepared PRP/PPP mixture. This procedural sequence highlights the essential steps of centrifugation, fractionation, and targeted delivery for regenerative medicine studies.
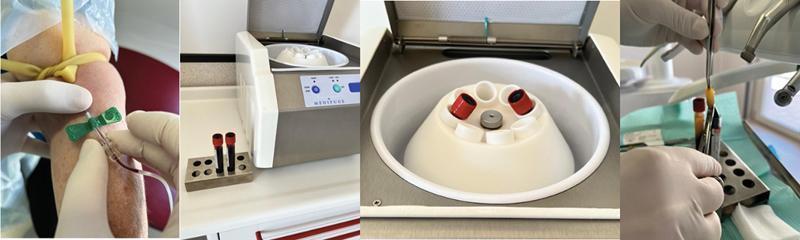
A multi-panel clinical photograph series demonstrating the workflow for preparing Concentrated Growth Factor (CGF). The sequence begins with peripheral venous blood collection from a patient’s arm using a butterfly needle and tourniquet. Collected blood is contained in red-stoppered tubes, which are then placed into a specialized benchtop centrifuge (Medifuge MF200). An overhead view shows the centrifuge rotor loaded with tubes for automated separation of blood components. Following centrifugation, the final panel illustrates the manual extraction and manipulation of the fibrin-rich CGF clot using sterile surgical forceps. The CGF appears as a dense, yellowish-orange autologous biomaterial. This process is used in regenerative medicine, specifically dental and oral surgery, to produce growth factor-rich membranes for bone defect repair and tissue regeneration. The images highlight the transition from whole blood collection to the isolation of the growth factor and stem cell layer through density-based separation.
Separation of Blood Components in the Blood Bank
Overview
- Miller's Anesthesia, p. 6562: "Blood is collected either as whole blood and separated by centrifugation or by apheresis, in which only specific components are collected while other components are returned to the donor."
Two Main Collection Methods
1. Whole Blood Collection + Component Separation
2. Apheresis (Hemapheresis)
- Higher yield of one component per donation
- More frequent donations (e.g., AB donors give universal plasma while RBCs are returned)
- Types: Plateletpheresis, Plasmapheresis, Leukapheresis, Erythrocytapheresis
"Separation of blood components is based on size (filtration instruments), density (centrifugation instruments), or a combination of both." - Henry's Clinical Diagnosis, p. 811
The Separation Scheme from Whole Blood
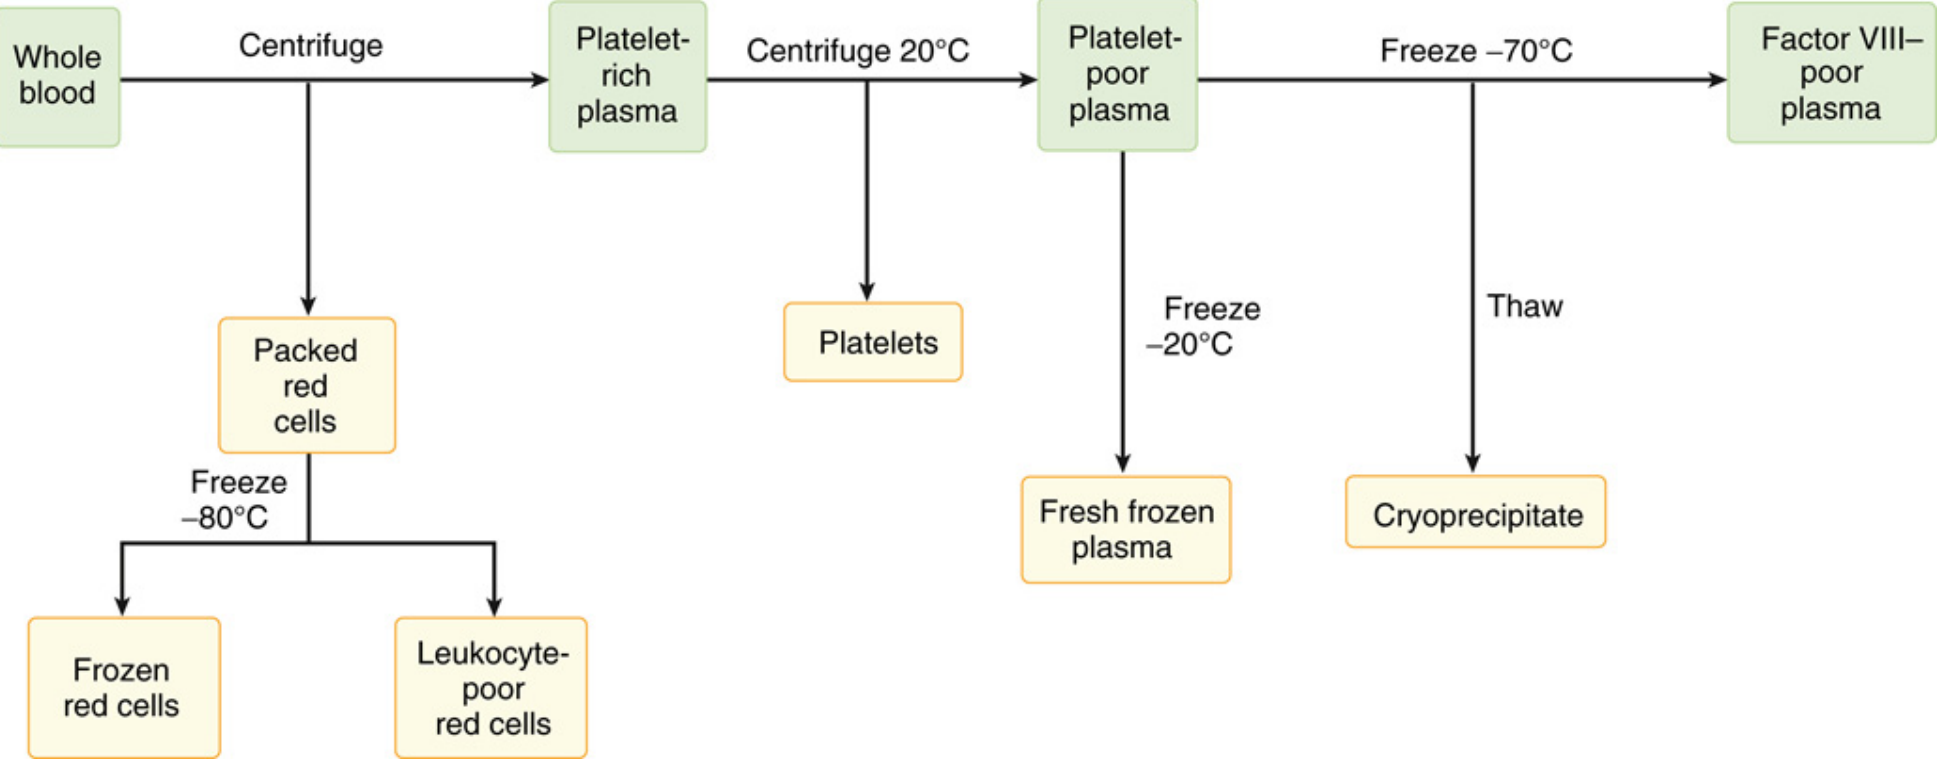
Step-by-Step Process
| Step | Process | Products Obtained |
|---|---|---|
| 1. Initial slow centrifugation | Whole blood centrifuged at low speed (~2,000 rpm) | Platelet-rich plasma (PRP) + Packed Red Blood Cells (PRBCs) |
| 2. Second centrifuge of PRP at 20°C | PRP centrifuged at high speed | Platelets (pellet) + Platelet-poor plasma |
| 3. Freeze platelet-poor plasma at -20°C | Within 6-8 hours of collection | Fresh Frozen Plasma (FFP) |
| 4. Freeze FFP at -70°C | Further processing of platelet-poor plasma | Factor VIII-poor plasma |
| 5. Thaw platelet-poor plasma | Controlled thaw of FFP | Cryoprecipitate (Factor VIII, fibrinogen, vWF, Factor XIII) |
| 6. Freeze PRBCs at -80°C | Cryopreservation with glycerol | Frozen Red Cells or Leukocyte-poor Red Cells |
Products and Their Key Properties
Packed Red Blood Cells (PRBCs)
- Volume: ~250-300 mL (with additive solution)
- Hematocrit: 50-70%
- Stored at 4 ± 2°C for 35-42 days (depending on additive solution used)
- Indications: anemia, blood loss
Platelets
- Derived from: pooled whole blood (buffy coat or PRP method) or single-donor apheresis
- Stored at 20-24°C with continuous agitation for up to 5-7 days
- Apheresis platelets equivalent to 4-6 whole blood units
Fresh Frozen Plasma (FFP)
- Frozen at -20°C within 6-8 hours of collection
- Contains all coagulation factors (including labile Factors V and VIII)
- Volume: ~200-250 mL
- Stored for up to 1 year at -18°C or colder
- Indications: coagulopathy, liver disease, DIC
Cryoprecipitate
- Produced by slowly thawing FFP at 1-6°C - the cold-insoluble precipitate that forms is collected
- Rich in: Factor VIII, fibrinogen (Factor I), vWF, Factor XIII, fibronectin
- Volume: ~10-20 mL per unit
- Stored at -18°C or colder for up to 1 year
- Indications: hemophilia A, hypofibrinogenemia, vWD (when Factor VIII concentrate unavailable)
Frozen/Leukocyte-poor Red Cells
- Frozen at -80°C with glycerol as cryoprotectant
- Stored for up to 10 years (useful for rare blood types)
- Must be deglycerolized before transfusion; use within 24 hours of thawing
Buffy Coat Method (Alternative to PRP Method)
- Whole blood centrifuged at high speed → separates into RBCs (bottom), buffy coat (middle), and plasma (top)
- Buffy coat (containing WBCs + platelets) is pooled from 4-6 donations
- Pool is re-centrifuged at slow speed → platelets remain in suspension
- Advantage: produces leukocyte-reduced platelets more efficiently
Additional Processing Steps (Optional/Mandatory)
| Process | Purpose |
|---|---|
| Leukoreduction (filtration) | Reduces febrile reactions, CMV transmission risk, HLA alloimmunization |
| Irradiation (gamma/X-ray, >25 Gy) | Prevents transfusion-associated Graft-versus-Host Disease (TA-GvHD) in immunosuppressed patients |
| Washed RBCs | Removes plasma proteins - for patients with IgA deficiency or severe allergic reactions |
| CMV-negative components | For seronegative immunocompromised patients |
| Pathogen reduction (e.g., amotosalen + UV-A) | Inactivates pathogens in plasma and platelets |
Regulatory Framework
- In the USA: FDA's Center for Biologics Evaluation and Research, accreditation by AABB
- In Europe: European Blood Directive (Directive 2002/98/EC)
Summary Table: Component Separation at a Glance
| Component | Method | Temperature | Shelf Life |
|---|---|---|---|
| Packed RBCs | Slow centrifugation | 4°C | 35-42 days |
| Platelets (pooled) | Slow + high centrifuge | 20-24°C (agitated) | 5-7 days |
| Platelets (apheresis) | Apheresis machine | 20-24°C | 5-7 days |
| FFP | Freeze plasma <6-8 h | -20°C or colder | 1 year |
| Cryoprecipitate | Thaw FFP at 1-6°C | -18°C or colder | 1 year |
| Frozen RBCs | Freeze with glycerol | -80°C | 10 years |