
Intertrochanteric fracture surgery with proximal femoral nailing in detail for ortho surgeon
Reading File
Now let me search the medical library for intertrochanteric fracture and proximal femoral nail content in parallel.
Finding Sources
Finding Sources
Searching PubMed
"intertrochanteric fracture" AND "proximal femoral nail"
Finding Sources
Finding Sources
Finding Sources
Searching PubMed
"intertrochanteric fracture" AND "intramedullary nail"
Excellent - I found the key sources: Campbell's Operative Orthopaedics 15th Ed 2026 and Rockwood & Green's Fractures 10th Ed 2025. Let me read the detailed surgical content now.
Reading File
Reading File
The Campbell's block 31 started at tibial plateau content. I need to find the correct block for intertrochanteric fractures in Campbell's. Let me search the TOC and the correct blocks.
Finding Sources
Finding Sources
Finding Sources
Finding Sources
Now let me read the key sections from both textbooks simultaneously - the Campbell's intertrochanteric section and the Rockwood & Green implant/technique sections.
Reading File
Reading File
Reading File
Reading File
Reading File
Reading File
Reading File
Reading File
Reading File
Reading File
Excellent - I now have the Rockwood & Green cephalomedullary nail technique content. Let me now read the Campbell's technique section for intramedullary nailing of IT fractures.
Reading File
Reading File
Reading File
Reading File
Now let me fetch the key Campbell's intramedullary nailing technique section which starts at line 7693 - and also the classification and pre-op section.
Reading File
Reading File
I now have comprehensive content from both textbooks. Let me fetch one key x-ray image to include in the response.
Loading Image
Loading Image
I now have all the content needed to write a comprehensive, surgeon-level response. Let me compile everything.
Intertrochanteric Fracture: Proximal Femoral Nailing - Surgical Reference
Sources: Campbell's Operative Orthopaedics 15th Ed 2026; Rockwood & Green's Fractures in Adults 10th Ed 2025
1. Classification
AO/OTA 31-A System (most widely used)
| Type | Description | Stability |
|---|---|---|
| A1 | Simple 2-part along intertrochanteric line | Stable |
| A2 | Comminuted, medial cortex disrupted, multiple fragments | Unstable |
| A3 | Reverse obliquity / transverse - fracture line crosses into subtrochanteric zone | Highly unstable |
A2 and A3 are the primary indications for proximal femoral nailing (PFN) / cephalomedullary nailing.
- Boyd & Griffin (older): Type 1 = along intertrochanteric line; Type 2 = comminuted; Type 3 = subtrochanteric extension; Type 4 = comminuted with 2 planes
- Evans-Jensen: Widely used, emphasizes reducibility and posteromedial cortex integrity
Lateral Wall Assessment
The lateral wall thickness - measured from a point 3 cm distal to the innominate tubercle at 135° to the fracture line - is critical. Lateral wall < 21 mm predicts lateral wall fracture with 95% sensitivity/88.2% specificity. This represents an independent indication for a cephalomedullary nail over a sliding hip screw (SHS), as lateral wall fracture during SHS insertion leads to loss of fixation.
2. Implant Selection: Why PFN Over SHS?
Biomechanical Rationale for Intramedullary Fixation
- Shortened bending lever arm (nail lies within the femoral canal, vs. SHS plate on lateral cortex)
- Better load transfer to medial calcar
- Less femoral neck shortening and medialization
- Smaller incision, less blood loss
Evidence-Based Indications for Cephalomedullary Nail
- AO/OTA A2 (unstable, comminuted) - preferred
- AO/OTA A3 (reverse obliquity, transverse) - mandatory; SHS contraindicated as fracture line opposes sliding and promotes failure
- Lateral wall insufficiency (< 21 mm)
- Subtrochanteric extension
- High-energy fractures in young patients
- Any fracture where posteromedial calcar support is absent
From Rockwood & Green (2025): "The sliding hip screw may still be used for stable A1 fractures and the cephalomedullary nail is recommended for unstable A2 and A3 fractures." Most studies now report improved functional outcomes with cephalomedullary nails, largely due to reduced collapse and femoral medialization.
Available Implants
- Gamma Nail (Stryker) - original standard; 6° valgus angle
- PFNA / PFN-A (Synthes) - helical blade design; better rotational control
- TFN-ADVANCED (TFNA) (DePuy Synthes)
- InterTAN (Smith & Nephew) - dual integrated proximal screws for linear intraoperative compression; theoretically better rotational stability
- Trigen / Targon - demonstrated equivalence to SHS in adequate RCTs
Short vs. Long Nail: For fractures extending no further than 3 cm below the trochanteric region, short nails (approx. 200 mm) give equivalent results with less operative time, blood loss, and cost. Long nails are required if the fracture extends below the lesser trochanter or in subtrochanteric patterns.
3. Preoperative Planning
Checklist
| Item | Detail |
|---|---|
| OR table | Fracture table - essential; free-hand technique only if sufficient assistants |
| Position | Supine preferred; lateral for obese patients or difficult patterns |
| Contralateral limb | Lithotomy holder (image intensifier between legs) or scissor position (image intensifier from opposite side) |
| Image intensifier | Confirm AP and lateral views of proximal femur BEFORE prep - obtain true AP of knee for rotation reference |
| Reduction aids | Bone hooks, peri-articular clamps, Schanz pins as joystick in proximal fragment if needed |
| Nail system | Template pre-op; select nail diameter, length, and proximal angle (typically 125° or 130°) |
Timing
Surgery should not be delayed beyond 24-48 hours for medically optimized patients. Blood loss from IT fracture is typically 500-1,000 mL - ensure IV access and fluid balance monitoring. Do NOT stop aspirin preoperatively (low bleeding risk does not justify delay). DOAC: typically delay 1-2 days depending on drug and renal function.
4. Surgical Technique: PFN (Cephalomedullary Nailing)
(Campbell's TECHNIQUE 60.5 + Rockwood & Green Chapter 54)
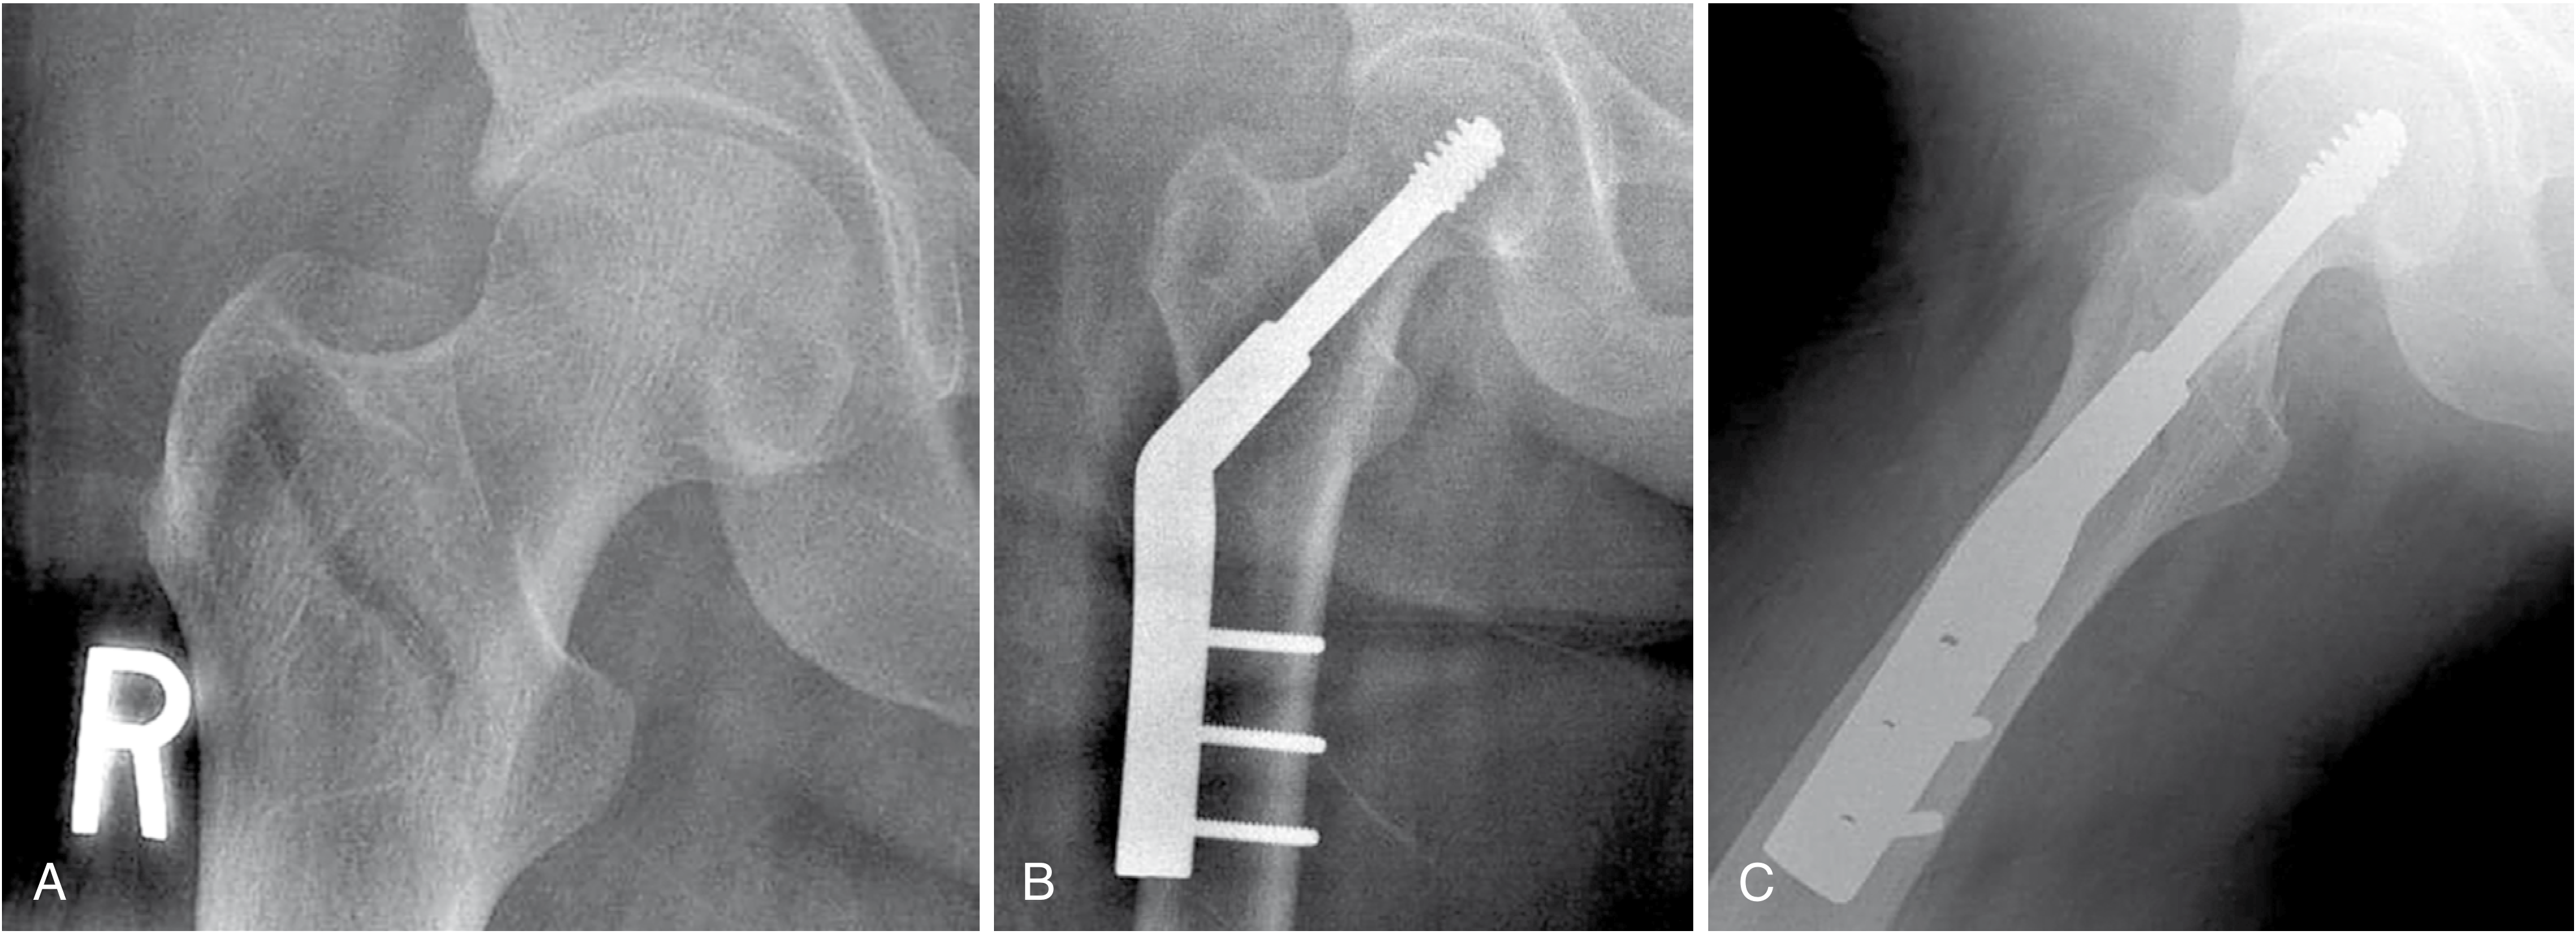
Step 1 - Patient Positioning
- Supine on fracture table with perineal post (pad generously to avoid pudendal/perineal nerve injury).
- Contralateral limb in well-leg holder (lithotomy) or scissored position (hip extended relative to injured side). Scissor position preferred if contralateral hip motion is limited.
- Injured limb: apply traction boot securely. Apply longitudinal traction + internal rotation for reduction. Correct typical deformity - varus and posterior sag of the proximal fragment.
- 20-30° of hip flexion on injured side (Campbell's recommendation) to align nail entry with femoral canal.
- Adduct torso; ipsilateral arm secured over chest to allow unobstructed fluoroscopy.
- Image intensifier: positioned to obtain perfect AP (lesser trochanter visible as bony landmark for rotation) and lateral views. Save a true AP image of the contralateral knee as rotation reference before prep.
Step 2 - Fracture Reduction
- Under fluoroscopy: AP view checks varus/valgus; lateral checks anterior/posterior sag.
- Acceptable reduction: slight valgus preferred over varus; neutral or 10° valgus on AP; neutral on lateral.
- Anatomical reduction is NOT required and is not always achievable - controlled collapse is acceptable and expected.
- If closed reduction fails: a Schanz pin inserted percutaneously into the proximal fragment as a joystick can correct the typical flexion-abduction-external rotation deformity.
- The proximal fragment "deforming forces": iliopsoas pulls it into flexion and external rotation; abductors cause abduction.
Step 3 - Nail Entry Point (Critical Step)
This is one of the most common sources of malalignment.
Entry point: Just lateral to the medial aspect of the greater trochanter on AP view (tip of or just medial to tip of greater trochanter) AND centered or slightly posterior in the neck/head axis on lateral view.
- Incision: 3 cm skin incision, approximately 5 cm proximal to the tip of the greater trochanter
- Incise fascia lata; split muscle to expose trochanteric tip
- Insert guide pin under fluoroscopy; confirm AP and lateral position before opening the canal
Consequences of malpositioned entry point:
- Too lateral entry → varus malalignment of nail + fracture
- Too medial entry → valgus malalignment, possible iatrogenic femoral neck fracture
- Too anterior on lateral → apex anterior deformity
Step 4 - Canal Opening and Reaming
- Open proximal femur with appropriately sized solid channel reamer (trochanteric reamer)
- Depending on nail design and diameter, sequential reaming of the femoral canal may be required
- Ream to 1-1.5 mm beyond desired nail diameter for unreamed technique; or full reaming to nail diameter + 0.5 mm
- Avoid eccentric reaming ("trajectory control") - maintain guide wire centrally
Step 5 - Nail Insertion
- Select nail with appropriate neck-shaft angle (usually 125° or 130°) and appropriate valgus angle
- Insert nail by hand where possible; mallet with light taps if resistance encountered
- Do NOT force - if significant resistance, check fluoroscopy for malalignment or inadequate reaming
- Advance until the proximal end is at or just below the tip of the greater trochanter (flush or 2-3 mm recessed)
- Check AP and lateral views for nail position and maintenance of fracture reduction
Step 6 - Proximal Locking (Cephalic Screw/Blade Insertion)
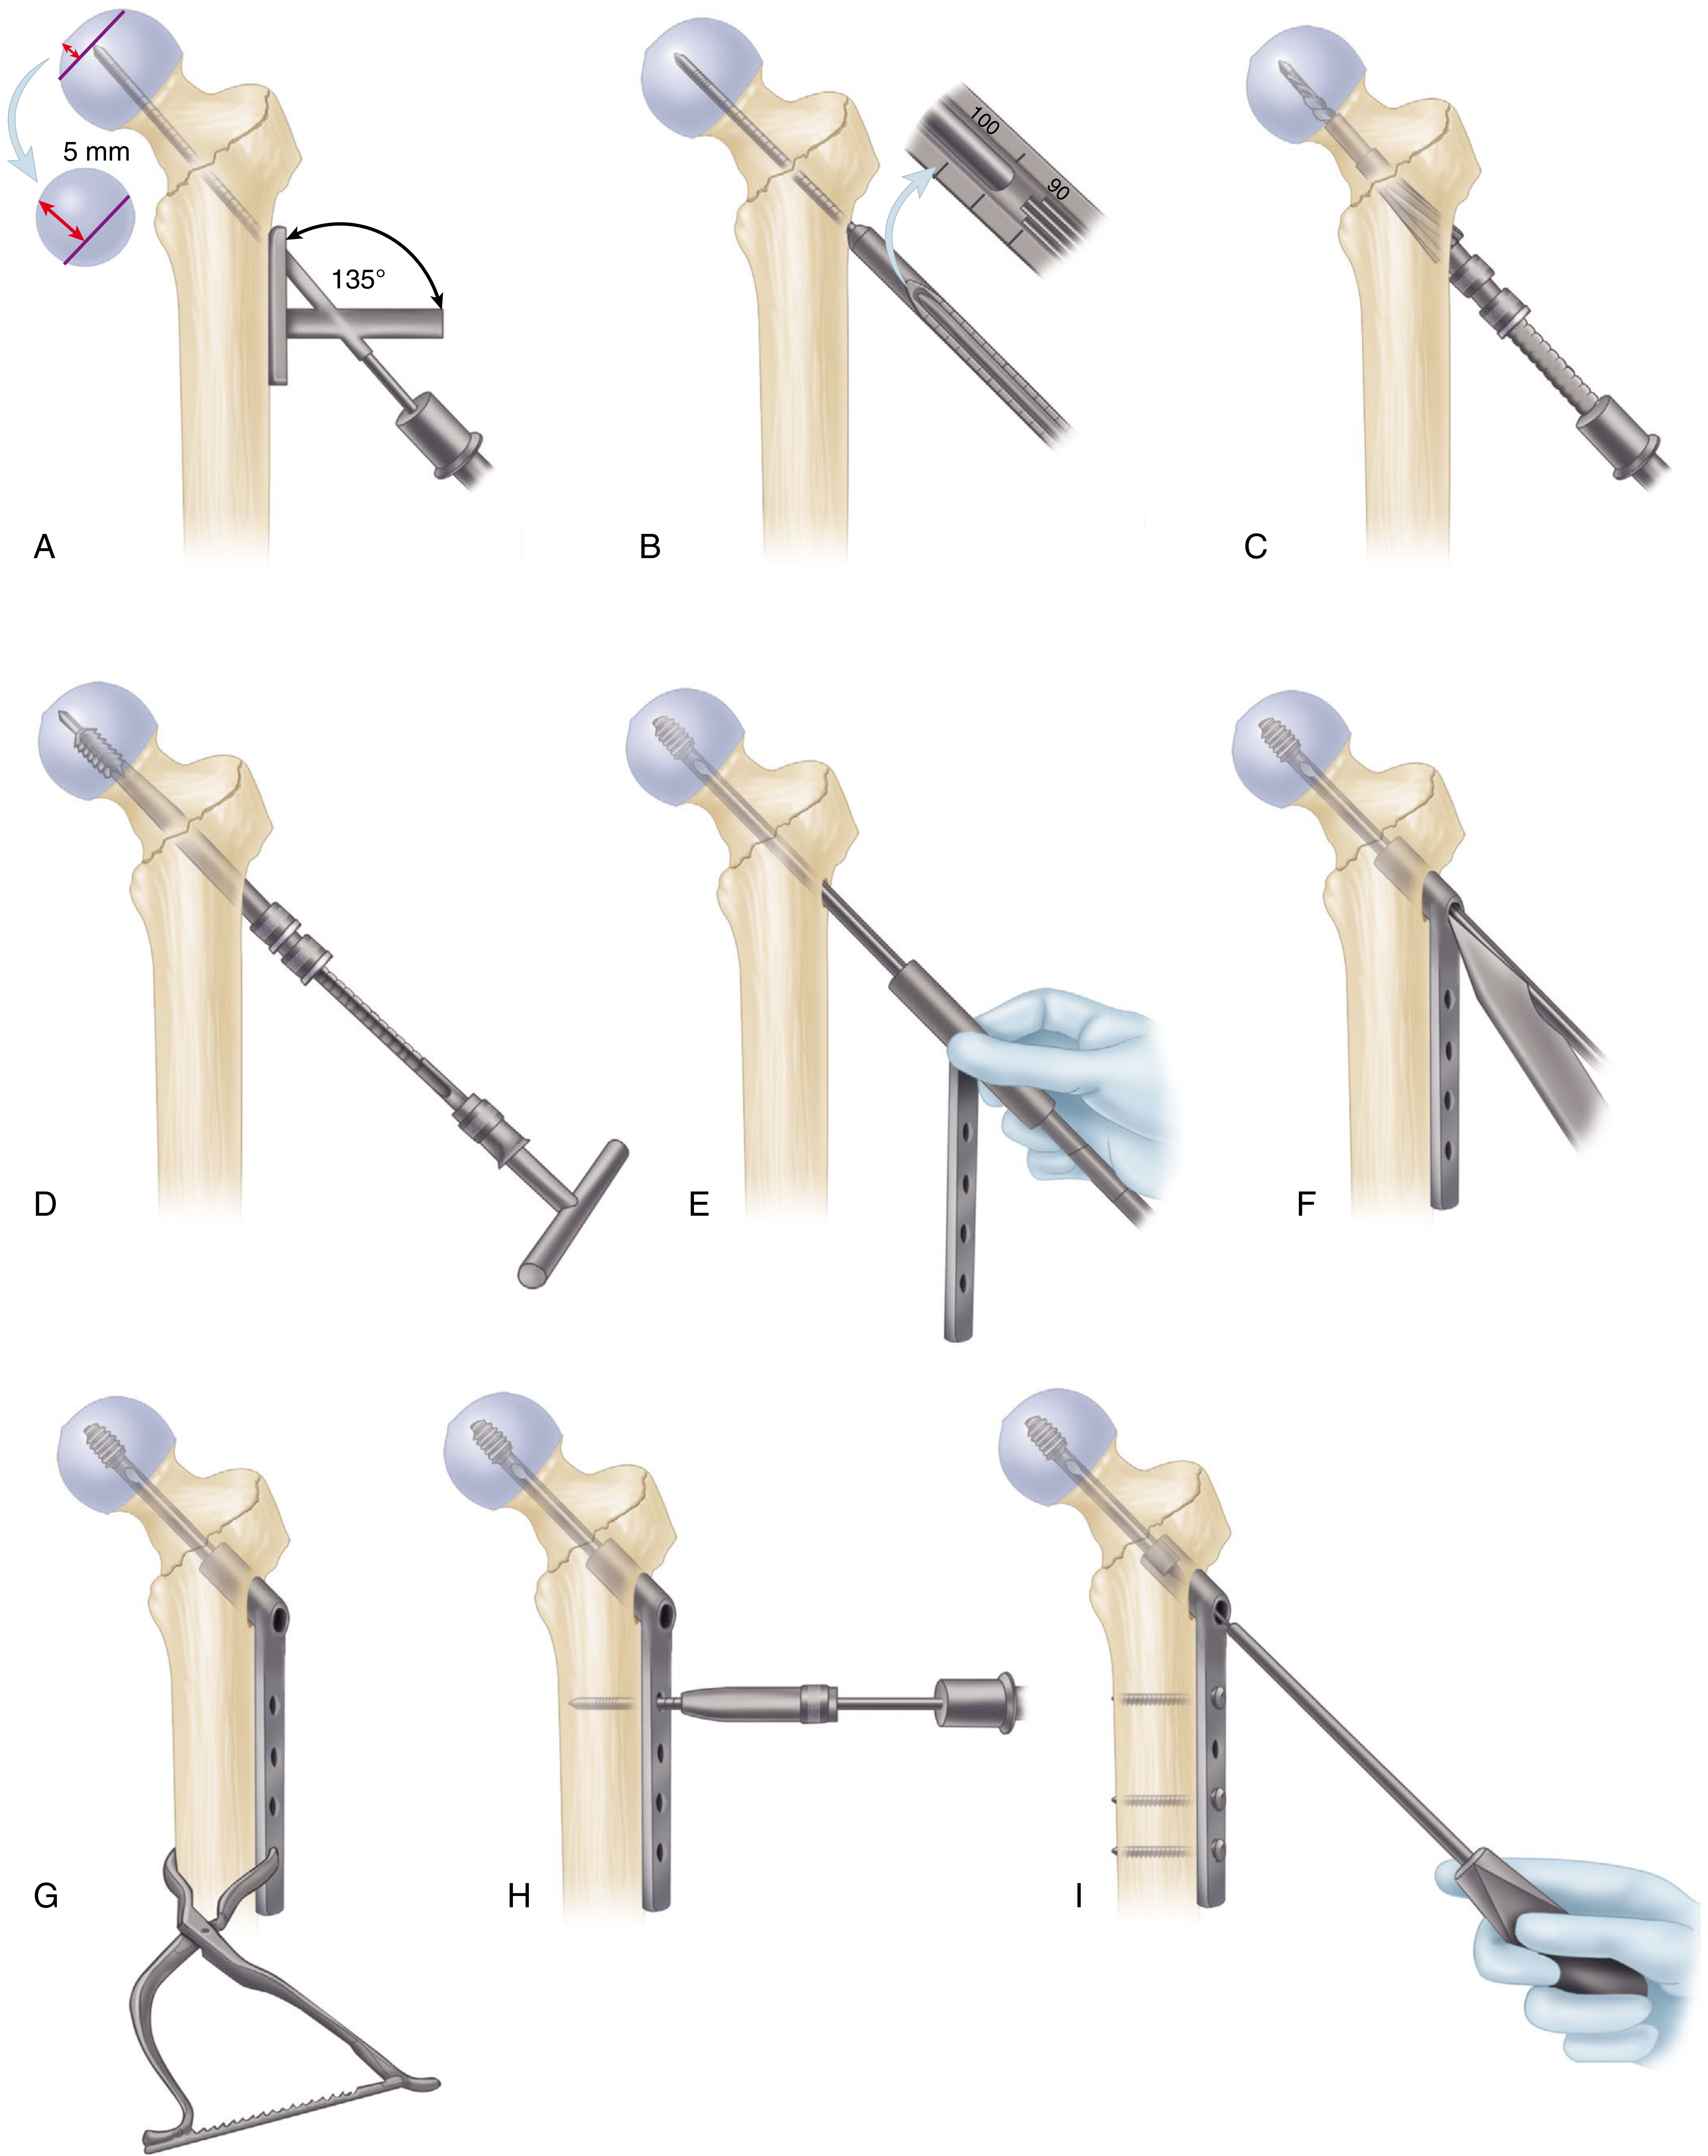
Using the proximal targeting jig attached to the nail:
- Insert guidewire through the jig hole into the femoral head
- Target position:
- AP view: central or slightly inferior in the femoral head (below the center of the femoral head, near the calcar)
- Lateral view: central in the femoral neck and head (not anterior or posterior)
- Tip-Apex Distance (TAD) < 25 mm - mandatory. TAD = sum of distances from screw tip to femoral head apex on AP + lateral views. Risk of cut-out increases exponentially above 25 mm.
From Campbell's (2026): "As the tip-apex distance increases above 25 mm, the risk of failure increases exponentially."
- Measure guidewire length; drill over wire; tap if required (dense cortical bone)
- Insert lag screw/blade to appropriate depth (5 mm from subchondral bone = tip 5 mm from joint line on both AP and lateral)
- Do NOT rotate the femoral head during screw insertion - prevent by: fingertip on anterior femoral neck, tap channel before insertion, or temporary antirotation wire
- Compress the fracture by removing traction before final tightening (intraoperative compression improves bone-to-bone contact)
- Set screw (end cap) insertion to control sliding versus static fixation depending on implant design
Proximal fixation variants:
- Single screw (Gamma, standard PFNA): simpler, adequate for most
- Dual screws / blade (PFNA-II, InterTAN): improved rotational stability, especially for A3 and basicervical patterns
- Helical blade (PFNA): compacts rather than cuts bone; better hold in osteoporotic bone
Step 7 - Distal Locking
- For short nails in stable A1 fractures: unlocked can give comparable results; however, all short nails should be locked per current guidelines
- Dynamic locking: allows longitudinal compression during weight bearing - preferred for transverse patterns (A3)
- Static locking: rigid length-stable construct - preferred for comminuted unstable fractures (most A2)
- For long nails: distal locking is required for all unstable fractures
- Use freehand technique for distal locking (radiolucent drill guide or freehand targeting under fluoroscopy)
Step 8 - Final Fluoroscopic Checks
Before wound closure, confirm on fluoroscopy:
- AP hip: nail depth, cephalic screw position (central-inferior on AP), TAD
- Lateral hip: cephalic screw central in femoral neck
- AP full femur (if long nail): nail tip not abutting anterior cortex distally
- Rotation: compare lesser trochanter profile to pre-op reference image
Step 9 - Wound Closure
- Irrigate; close fascia lata; subcutaneous; skin
- Drain: not routinely required
5. Intraoperative Pitfalls and Solutions
| Problem | Cause | Solution |
|---|---|---|
| Varus malalignment | Lateral entry point; proximal fragment in abduction | Correct entry; use joystick Schanz pin |
| Posterior sag on lateral | Gravity pulls distal fragment posteriorly | Anterior reduction force before locking traction boot; bump under knee |
| Nail won't advance | Undersized reaming; nail too large | Ream further; downsize nail |
| Cephalic screw in wrong position | Poor jig alignment; nail rotation | Rotate nail before inserting; re-check jig alignment |
| TAD > 25 mm | Screw too short, or placed eccentrically | Re-position guidewire; exchange screw |
| Femoral head rotation during screw insertion | Comminuted fracture with no soft tissue restraint | Antirotation wire; finger on anterior neck; tap before insert |
| Lateral wall fracture during proximal reaming | Thin lateral wall (< 21 mm); over-aggressive reaming | Protect lateral wall; use smaller reamer |
6. Postoperative Management
- Weight bearing: Full weight bearing as tolerated from POD 1 (if fixation is stable and patient allows) - early mobilization reduces medical complications
- DVT prophylaxis: LMWH commencing 12 hours post wound closure; continue for minimum 28 days
- Physiotherapy: Commence day 1; sit out of bed POD 1; walking frame/zimmer frame
- Radiographs: AP pelvis and lateral hip at 6 weeks, 3 months, 6 months, and 1 year
7. Complications and Management
| Complication | Incidence | Prevention / Management |
|---|---|---|
| Implant cut-out | 3-5% | TAD < 25 mm; central-inferior screw position; adequate reduction |
| Cut-in phenomenon (craniomedial migration) | ~2% with nails | Avoid jamming lag screw; ensure sliding mechanism is free; if joint penetration - arthroplasty |
| Superficial wound infection | 1-5% | Minimize surgical exposure; prophylactic antibiotics |
| Deep infection | < 1% | Same; wound care |
| Malunion (varus) | 5-10% | Correct entry point; adequate reduction before locking |
| Nonunion | 1-3% | Good reduction; implant positioning |
| Peri-implant fracture at nail tip | 1-2% | Use long nail if subtrochanteric fracture or thin cortex; taper-tip nails |
| Avascular necrosis of femoral head | ~1% | Avoid rotating femoral head during lag screw insertion |
| Implant breakage | 1-2% | Treat nonunion promptly; avoid nail bending errors |
Management of Cut-Out
- Minor cut-out with acceptable reduction: allow fracture to heal conservatively
- Severe cut-out with hardware failure: revision fixation if adequate residual femoral head bone stock; cemented hemiarthroplasty or THA if bone stock inadequate
- SHS with varus collapse/plate detachment: convert to cephalomedullary nail, longer plate, or arthroplasty
8. Special Situations
Reverse Obliquity (A3) Fractures
- SHS is contraindicated - the fracture geometry causes the distal fragment to migrate medially when force is applied, directly opposing the sliding mechanism
- Long cephalomedullary nail is the implant of choice
- Standard nail (Gamma) or InterTAN/TFNA preferred; long nail if subtrochanteric extension
Basicervical Femoral Neck Fractures
- Behaves more like an IT fracture than a neck fracture
- High failure rate with SHS (6/11 in one series with cut-out)
- Cephalomedullary nail preferred; add derotational screw
Young High-Energy Fractures
- Anatomical reduction is more important
- Fixation should be rigid; bone stock allows more aggressive fixation
- Consider long nail with static locking
Osteoporotic Bone
- Helical blade (PFNA) compacts bone rather than removing it - superior hold
- Cement augmentation of cephalic screw is an option in extreme osteoporosis (some systems allow)
- Avoid over-reaming; preserve endosteal bone
Subtrochanteric Extension
- Use long cephalomedullary nail
- Trajectory control is paramount: precise entry point, channel reaming to avoid eccentric reaming
- Lock with cephalomedullary screws; may use Gamma, TFNA, or InterTAN for better curvature match
9. Key Numbers to Remember
| Parameter | Value |
|---|---|
| Tip-Apex Distance (TAD) | < 25 mm (failure rate rises exponentially above this) |
| Lag screw tip from joint line | ~5 mm |
| Lateral wall thickness threshold | < 21 mm → prefer intramedullary nail |
| Neck-shaft angle of nail | 125° or 130° (match to patient anatomy) |
| Short nail length | ~200 mm (sufficient for fractures ≤ 3 cm below trochanteric region) |
| Blood loss (IT fracture) | 500-1,000 mL (plan transfusion threshold) |
| DVT prophylaxis duration | Minimum 28 days post-op |
| Cut-out rate (current implants) | 3-5% |
10. Implant Comparison Summary
| Parameter | Sliding Hip Screw | Short Cephalomedullary Nail | Long Cephalomedullary Nail |
|---|---|---|---|
| A1 fractures | Yes (acceptable) | Yes | Not needed |
| A2 fractures | Acceptable if lateral wall intact | Preferred | If sub-trochanteric extension |
| A3 fractures | Contraindicated | Inadequate | Mandatory |
| Lateral wall < 21 mm | Contraindicated | Yes | Yes |
| Femoral neck shortening | Greater | Less | Less |
| Functional recovery speed | Slower | Faster | Faster |
| Implant cost | Lower | Higher | Higher |
| Operative complexity | Familiar | Moderate | More demanding |
From Rockwood & Green (2025): "Most studies have reported improved functional outcomes with cephalomedullary nails. This is probably due to the reduced collapse and femoral medialization as the fracture heals in a more anatomical position."
References:
- Campbell's Operative Orthopaedics 15th Ed 2026, Chapter 60, pp. 3448-3476
- Rockwood and Green's Fractures in Adults 10th Ed 2025, Chapter 54, pp. 2700-2730
This is a shared conversation. Sign in to Orris to start your own chat.