
Expand the different types of biosafety cabinet with their principles, working mechanism and application.
biosafety cabinet types Class I II III laboratory
This composite educational graphic illustrates three primary types of dentofacial disharmony (DFD) and malocclusion: Class I Anterior Open Bite (AOB), Class II, and Class III. Each category is represented by a lateral cephalogram (radiograph), a corresponding cephalometric tracing with linear and angular measurements, and a triplet of intraoral clinical photographs (frontal, right, and left views). The Class I AOB section demonstrates a high mandibular plane angle, increased lower facial height, and vertical spacing between the maxillary and mandibular incisors. The Class II presentation shows excessive overjet, proclined maxillary incisors, and a deep bite. The Class III section highlights mandibular prognathism characterized by a negative overjet (underbite) and compensatory incisor inclinations. The cephalometric tracings include key diagnostic values such as SNA, SNB, and ANB angles, Wits appraisal, and Frankfort Horizontal relationships. This visual resource is designed for orthodontic and maxillofacial surgery training to aid in the differential diagnosis of skeletal and dental alignment disorders.
Summary : This figure presents a classification system for medical recommendations, detailing the definitions and suggested wording for each class based on the strength and consensus of supporting evidence. table: # Classes of Recommendations : • Class I: Evidence and/or general agreement that a given treatment or procedure is beneficial, useful, effective. • Class II: Conflicting evidence and/or a divergence of opinion about the usefulness/efficacy of the given treatment or procedure. – Class IIa: Weight of evidence/opinion is in favour of usefulness/efficacy. – Class IIb: Usefulness/efficacy is less well established by evidence/opinion. • Class III: Evidence or general agreement that the given treatment or procedure is not useful/effective, and in some cases may be harmful. # Definitions : • Class I: "Evidence and/or general agreement that a given treatment or procedure is beneficial, useful, effective." • Class II: "Conflicting evidence and/or a divergence of opinion about the usefulness/efficacy of the given treatment or procedure." – Class IIa: "Weight of evidence/opinion is in favour of usefulness/efficacy." – Class IIb: "Usefulness/efficacy is less well established by evidence/opinion." • Class III: "Evidence or general agreement that the given treatment or procedure is not useful/effective, and in some cases may be harmful." # Wording to Use : • Class I: "Is recommended or is indicated" (green background) • Class IIa: "Should be considered" (yellow background) • Class IIb: "May be considered" (orange background) • Class III: "Is not recommended" (red background) # Design Encodings : • Colour coding: Green for Class I, yellow for Class IIa, orange for Class IIb, red for Class III. • Table format with three columns: Class, Definition, Wording to use. • Bold and coloured class names for emphasis. # Analysis : • The figure provides a clear, colour-coded hierarchy of recommendation strength, from strong positive (Class I) to strong negative (Class III). • Wording guidance aligns with the level of evidence and consensus, supporting consistent clinical communication. • The use of colour and structured layout enhances quick reference and usability for clinical decision-making.
Summary : This figure presents the "Classes of recommendations" used in clinical guidelines, categorizing treatments or procedures based on the strength of evidence and consensus, and specifying the recommended wording for each class. table/flowchart hybrid: Classes of Recommendations : • Class I: Evidence and/or general agreement that a treatment or procedure is beneficial, useful, effective. • Class II: Conflicting evidence and/or divergence of opinion about usefulness/efficacy. – Class IIa: Weight of evidence/opinion favors usefulness/efficacy. – Class IIb: Usefulness/efficacy is less well established by evidence/opinion. • Class III: Evidence or general agreement that a treatment or procedure is not useful/effective, and may be harmful. Definitions : • Class I: "Evidence and/or general agreement that a given treatment or procedure is beneficial, useful, effective." • Class II: "Conflicting evidence and/or a divergence of opinion about the usefulness/efficacy of the given treatment or procedure." – Class IIa: "Weight of evidence/opinion is in favour of usefulness/efficacy." – Class IIb: "Usefulness/efficacy is less well established by evidence/opinion." • Class III: "Evidence or general agreement that the given treatment or procedure is not useful/effective, and in some cases may be harmful." Wording to Use : • Class I: "Is recommended or is indicated" (green background) • Class IIa: "Should be considered" (yellow background) • Class IIb: "May be considered" (orange background) • Class III: "Is not recommended" (red background) Design Encodings : • Each class is color-coded: Class I (green), Class IIa (yellow), Class IIb (orange), Class III (red). • Table layout with three main columns: Class, Definition, Wording to use. • Hierarchical indentation for Class IIa and IIb under Class II. Analysis : • The figure provides a clear, color-coded framework for interpreting the strength of clinical recommendations, distinguishing between strong recommendations (Class I), varying degrees of uncertainty (Class IIa and IIb), and recommendations against use (Class III). The wording guidance standardizes how recommendations should be communicated in clinical documents.
Summary : This figure presents the classification system for medical recommendations, detailing the definitions and suggested wording for each class, as per the 2023 ESC guidelines. table: # Classes of Recommendations : • Class I: Evidence and/or general agreement that a given treatment or procedure is beneficial, useful, effective. • Class II: Conflicting evidence and/or a divergence of opinion about the usefulness/efficacy of the given treatment or procedure. • Class IIa: Weight of evidence/opinion is in favour of usefulness/efficacy. • Class IIb: Usefulness/efficacy is less well established by evidence/opinion. • Class III: Evidence or general agreement that the given treatment or procedure is not useful/effective, and in some cases may be harmful. # Definitions : • Class I: Treatment/procedure is beneficial, useful, effective. • Class II: Uncertainty or disagreement about usefulness/efficacy. • IIa: Evidence/opinion favours usefulness/efficacy. • IIb: Usefulness/efficacy less well established. • Class III: Treatment/procedure is not useful/effective, may be harmful. # Wording to Use : • Class I: "Is recommended" or "is indicated" (green background). • Class IIa: "Should be considered" (yellow background). • Class IIb: "May be considered" (orange background). • Class III: "Is not recommended" (red background). # Design Encodings : • Each class is colour-coded: Class I (green), Class IIa (yellow), Class IIb (orange), Class III (red). • Table layout with three columns: Class, Definition, Wording to use. • Class names in red font for emphasis. # Analysis : • The figure provides a clear, colour-coded framework for interpreting the strength and consensus behind medical recommendations. • Class I is the strongest recommendation, Class III is a strong negative recommendation, and Class II is subdivided to reflect varying degrees of uncertainty or support. • The wording guidance ensures consistent communication in clinical guidelines.
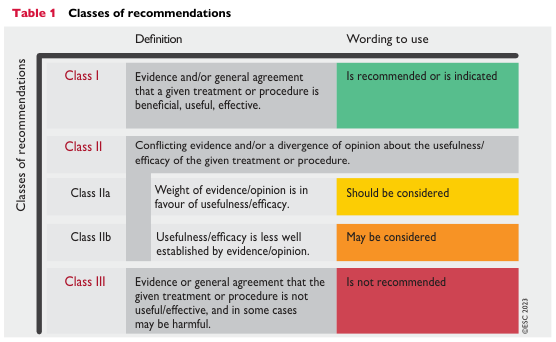
Summary : This figure presents the classification system for medical recommendations, detailing the definitions and suggested wording for each class, as per ESC 2023 guidelines. table: Classes of Recommendations : • Class I: Evidence and/or general agreement that a treatment or procedure is beneficial, useful, effective. • Class II: Conflicting evidence and/or divergence of opinion about usefulness/efficacy. – Class IIa: Weight of evidence/opinion is in favour of usefulness/efficacy. – Class IIb: Usefulness/efficacy is less well established by evidence/opinion. • Class III: Evidence or general agreement that the treatment or procedure is not useful/effective, and may be harmful. Definitions : • Class I: "Evidence and/or general agreement that a given treatment or procedure is beneficial, useful, effective." • Class II: "Conflicting evidence and/or a divergence of opinion about the usefulness/efficacy of the given treatment or procedure." – Class IIa: "Weight of evidence/opinion is in favour of usefulness/efficacy." – Class IIb: "Usefulness/efficacy is less well established by evidence/opinion." • Class III: "Evidence or general agreement that the given treatment or procedure is not useful/effective, and in some cases may be harmful." Wording to Use : • Class I: "Is recommended or is indicated" (green background). • Class IIa: "Should be considered" (yellow background). • Class IIb: "May be considered" (orange background). • Class III: "Is not recommended" (red background). Design Encodings : • Colour coding: Green for Class I, yellow for Class IIa, orange for Class IIb, red for Class III. • Table layout with three main columns: Class, Definition, Wording to use. • ESC 2023 copyright noted on the right. Analysis : • The figure provides a clear, colour-coded framework for interpreting the strength and consensus behind medical recommendations. • Class I is the strongest recommendation, Class III is a strong negative recommendation, and Class II is subdivided to reflect varying degrees of uncertainty or consensus. • The wording and colour scheme facilitate rapid identification of recommendation strength for clinical decision-making.
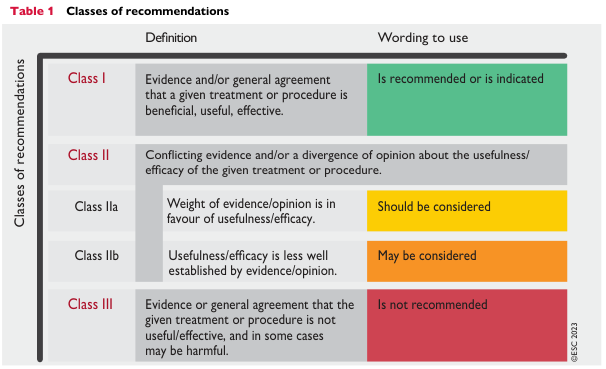
Summary : This figure presents the European Society of Cardiology (ESC) 2023 classification system for clinical recommendations, detailing the definitions and suggested wording for each class based on the strength and quality of evidence regarding a treatment or procedure's usefulness or harm. table: # Classes of Recommendations : • Class I: Evidence and/or general agreement that a treatment/procedure is beneficial, useful, effective. • Class II: Conflicting evidence and/or divergence of opinion about usefulness/efficacy. – Class IIa: Weight of evidence/opinion is in favour of usefulness/efficacy. – Class IIb: Usefulness/efficacy is less well established by evidence/opinion. • Class III: Evidence or general agreement that a treatment/procedure is not useful/effective, and may be harmful. # Definitions : • Class I: "Evidence and/or general agreement that a given treatment or procedure is beneficial, useful, effective." • Class II: "Conflicting evidence and/or a divergence of opinion about the usefulness/efficacy of the given treatment or procedure." – Class IIa: "Weight of evidence/opinion is in favour of usefulness/efficacy." – Class IIb: "Usefulness/efficacy is less well established by evidence/opinion." • Class III: "Evidence or general agreement that the given treatment or procedure is not useful/effective, and in some cases may be harmful." # Wording to Use : • Class I: "Is recommended or is indicated" (green background). • Class IIa: "Should be considered" (yellow background). • Class IIb: "May be considered" (orange background). • Class III: "Is not recommended" (red background). # Design Encodings : • Colour-coded backgrounds for each class: green (Class I), yellow (Class IIa), orange (Class IIb), red (Class III). • Class names in red font for emphasis. • Table divided into columns: Definition and Wording to use. • ESC 2023 copyright noted on the right edge. # Layout : • Table format with rows for each class and columns for definition and recommended wording. • Subdivision of Class II into IIa and IIb for more granular recommendations. # Analysis : • The figure provides a clear, colour-coded framework for interpreting the strength of clinical recommendations, ranging from strong endorsement (Class I) to explicit discouragement (Class III). • The wording guidance standardises how recommendations should be communicated in clinical guidelines, improving clarity and consistency. • The subdivision of Class II into IIa and IIb allows for nuanced recommendations when evidence is less definitive.
biosafety cabinet types Class I II III principles working mechanism applications CDC WHO
https://policies.unc.edu/TDClient/2833/Portal/KB/Article/132…
Biosafety Cabinets (BSCs): Types, Principles, Working Mechanisms, and Applications
Core Principle Common to All BSCs
- Inward airflow (negative pressure at the work opening) - Air is drawn inward from the room, preventing aerosols from escaping to the operator.
- HEPA filtration - HEPA filters capture ≥99.97% of particles ≥0.3 µm in diameter, including most bacteria, fungi, and viral particles carried on aerosol droplets.
Class I Biosafety Cabinet
Principle
Working Mechanism
- Room air is drawn inward through the front opening at a minimum inflow velocity of 75 feet per minute (fpm), creating a negative-pressure air curtain that prevents aerosols from escaping toward the operator.
- This inward air flows across the work surface, away from the operator, and is then directed through an exhaust HEPA filter before being discharged.
- Exhaust can be:
- Recirculated back to the room through the internal HEPA filter, or
- Ducted to the outside (required if volatile toxic chemicals or radionuclides are used).
- There is no supply HEPA filter - room air enters the cabinet unfiltered.
- Air pattern is similar in concept to a chemical fume hood, but with HEPA-filtered exhaust rather than direct venting.
Key Features
- One HEPA filter (exhaust only)
- 100% of cabinet air is exhausted (0% recirculated within)
- Inflow velocity: minimum 75 fpm
- Open front with sash
Applications
- Work with Biosafety Level (BSL) 1, 2, and 3 agents
- Handling of agents where product sterility is not required (e.g., work with pathogens that do not need to be protected from contamination)
- Small quantities of volatile toxic chemicals or radionuclides when hard-ducted to the outside exhaust
- Older research labs and some specialized containment settings
- Work with radioactive isotopes (when externally exhausted)
Class II Biosafety Cabinet
Core Principle
- Inward airflow at the front sash protects the worker.
- Downward HEPA-filtered laminar airflow (downflow) protects the sample/product from external contamination.
- HEPA-filtered exhaust protects the environment.
Working Mechanism (General)
- Room air is drawn inward through the front opening (inflow air).
- This air enters a front intake grille and is directed upward into a plenum.
- A supply HEPA filter provides HEPA-filtered downflow air that flows vertically downward in a laminar (non-turbulent) pattern across the work surface, creating an ISO Class 5 clean environment.
- Air is collected at rear and front grilles at the work surface and recirculated or exhausted.
- Exhaust air passes through an exhaust HEPA filter before being released to the room or ducted outside.
Class II, Type A1
| Feature | Detail |
|---|---|
| Inflow velocity | 75 fpm minimum |
| Air recirculated | ~70% |
| Air exhausted | ~30% |
| Exhaust | To room via HEPA filter, or canopy-connected to outside |
| Contaminated plenum pressure | Positive (older design) |
- The exhaust HEPA filter may discharge recirculated air back into the lab.
- Not suitable for volatile chemicals or radionuclides (positive-pressure contaminated plenums).
- Applications: general microbiology, cell culture, clinical microbiology at BSL 1-3.
Class II, Type A2 (Most Common Type)
| Feature | Detail |
|---|---|
| Inflow velocity | 100 fpm minimum |
| Air recirculated | ~70% |
| Air exhausted | ~30% |
| Exhaust | To room via HEPA filter (standard) or external via canopy connection |
| Contaminated plenum pressure | Negative (safety improvement over A1) |
- All contaminated ducts and plenums are maintained under negative pressure.
- Recirculated, HEPA-filtered downflow creates an ISO 5 work environment.
- Can be canopy-connected to handle small amounts of volatile/odorous compounds.
- Applications: the most common BSC used in modern labs - cell culture, tissue culture, microbiology, sterile pharmaceutical compounding, vaccine production, BSL 1-3 work. Referred to as "tissue culture hoods" or "chemo hoods" in pharmacy.
Class II, Type B1
| Feature | Detail |
|---|---|
| Inflow velocity | 100 fpm minimum |
| Air recirculated | ~30% (of supply air) |
| Air exhausted | ~70% |
| Exhaust | Mandatory hard-duct to outside (remote exhaust fan) |
| Downflow | Mostly uncontaminated inflow air |
- Most of the contaminated downflow air is exhausted through a dedicated duct after HEPA filtration.
- Safe for work with limited volatile chemicals and trace radionuclides if work is performed in the rear portion of the cabinet (behind the "smoke split").
- Requires continuous monitoring of exhaust flow; audible/visual alarms for ≥20% loss of exhaust volume.
- Applications: microbiology work involving small amounts of chemical hazards, BSL 1-3.
Class II, Type B2 (Total Exhaust)
| Feature | Detail |
|---|---|
| Inflow velocity | 100 fpm minimum |
| Air recirculated | 0% - no recirculation |
| Air exhausted | 100% |
| Exhaust | Mandatory hard-duct to outside |
| Supply air | 100% HEPA-filtered from outside/building supply |
- All air is exhausted to the outside - there is no internal recirculation.
- Both supply and exhaust air pass through HEPA filters.
- Provides the highest chemical protection of all Class II types.
- Applications: work involving volatile chemicals, carcinogens, or radionuclides alongside biological agents; pharmaceutical labs; BSL 1-3.
Class II, Type C1 (Newer Type)
- Hybrid design offering flexibility between A2 and B2 modes.
- Can operate in recirculating mode (like A2) or total exhaust mode (like B2).
- Suitable for labs that occasionally need chemical exhaust capability without dedicated B2 infrastructure.
Class III Biosafety Cabinet (Glove Box)
Principle
Working Mechanism
- The cabinet is a gas-tight, welded-metal construction maintained at negative pressure relative to the ambient room (typically -0.5 inches water gauge or more), providing a fail-safe mechanism if physical containment is compromised.
- The operator accesses the work area exclusively through arm-length rubber gloves attached to sealed glove ports on the front panel - there is no open front.
- Supply air enters through HEPA filters (providing clean, filtered air to the cabinet interior for product protection and preventing cross-contamination).
- Exhaust air is treated by either:
- Double HEPA filtration, or
- Single HEPA filtration followed by incineration (thermal destruction) before being discharged to the outside.
- Materials enter/exit through:
- A transfer chamber (pass-through autoclave) with interlocked doors - one door cannot open while the other is open, and materials can be autoclaved before removal.
- A dunk tank filled with a disinfecting solution (liquid disinfectant trap).
- When additional work space is needed, multiple Class III cabinets can be interconnected to form a "glove box line" or "isolator suite."
Key Features
- No open front - completely enclosed
- Glove ports as the sole access mechanism
- Gas-tight construction
- Double HEPA or HEPA + incineration exhaust
- Maintained under continuous negative pressure
- Interlocked transfer chambers for safe material transfer
Applications
- Work with BSL 1, 2, 3, and 4 agents - the only BSC suitable for BSL-4 pathogens (e.g., Ebola, Marburg, Lassa fever virus)
- Highly lethal microbiological agents for which no vaccines or treatments exist
- High-concentration carcinogens and highly toxic chemicals
- Agents classified as Select Agents (e.g., variola virus, Francisella tularensis at high concentrations)
- Maximum containment research laboratories
- Pharmaceutical isolator applications
Summary Comparison Table
| Feature | Class I | Class II A1 | Class II A2 | Class II B1 | Class II B2 | Class III |
|---|---|---|---|---|---|---|
| Personnel protection | Yes | Yes | Yes | Yes | Yes | Yes |
| Product protection | No | Yes | Yes | Yes | Yes | Yes |
| Environmental protection | Yes | Yes | Yes | Yes | Yes | Yes |
| HEPA filters | 1 (exhaust) | 2 (supply + exhaust) | 2 (supply + exhaust) | 2 (supply + exhaust) | 2 (supply + exhaust) | 2+ (supply + exhaust/incineration) |
| % Air recirculated | 0% | ~70% | ~70% | ~30% | 0% | 0% |
| % Air exhausted | 100% | ~30% | ~30% | ~70% | 100% | 100% |
| External exhaust required | Optional | No (canopy optional) | No (canopy optional) | Yes (hard duct) | Yes (hard duct) | Yes (hard duct) |
| Open front | Yes | Yes | Yes | Yes | Yes | No (glove box) |
| BSL suitability | 1-3 | 1-3 | 1-3 | 1-3 | 1-3 | 1-4 |
| Chemical use | Limited | Not recommended | Trace (with canopy) | Limited (rear area) | Yes | Yes |
What is NOT a Biosafety Cabinet
Key Regulatory Standards
- NSF/ANSI 49 (USA): primary performance standard for Class II BSCs
- WHO Laboratory Biosafety Manual (4th ed., 2020): international guidance
- CDC/NIH Biosafety in Microbiological and Biomedical Laboratories (BMBL): U.S. standard of practice
Describe microscope and types of microscope. U8 marks answer.
types of microscope light electron dark field phase contrast fluorescence
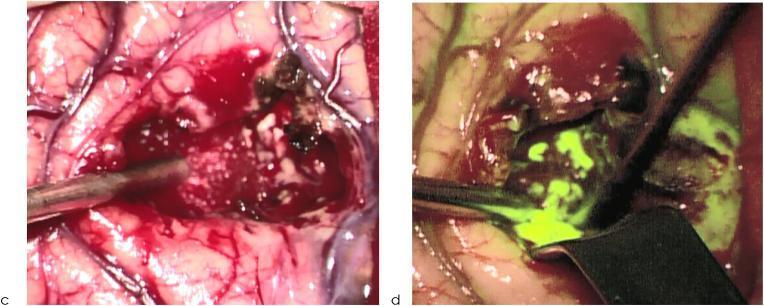
This comparative clinical photograph demonstrates the intraoperative visualization of a high-grade glioma (HGG) during neurosurgical resection using two different lighting modalities. Image (c) shows the surgical field under conventional white light, where the brain parenchyma, vascular structures, and the tumor bed are visible with typical anatomical colors; the tumor appears as heterogeneous dark and white tissue within a bloody surgical field. Image (d) displays the same surgical site under filtered light, utilizing fluorescence-guided surgery (FGS) techniques (likely 5-ALA induced protoporphyrin IX fluorescence). In this view, the malignant tumor tissue exhibits a vivid bright green fluorescence, significantly enhancing the contrast against the surrounding non-fluorescent normal brain tissue. Surgical instruments, including a metallic aspirator or probe, are seen positioned within the tumor cavity in both frames, indicating an active resection phase. This comparison illustrates how filtered light improves the identification of tumor margins and residual neoplastic tissue, facilitating a more complete extent of resection (EOR) compared to white light alone.
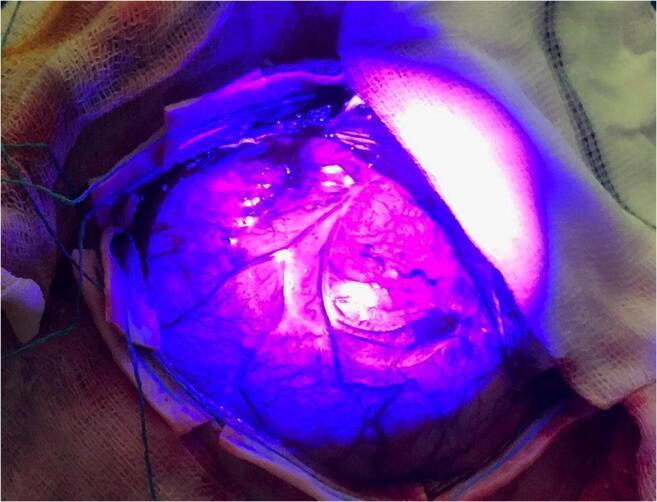
This clinical intraoperative photograph demonstrates the application of 5-aminolevulinic acid (5-ALA) fluorescence-guided surgery during the resection of a superficial glioblastoma. The image shows an exposed cerebral cortical surface viewed through a specialized operating microscope filter. A distinct region of bright pink fluorescence is visible, indicating the presence of malignant glioma cells where 5-ALA has been metabolized into fluorescent porphyrins. In contrast, the surrounding healthy brain parenchyma appears dark blue, providing high-contrast visual differentiation between neoplastic and normal tissue. Within the surgical field, surface vascular structures are visible as dark, branching lines traversing both the fluorescent and non-fluorescent regions. Surgical gauze and drapes are visible at the periphery of the craniotomy site. This imaging modality is utilized by neurosurgeons to achieve maximal cytoreduction and improve the extent of resection (EOR) by highlighting infiltrative tumor margins that may appear normal under standard white-light illumination.
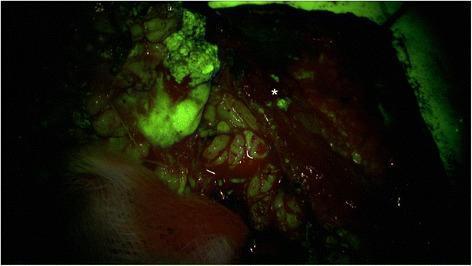
This clinical photograph displays an intraoperative surgical field of the parotid gland region during a tumor resection, captured using fluorescence-guided surgery with a 560 nm yellow filter. The image demonstrates high-contrast visualization of neoplastic tissue against dark background anatomical structures. A large, lobulated mass in the upper left quadrant exhibits intense green fluorescence, indicating active accumulation of a fluorescent tracer within the tumor. In the center-right of the surgical bed, a small, discrete punctate area of fluorescence is marked with an asterisk (*), identifying a small nest of residual tumor or a satellite nodule that may not be easily visible under standard white light. The surrounding healthy tissues, including the facial nerve branches and background stroma, appear in dark reddish-brown tones with minimal to no fluorescence. This imaging technique is utilized in otorhinolaryngology to improve oncological margins and facilitate the identification of microscopic residual disease in complex anatomical regions like the parotid gland.
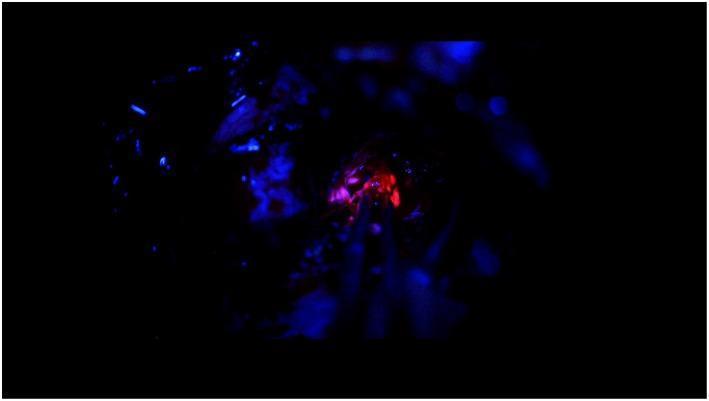
An intraoperative clinical photograph showing a neurosurgical field under blue light (400 nm) during a 5-aminolevulinic acid (5-ALA)-guided resection of a glioblastoma. The image demonstrates protoporphyrin IX (PpIX) fluorescence, a key diagnostic and surgical aid for identifying malignant tissue. In the center of the surgical cavity, the tumor bulk exhibits intense, well-defined red fluorescence. Surrounding this core, the tumor margins display a more diffuse, vague pink fluorescence, indicating transitional areas of tumor infiltration. The background healthy brain tissue appears predominantly dark or blue due to the absence of significant PpIX accumulation, providing a high-contrast visual guide for maximal safe resection. This image illustrates the clinical application of fluorescence-guided surgery in neuro-oncology for the intraoperative differentiation between high-grade glioma tissue and normal brain parenchyma.
Microscope and Types of Microscope
Definition
- Initial detection of microorganisms in clinical specimens
- Preliminary or definitive identification of microorganisms based on their morphology
Types of Microscope
1. Brightfield (Light) Microscopy
- A light source illuminates the specimen from below through a condenser.
- The objective lens (10×, 40×, or 100× oil immersion) magnifies the image first.
- The ocular lens (10-15×) further magnifies it.
- Oil immersion (100× objective + 10× ocular = 1000× total magnification) is used for bacteria and yeasts; oil reduces light dispersion and maximizes resolution.
- Best resolving power: ~0.2 µm (can visualize most bacteria but not viruses).
- Organisms must be stained (e.g., Gram stain, Ziehl-Neelsen stain) because the refractive indices of organisms and background are similar, making unstained organisms difficult to see.
- Routine laboratory examination of clinical specimens
- Viewing stained bacteria, fungi, and parasites
- Gram staining, acid-fast staining, Giemsa staining
2. Darkfield Microscopy
- The same objective and ocular lenses as brightfield microscopy are used.
- The darkfield condenser has a central stop that blocks the central cone of light; only peripheral (oblique) rays strike the specimen.
- Light scattered by the specimen enters the objective - structures glow brightly while the background remains dark.
- Resolving power is dramatically improved: ~0.02 µm (10× better than brightfield).
- Detection of Treponema pallidum (syphilis) - the organism is too thin (0.1-0.2 µm wide) to be seen by brightfield microscopy
- Detection of Leptospira spp. (leptospirosis)
- Examination of very thin or delicate organisms that cannot be stained easily
3. Phase-Contrast Microscopy
- A special annular ring condenser produces a hollow cone of light.
- A corresponding phase ring in the objective lens advances or retards the direct beam relative to scattered light.
- Out-of-phase light appears darker; in-phase light appears brighter.
- This creates contrast between structures of different densities without staining.
- Produces a 3D image of the organism with visible internal structural detail.
- Examining internal details of microorganisms and cells without fixation or staining
- Studying living, unstained cells (bacteria, protozoa, eukaryotic cells)
- Particularly useful in cell biology and parasitology for live specimen examination
4. Fluorescent Microscopy
- Uses a high-pressure mercury, halogen, or xenon vapor lamp that emits short-wavelength light.
- A series of filters block heat, eliminate infrared light, and select the appropriate excitation wavelength.
- Fluorochrome-labeled organisms absorb this excitation light and emit visible light of a longer wavelength.
- The emitted light is magnified through standard objective and ocular lenses.
- Organisms appear brightly illuminated against a dark background, with colors depending on the fluorochrome used.
- Because contrast is high, specimens can be screened rapidly at low magnification and then examined under higher magnification once fluorescence is detected.
- Direct immunofluorescence (DIF): Antibody directly conjugated to fluorochrome
- Indirect immunofluorescence (IIF): Primary unlabeled antibody + secondary fluorochrome-conjugated antibody
- Autofluorescence: Some organisms (e.g., Pneumocystis jirovecii) show natural fluorescence
- Detection of Mycobacterium tuberculosis using auramine-rhodamine stain (faster screening than Ziehl-Neelsen)
- Detection of Pneumocystis jirovecii in BAL specimens
- Direct fluorescent antibody (DFA) tests for Chlamydia trachomatis, Legionella pneumophila, Bordetella pertussis, herpes simplex virus
- FITC-labeled antibody tests for rapid specific identification of organisms
- Flow cytometry and confocal microscopy in research
5. Electron Microscopy (EM)
- Electrons are produced by a tungsten filament (electron gun).
- Magnetic coils replace glass lenses to focus and direct the electron beam.
- Specimens are stained or coated with metal ions (e.g., uranyl acetate, lead citrate, osmium tetroxide) to create contrast.
- Magnification: up to 100,000× or more; resolving power: ~0.001 µm (1 nm)
| Feature | Transmission EM (TEM) | Scanning EM (SEM) |
|---|---|---|
| Principle | Electrons pass through thin sections of specimen | Electrons bounce off the specimen surface |
| Image type | 2D internal cross-sectional view | 3D surface topography image |
| Specimen prep | Ultra-thin sections (<100 nm) required | Specimen coated with gold/metal |
| Use | Internal ultrastructure (organelles, virus morphology) | Surface structure (bacterial pili, spore coats, cell surfaces) |
- Visualizing individual viral particles (e.g., rotavirus, herpesviruses, poxviruses)
- Diagnosing rare viral infections when culture and serology are unavailable
- Research tool for ultrastructural studies of cells, organelles, and pathogens
- Today, largely replaced by highly sensitive nucleic acid amplification tests (NAATs) for routine diagnosis; used primarily as a research tool
Summary Table
| Microscope Type | Light Source | Resolving Power | Background | Staining Needed | Key Use |
|---|---|---|---|---|---|
| Brightfield | Visible light | 0.2 µm | Bright | Yes | Routine stained smears |
| Darkfield | Oblique light only | 0.02 µm | Dark | No | Treponema, Leptospira |
| Phase-contrast | Visible light | ~0.2 µm | Gray/3D | No | Living unstained cells |
| Fluorescent | UV/ultrablue light | ~0.2 µm | Dark (colored glow) | Fluorochrome | Specific antibody-labeling tests |
| Electron (TEM/SEM) | Electron beam | 0.001 µm | Black | Metal staining | Viruses, ultrastructure |
Source: Medical Microbiology 9e, Chapter 4 - Microscopy and In Vitro Culture