
Explain ankle joint briefly
ankle joint anatomy diagram ligaments tibia fibula talus
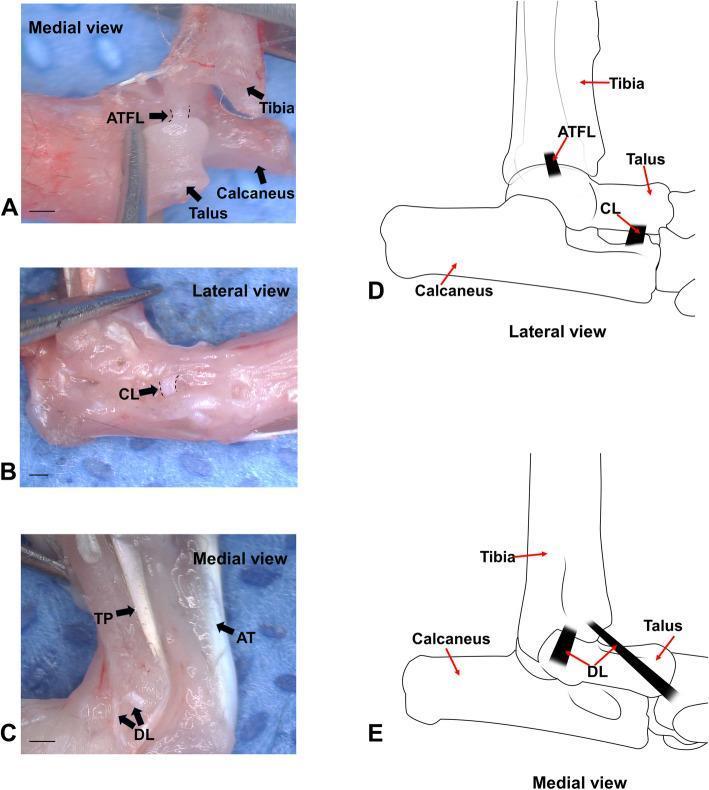
This composite educational image illustrates the anatomy of the ankle and subtalar joint ligaments using a mouse model, featuring three micro-dissection photographs (A-C) and two corresponding anatomical diagrams (D-E). Panel A presents a medial view identifying the anterior talofibular ligament (ATFL) situated between the fibula and talus. Panel B provides a lateral view highlighting the cervical ligament (CL) within the sinus tarsi region. Panel C shows the medial perspective of the ankle, specifically labeling the deltoid ligament (DL) complex along with the posterior tibial tendon (TP) and the Achilles tendon (AT). The anatomical diagrams (D and E) serve as schematic guides to the spatial orientation of these structures: Diagram D depicts the lateral anatomy including the ATFL and CL relative to the tibia, talus, and calcaneus, while Diagram E focuses on the medial deltoid ligament (DL) and its bony attachments. These visuals demonstrate ligamentous landmarks essential for orthopedic research, particularly in studies of joint stability and post-traumatic osteoarthritis. Scale bars represent 1 mm.
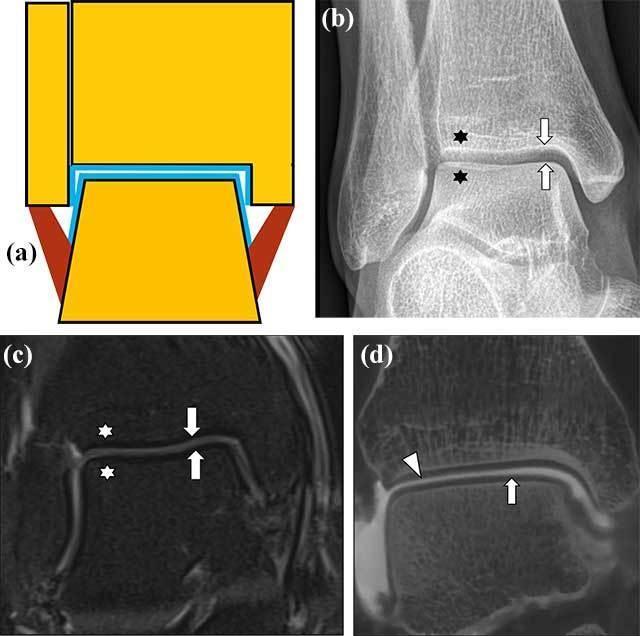
This composite educational image illustrates the normal anatomy and multimodal imaging appearances of the talocrural (ankle) joint. Panel (a) is a schematic diagram showing the articulation of the distal tibia and fibula with the talus, highlighting the articular cartilage (blue), cortical bone (black), bone marrow (yellow), and ligaments (brown). Panel (b) presents a conventional mortise view radiograph, demonstrating smooth articular surfaces (arrows) and normal trabecular bone patterns (stars). Panel (c) is a coronal MRI (Proton Density fat-suppressed) showing the cartilage as a thin layer of intermediate signal intensity (arrows) and homogenous marrow signal (stars). Panel (d) displays a Cone Beam CT (CBCT) arthrography reformatted image, where intra-articular contrast provides superior visualization of the cartilage lining on the talar dome (arrow) and distal tibia (arrowhead) compared to routine MRI. The set serves as a comparative reference for diagnosing osteochondral lesions, emphasizing how different modalities delineate the interface between subchondral bone and articular cartilage.
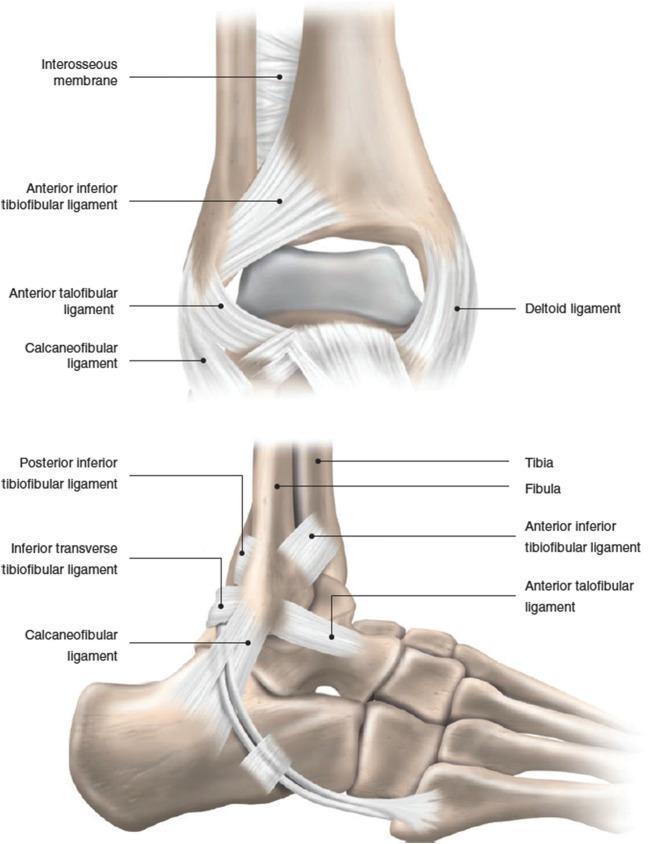
This medical illustration presents two views of the human ankle joint: an anterior-posterior (top) and a lateral (bottom) view, detailing the primary ligamentous structures and bony anatomy. Key anatomical structures include the distal tibia and fibula, talus, and calcaneus. The syndesmotic complex is represented by the interosseous membrane, anterior inferior tibiofibular ligament (AITFL), and posterior inferior tibiofibular ligament (PITFL). The lateral collateral ligament complex is clearly labeled, showcasing the orientation of the anterior talofibular ligament (ATFL) and the calcaneofibular ligament (CFL). The lateral view provides a detailed perspective on the diagonal course of the CFL from the fibular tip to the calcaneus, as well as the inferior transverse tibiofibular ligament. Medially, the deltoid ligament is visible in the anterior view. This educational diagram is designed for orthopedic and radiological study, illustrating the stabilization mechanisms of the ankle joint and the specific spatial relationships between ligaments and tarsal bones involved in inversion and eversion injuries.
Ankle Joint (Talocrural Joint)
Type and Bones
- Tibia - forms the roof and medial wall (medial malleolus) of the socket
- Fibula - forms the longer lateral wall (lateral malleolus) of the socket
- Talus - the dome-shaped bone that fits into the mortise socket
Movements
- Primary: Dorsiflexion and plantarflexion (hinge motion)
- Stability note: The articular surface of the talus is wider anteriorly than posteriorly. This means the joint is most stable during dorsiflexion (wider part of talus is engaged) and least stable during plantarflexion.
Ligaments
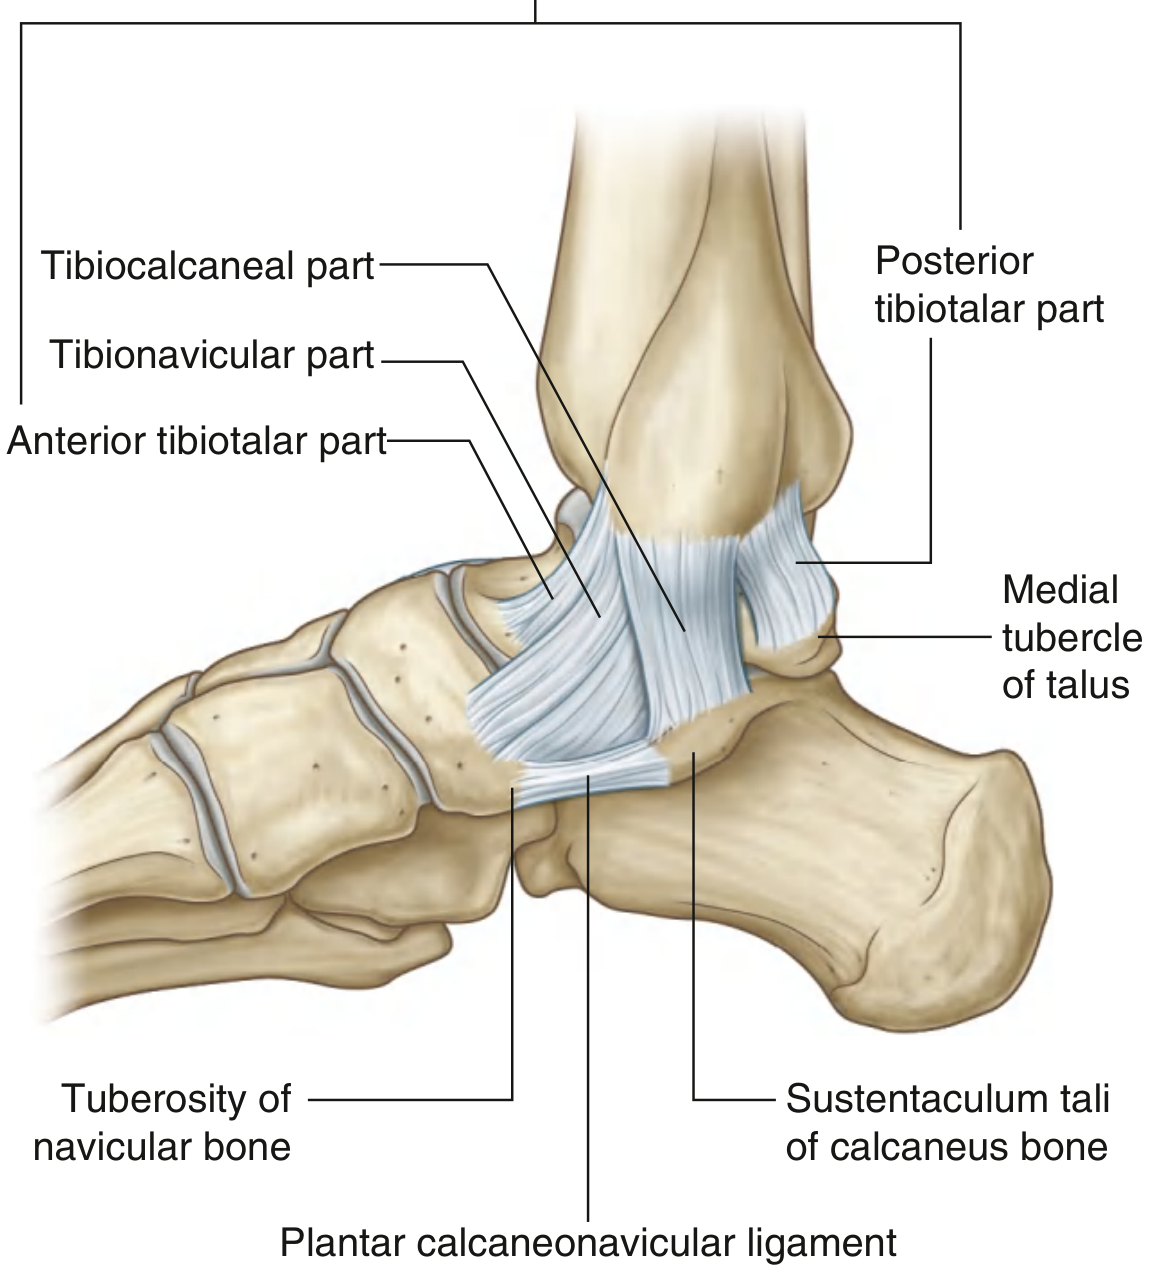
Medial Ligament (Deltoid Ligament)
| Part | Inferior Attachment |
|---|---|
| Tibionavicular | Tuberosity of navicular + spring ligament |
| Tibiocalcaneal | Sustentaculum tali of calcaneus |
| Posterior tibiotalar | Medial tubercle of talus |
| Anterior tibiotalar (deep) | Medial surface of talus |
Lateral Ligament
| Ligament | Course |
|---|---|
| ATFL (Anterior talofibular) | Anterior margin of lateral malleolus → adjacent talus |
| PTFL (Posterior talofibular) | Malleolar fossa → posterior process of talus (runs horizontally) |
| CFL (Calcaneofibular) | Malleolar fossa → lateral surface of calcaneus (runs posteroinferiorly) |
The ATFL is the most commonly injured ligament in ankle sprains (inversion injuries).
Fibro-osseous Ring Concept
- Upper part: tibiofibular joint + ankle joint
- Sides: medial and lateral malleolar ligaments
- Bottom: subtalar joint and ligaments
Synovial Cavity
All bones in ankle and arches anf simple biomechanics too
bones of the foot tarsal metatarsal anatomy diagram
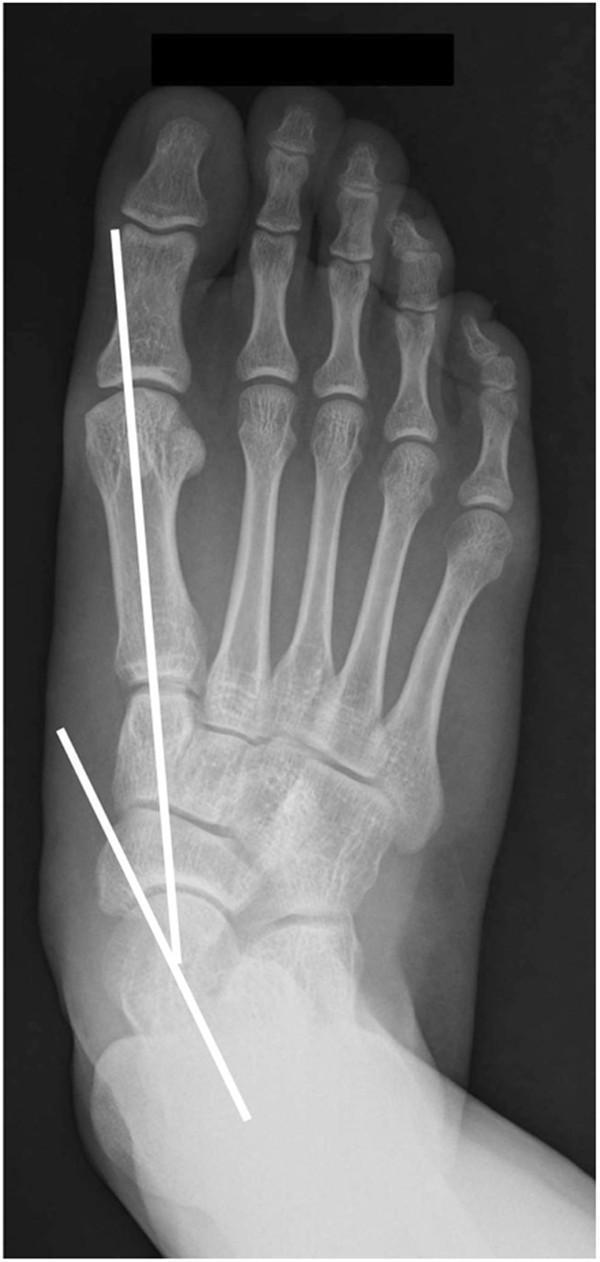
This diagnostic image is a weight-bearing anteroposterior (AP) radiograph of a human foot, illustrating key anatomical landmarks used in orthopedic assessment. The X-ray clearly visualizes the tarsal bones (talus, calcaneus, navicular, cuboid, and cuneiforms), the five metatarsals, and the phalanges. Superimposed on the anatomy are two white reference lines used to measure the Talo-first metatarsal angle. One line is drawn along the longitudinal axis of the talus, and the second line follows the longitudinal axis of the first metatarsal bone. The intersection of these lines demonstrates the angular relationship between the hindfoot and the forefoot. This measurement is clinically significant in evaluating foot deformities such as hallux valgus or pes planus. The radiograph demonstrates normal bone density and joint space preservation in the midfoot and forefoot regions, serving as an educational example of radiographic alignment and musculoskeletal geometry.
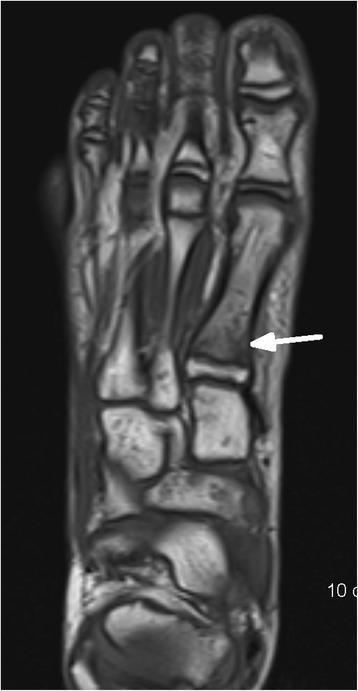
This diagnostic image is an axial T1-weighted turbo spin-echo (TSE) MRI scan of the human foot, focusing on the midfoot and forefoot anatomy. The scan clearly depicts the metatarsals, tarsal bones including the cuneiforms and navicular, and surrounding soft tissue structures. A prominent white arrow points to the base of the first metatarsal, where a distinct, low-signal intensity linear discontinuity is visible. This finding is characteristic of a cortical fracture at the base of the first metatarsal bone. The image illustrates a common pediatric or orthopedic trauma scenario, often associated with high-impact activities like trampoline use. The visualization of the fatty marrow signal on T1-weighted imaging provides high anatomical detail, allowing for the identification of structural disruptions in the cortical bone. This content is suitable for medical education regarding musculoskeletal radiology, particularly in the diagnosis of occult or acute foot fractures.
Bones of the Ankle and Foot
1. Hindfoot (Tarsals - posterior group)
| Bone | Key Features |
|---|---|
| Talus | Sits atop calcaneus; articulates with tibia/fibula (ankle joint) and navicular; no muscle attachments; ~60% surface is cartilage; blood supply enters via tarsal sinus |
| Calcaneus | Largest tarsal bone; forms the heel; has sustentaculum tali projecting medially (supports talus, groove for FHL tendon) |
2. Midfoot (Tarsals - anterior group)
| Bone | Key Features |
|---|---|
| Navicular | Boat-shaped; sits between talus and cuneiforms; tuberosity = attachment point for tibialis posterior |
| Cuboid | Lateral column; articulates with calcaneus and 4th/5th metatarsals |
| Medial cuneiform | Largest; articulates with 1st metatarsal |
| Intermediate cuneiform | Smallest |
| Lateral cuneiform | Articulates with 3rd metatarsal |
3. Forefoot
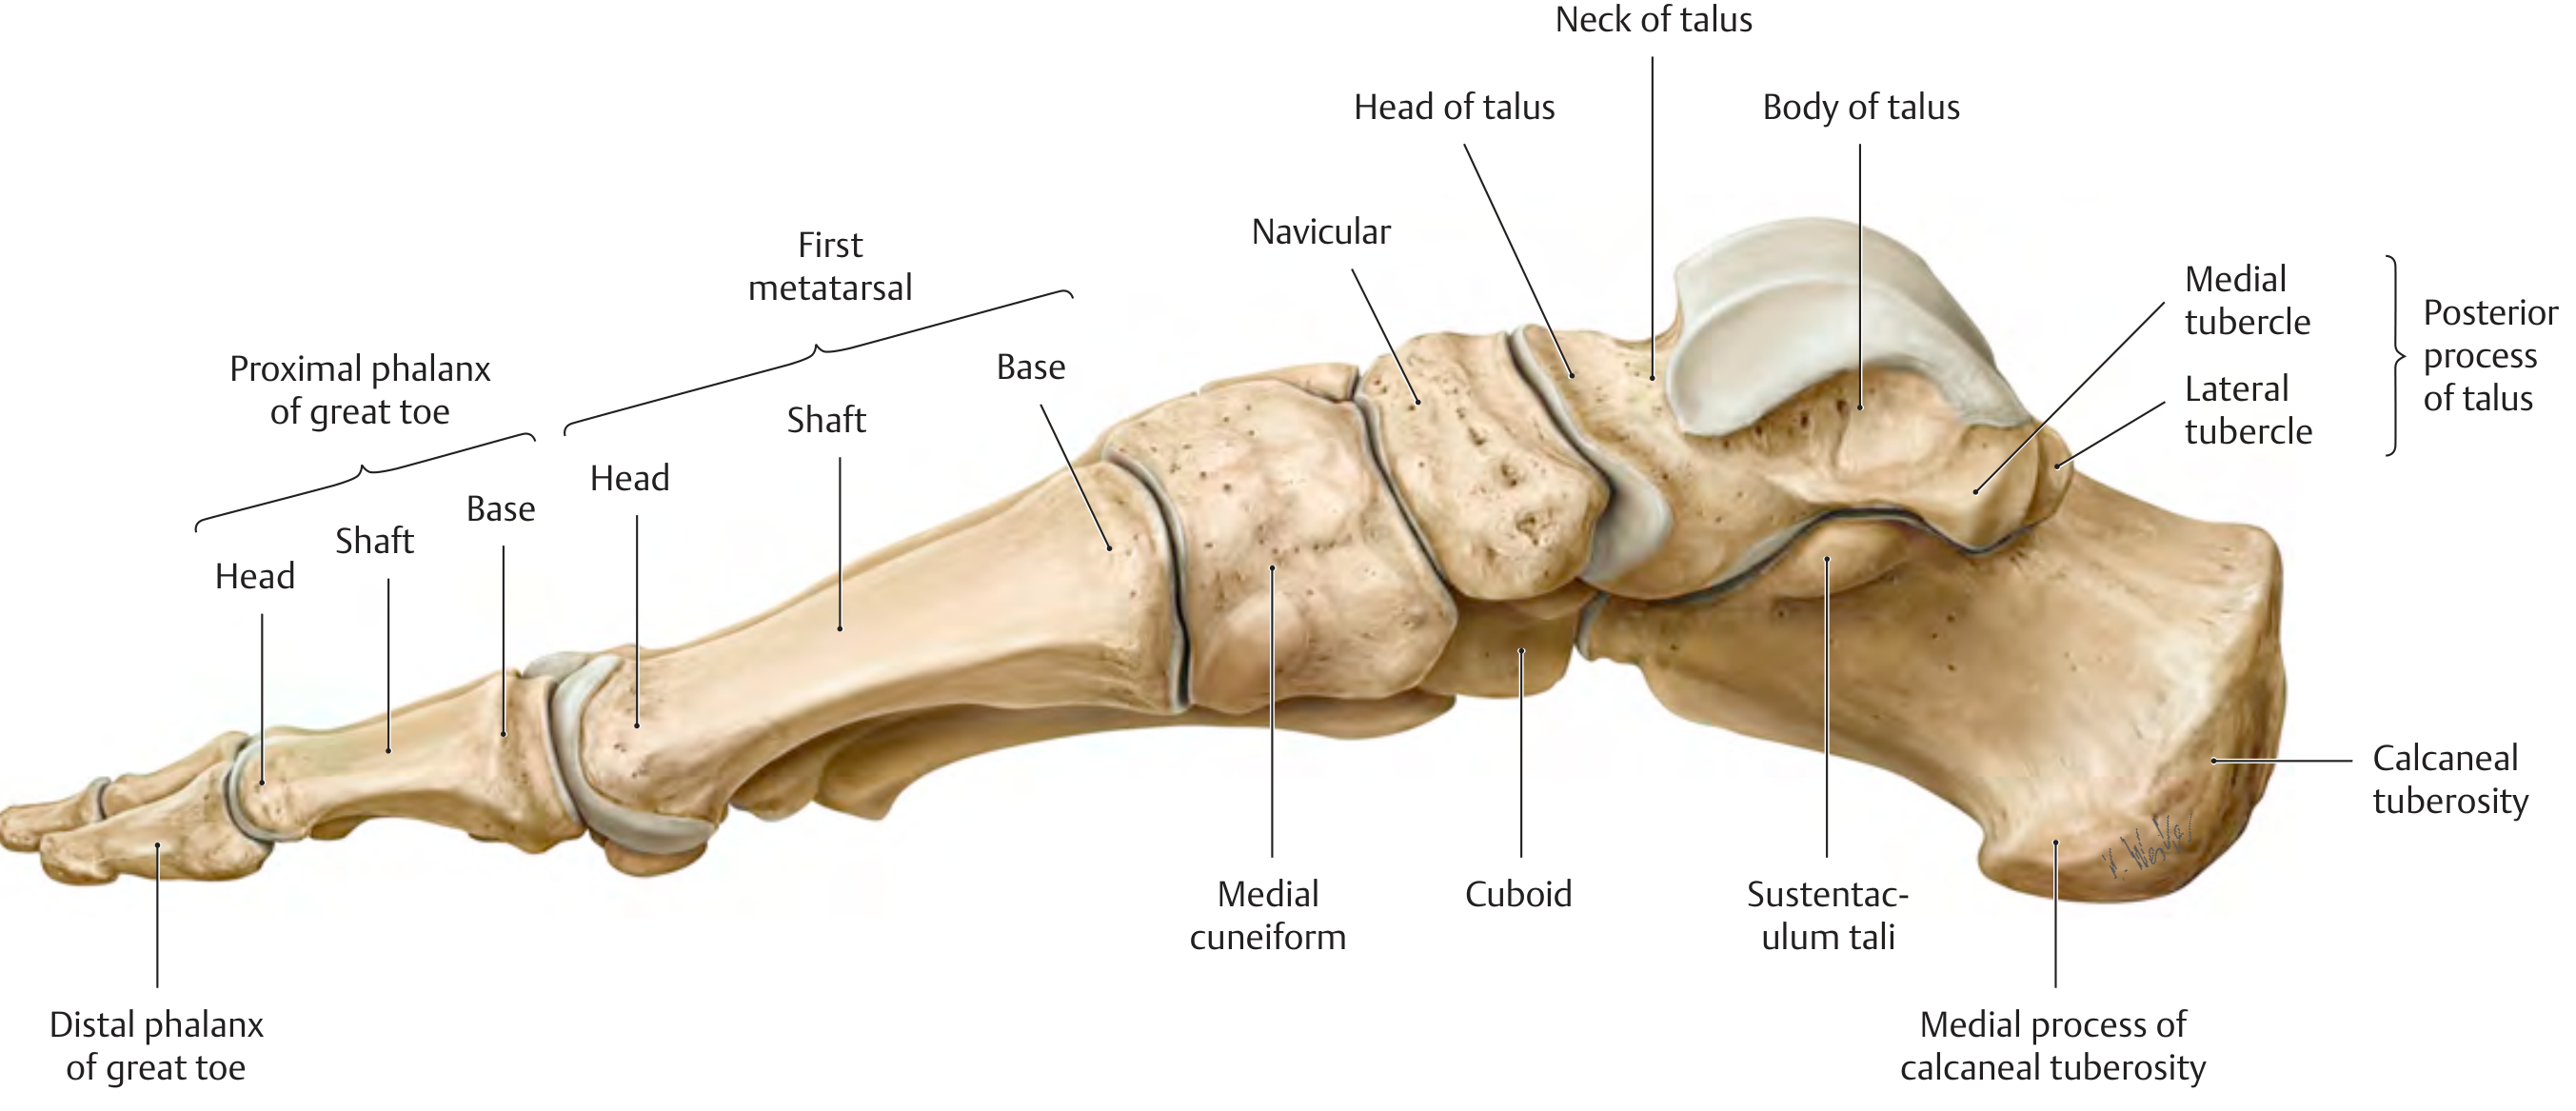
- 5 Metatarsals - each has base, shaft, and head
- 14 Phalanges - great toe has 2 (proximal + distal); toes 2-5 have 3 each (proximal, middle, distal)
Arches of the Foot
1. Medial Longitudinal Arch (Highest)
- Runs from the calcaneal tuberosity to the heads of metatarsals 1-3
- Keystone: head of talus
- Bones: calcaneus → talus → navicular → 3 cuneiforms → metatarsals 1-3
- This is the highest, most flexible arch - primarily for shock absorption
2. Lateral Longitudinal Arch (Lower, flatter)
- Runs from calcaneus to heads of metatarsals 4-5
- Keystone: cuboid
- Bones: calcaneus → cuboid → metatarsals 4-5
- More rigid; transmits weight bearing to ground
3. Transverse Arch
- Highest at the level of the head of the talus
- Disappears near the metatarsal heads (bones held by deep transverse metatarsal ligaments)
- Runs across the foot in a coronal plane
Arch Support System
- Plantar calcaneonavicular ligament (spring ligament) - main support for medial arch
- Plantar calcaneocuboid ligament (short plantar ligament) - lateral arch
- Long plantar ligament - spans calcaneus to metatarsals
- Plantar aponeurosis - thick band from calcaneal tuberosity to toes; supports longitudinal arch and protects deep sole structures
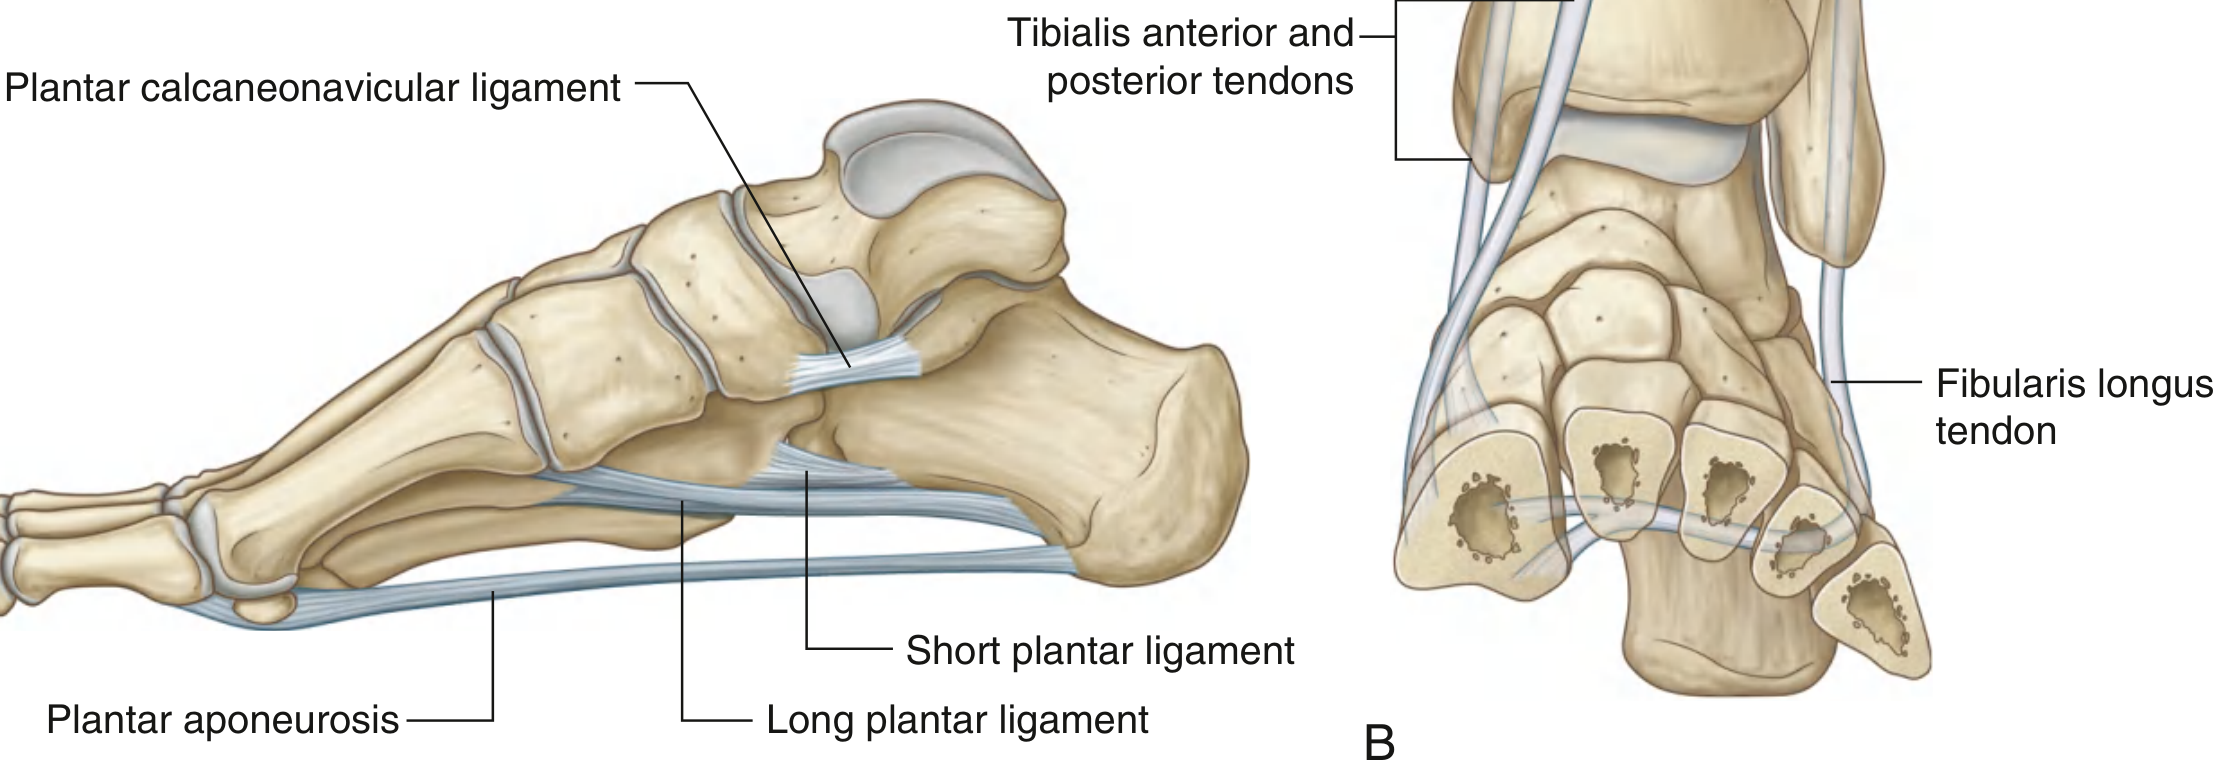
- Tibialis anterior - medial arch
- Tibialis posterior - medial arch (most important dynamic stabilizer)
- Fibularis (peroneus) longus - transverse arch (crosses sole obliquely)
Biomechanics (Simple)
Joint Roles
| Region | Primary Movement |
|---|---|
| Ankle (talocrural) | Dorsiflexion / plantarflexion |
| Subtalar joint | Inversion / eversion of hindfoot |
| Transverse tarsal (talonavicular + calcaneocuboid) | Pronation / supination |
| MTP joints | Extension during toe-off |
Gait Cycle
- Heel strike: Tibialis anterior contracts eccentrically to control foot lowering; hindfoot is locked/inverted
- Foot flat: Hindfoot unlocks and everts passively - this is critical for shock absorption and ground accommodation; gastrocnemius-soleus contracts eccentrically to control forward progression
- Toe-off: Gastrocnemius-soleus contracts concentrically for push-off
Windlass Mechanism
- The plantar fascia tightens (like a windlass/capstan)
- The medial longitudinal arch is accentuated
- The hindfoot supinates (posterior tibial tendon fires)
- The transverse tarsal joint locks - converting the foot from a flexible shock absorber to a rigid lever arm for push-off
If the posterior tibial tendon (PTT) is dysfunctional (e.g., adult acquired flatfoot), this rigid lever cannot be created and push-off power is severely reduced.
Stability Rule
- Ankle is most stable in dorsiflexion (wider part of talus is seated in the mortise)
- Ankle is most unstable in plantarflexion (common position for sprains)
- Dorsiflexion also causes external rotation and proximal translation of the fibula
Fibro-osseous Ring Concept
All bones in ankle simple biomechanism arches also
Bones of the Ankle & Foot (26 total)
Leg Bones (forming the mortise)
| Bone | Role |
|---|---|
| Tibia | Forms roof + medial wall (medial malleolus) of ankle socket |
| Fibula | Forms lateral wall (lateral malleolus) of ankle socket |
Tarsal Bones (7) — the "ankle bones"
| Bone | Simple Fact |
|---|---|
| Talus | Sits in the mortise; no muscle attachments; ~60% covered by cartilage; keystone of medial arch |
| Calcaneus | Heel bone; largest tarsal; has sustentaculum tali on medial side (shelf that supports the talus) |
| Bone | Simple Fact |
|---|---|
| Navicular | Boat-shaped; between talus and cuneiforms; tibialis posterior inserts here |
| Cuboid | Lateral column; between calcaneus and 4th/5th metatarsals; keystone of lateral arch |
| Medial cuneiform | Largest of the three; articulates with 1st metatarsal |
| Intermediate cuneiform | Smallest |
| Lateral cuneiform | Articulates with 3rd metatarsal |
Forefoot (19)
- 5 Metatarsals (each: base, shaft, head)
- 14 Phalanges: great toe = 2 (proximal + distal); toes 2-5 = 3 each
Arches of the Foot (3)
1. Medial Longitudinal Arch
- Highest and most important
- Bones: Calcaneus → Talus → Navicular → 3 Cuneiforms → Metatarsals 1-3
- Keystone: Head of talus
- Function: Shock absorption; most flexible arch
2. Lateral Longitudinal Arch
- Lower and more rigid
- Bones: Calcaneus → Cuboid → Metatarsals 4-5
- Keystone: Cuboid
- Function: Weight transmission to ground
3. Transverse Arch
- Runs across the foot (coronal plane)
- Highest at the talus head level; flattens near metatarsal heads
- Function: Spreads load across the width of the foot
What Holds the Arches Up?
| Structure | Arch Supported |
|---|---|
| Spring ligament (plantar calcaneonavicular) | Medial longitudinal |
| Short plantar ligament (plantar calcaneocuboid) | Lateral longitudinal |
| Long plantar ligament | Both longitudinal arches |
| Plantar aponeurosis | Longitudinal arches |
| Muscle | Arch Supported |
|---|---|
| Tibialis posterior | Medial longitudinal (main dynamic support) |
| Tibialis anterior | Medial longitudinal |
| Fibularis (peroneus) longus | Transverse arch |
Simple Biomechanics
Movements at Each Joint
| Joint | Movement |
|---|---|
| Ankle (talocrural) | Dorsiflexion (toes up) / Plantarflexion (toes down) |
| Subtalar | Inversion (sole faces in) / Eversion (sole faces out) |
| Transverse tarsal | Pronation / Supination of forefoot |
| MTP joints | Extension at toe-off |
Gait (Walking Cycle) - Simple Version
Heel Strike → Foot Flat → Toe-Off
62% Stance Phase 38% Swing Phase
| Phase | What Happens | Key Muscle |
|---|---|---|
| Heel strike | Hindfoot inverted/locked; foot lowers under control | Tibialis anterior (eccentric) |
| Foot flat | Hindfoot everts (unlocks) - absorbs shock, adapts to ground | Gastrocnemius-soleus (eccentric) |
| Toe-off | Push off the ground; arch stiffens | Gastrocnemius-soleus (concentric) |
The Windlass Mechanism (Most Important Biomechanical Concept)
Simple analogy: Like tightening a rope around a drum
- Flexible foot (foot flat) = shock absorber
- Rigid foot (toe-off) = propellant/lever
Key Stability Rule
| Position | Stability |
|---|---|
| Dorsiflexion | Most stable (wider part of talus gripped in mortise) |
| Plantarflexion | Least stable (narrow part of talus in mortise) - most ankle sprains happen here |