
Step by step of doing cataract surgery from giving anaesthesia till the end
Reading File
Now let me search the medical library for cataract surgery content in parallel:
Finding Sources
Finding Sources
Searching the Web
cataract surgery steps phacoemulsification procedure anaesthesia to end
Now let me read the Kanski ophthalmology content on cataract surgery and the Miller's Anesthesia content in parallel:
Reading File
Reading File
Reading Web Page
https://www.ncbi.nlm.nih.gov/books/NBK576419
Let me read more of the Kanski phacoemulsification section and the anaesthesia content from Miller's:
Reading File
Reading File
Let me now read more of the phacoemulsification surgical steps from Kanski (IOL implantation, cortical aspiration steps etc.) and fetch some key images:
Reading File
Reading File
Now let me also look at the earlier part of the phacoemulsification section covering incision, capsulorhexis, and hydrodissection from Kanski:
Reading File
Finding Sources
I now have comprehensive information from the textbooks. Let me fetch the key surgical images from Kanski to include in the answer:
Loading Image
Loading Image
I now have all the information needed for a thorough, step-by-step answer. Let me compile the complete guide.
Cataract Surgery: Step-by-Step (Phacoemulsification)
The standard modern technique is phacoemulsification ("phaco"), which is the gold standard for cataract extraction. Here is the full sequence from anaesthesia to wound closure.
STEP 1 - Anaesthesia
Options (choose one):
A. Topical Anaesthesia (most common today)
- Instill topical drops: 0.5% tetracaine, 0.75% bupivacaine, or 2% lidocaine into the conjunctival sac
- No akinesia - requires patient cooperation
- About 5% of patients still experience pain; supplement with intracameral lidocaine (1% preservative-free) injected into the anterior chamber at the start of surgery
- Sedation (IV midazolam, low-dose propofol, or dexmedetomidine) can be added for anxiolysis - aim for moderate sedation (OAA/S subscore 3), not unconsciousness
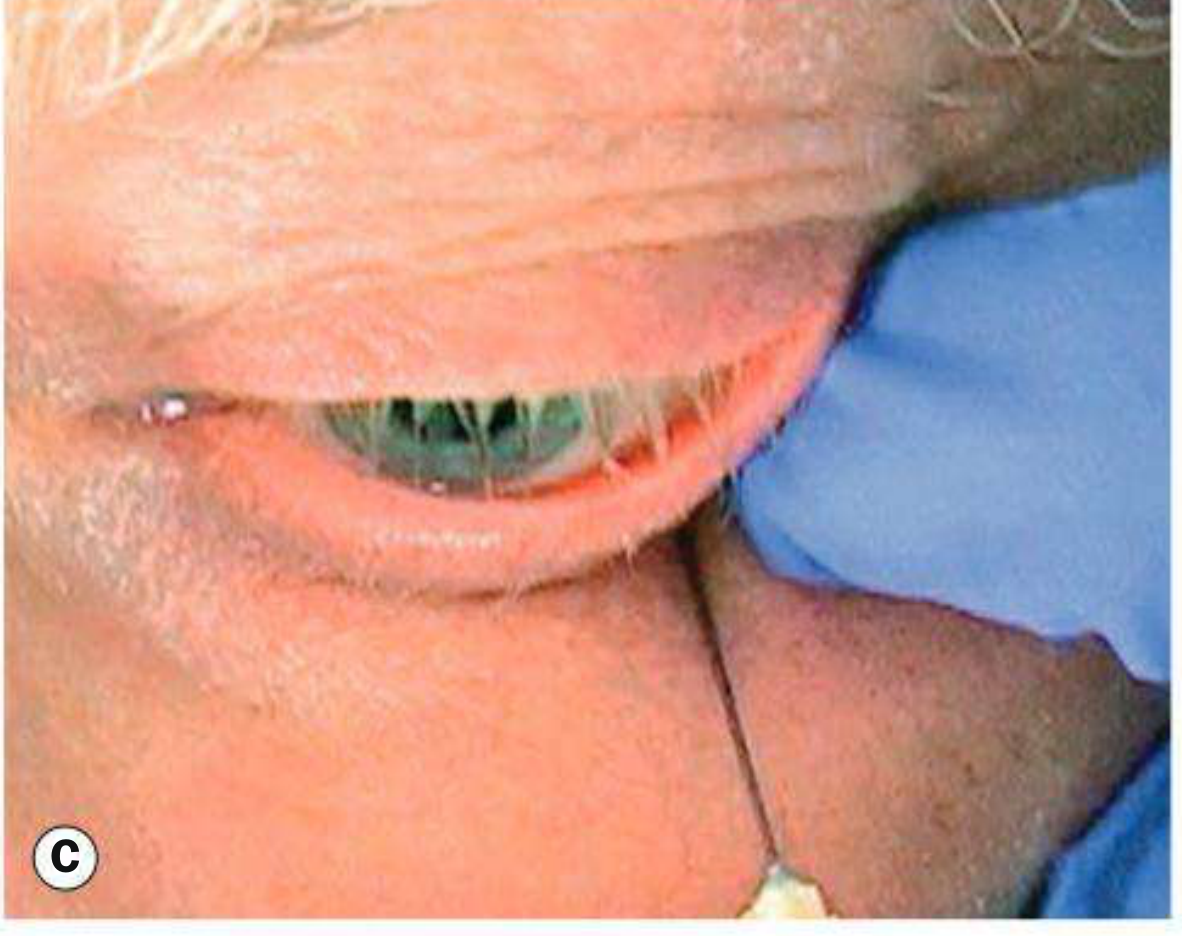
B. Sub-Tenon (Parabulbar) Block
- A small conjunctival incision is made in an infero-nasal quadrant
- Tenon's capsule is opened bluntly
- A blunt curved cannula is passed posteriorly and 3-5 mL of local anaesthetic (e.g. lidocaine + bupivacaine mixture) is injected into the sub-Tenon space
- Provides good analgesia AND akinesia; low risk of globe perforation
C. Peribulbar Block
- A needle is inserted through the lower lid skin or conjunctiva at the infero-lateral orbital rim
- 5-8 mL of LA injected outside the muscle cone
- Good akinesia; higher volume required vs retrobulbar
(Retrobulbar block is now less favoured due to risk of optic nerve damage and brainstem anaesthesia)
STEP 2 - Pupil Dilation
- Instill mydriatic drops pre-operatively: tropicamide 1% + phenylephrine 2.5-10% (± cyclopentolate)
- Target pupil diameter: >6 mm for adequate surgical access
- If small pupil persists intraoperatively, use a high-MW cohesive viscoelastic (e.g. Healon GV) to mechanically dilate, or insert pupil expansion rings/hooks
STEP 3 - Preparation and Draping
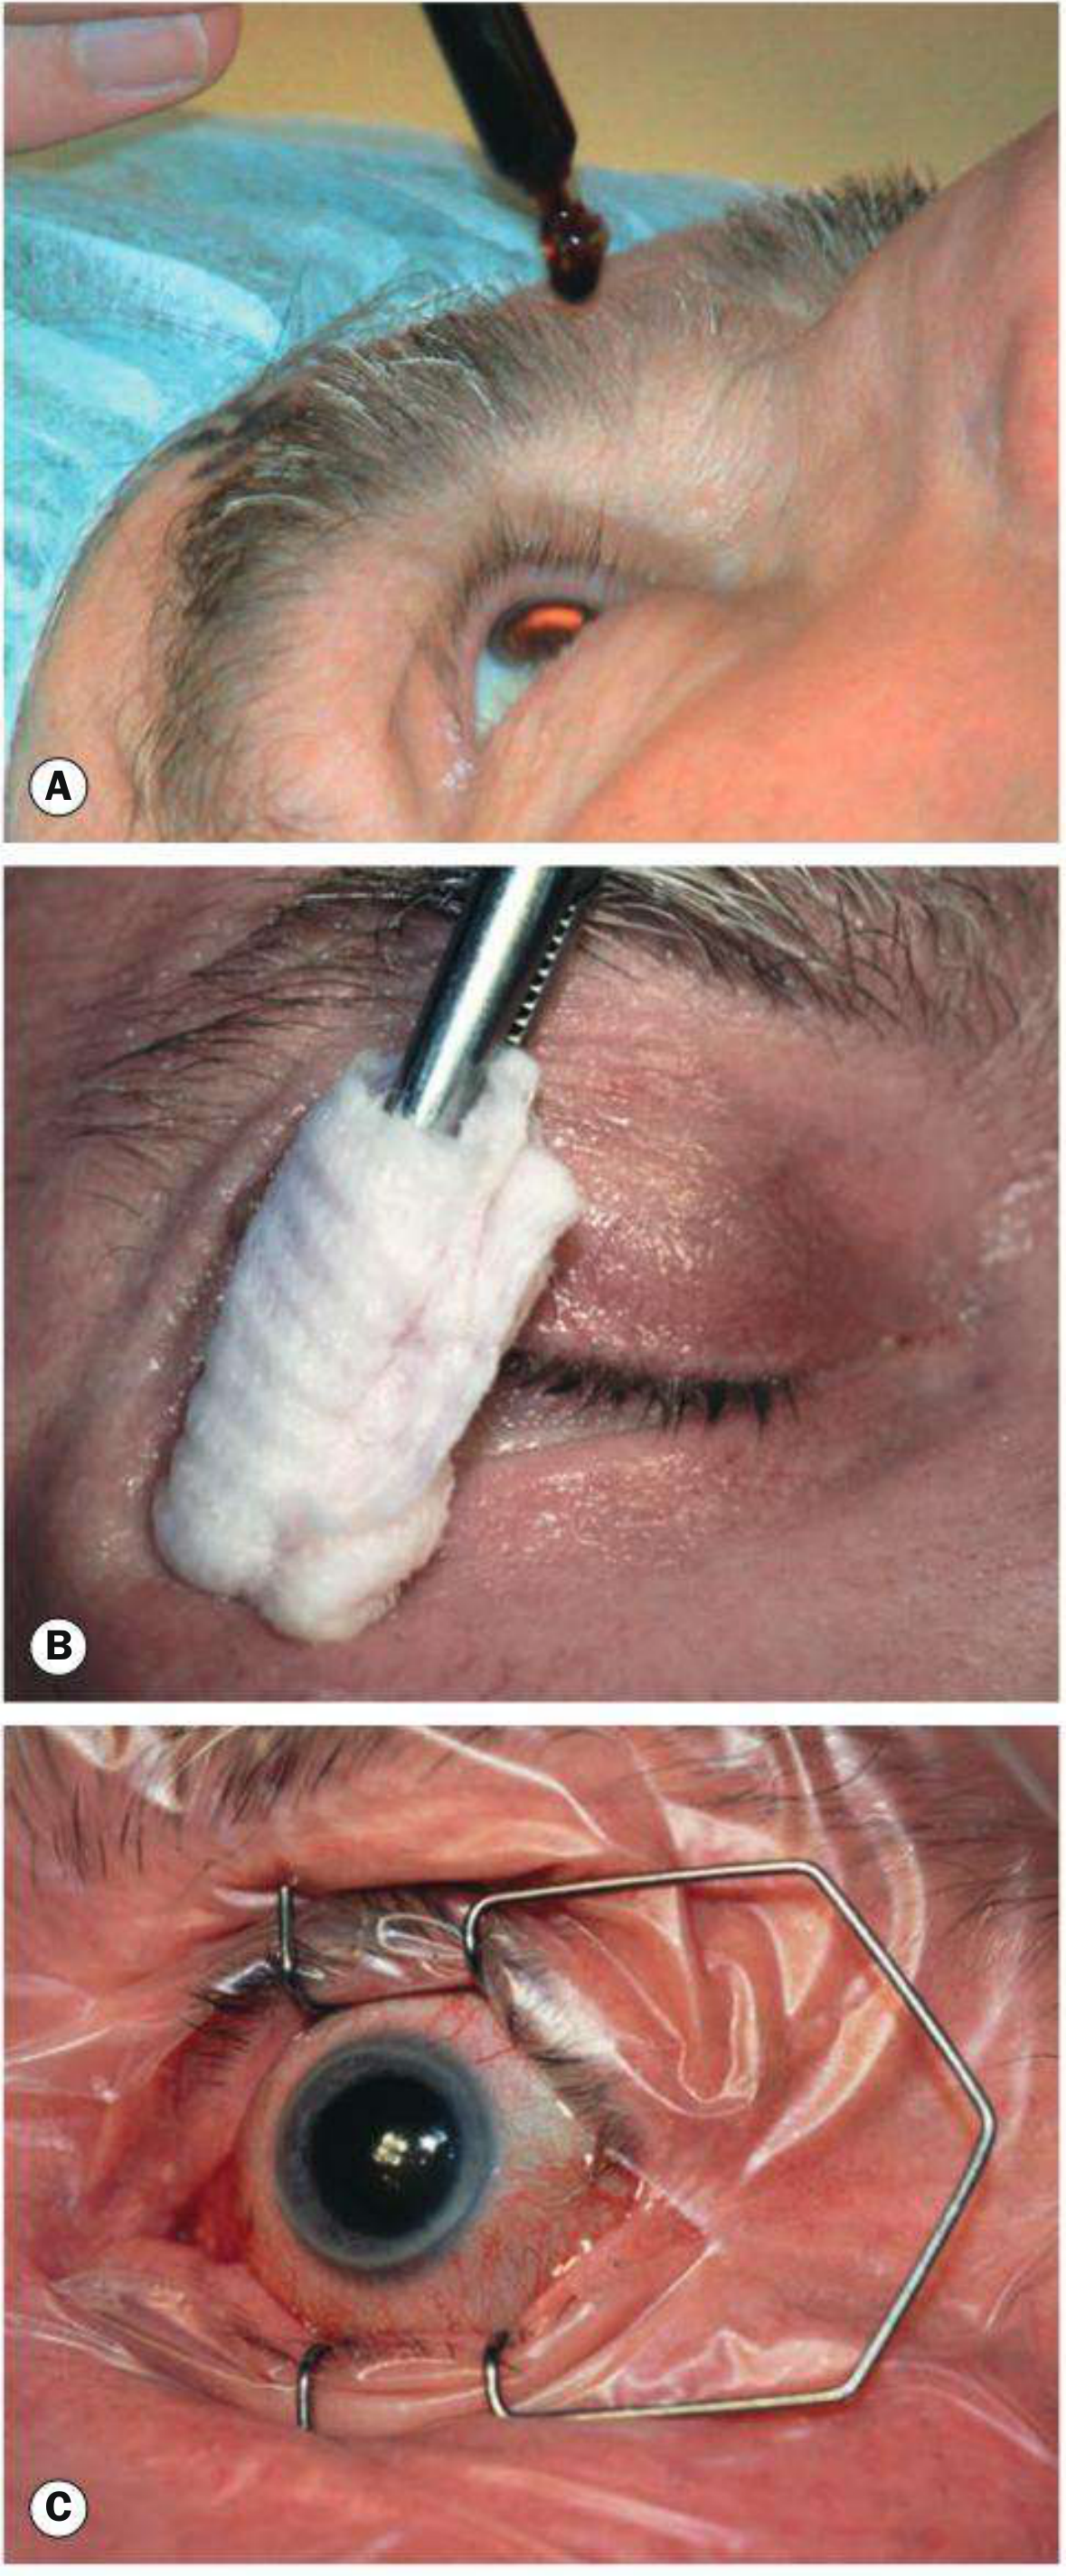
- Instill povidone-iodine 5% (or chlorhexidine) into the conjunctival sac - leave for minimum 3 minutes (single most important step to prevent endophthalmitis)
- Clean eyelids and periocular skin with povidone-iodine solution
- Apply a sterile plastic adhesive drape, ensuring eyelashes and lid margins are completely excluded from the surgical field
- Insert a lid speculum to hold the eye open
STEP 4 - Side Port Incision(s)
- Make one or two paracentesis (side port) incisions with a keratome, approximately 60° away from the planned main incision (in right-handed surgeons, typically at ~10 o'clock if main incision is temporal)
- Size: 1.0-1.2 mm, self-sealing
- These allow introduction of the second instrument (chopper, iris manipulator) and irrigating handpiece for bimanual techniques
STEP 5 - Viscoelastic (OVD) Injection into Anterior Chamber
- Inject cohesive OVD (e.g. sodium hyaluronate, Healon) through the side port into the anterior chamber
- This pressurizes the AC, protects the corneal endothelium, and creates working space for capsulorhexis
- In eyes at high risk of endothelial decompensation (e.g. cornea guttata), use the "soft shell" technique: dispersive OVD first (to coat endothelium), then cohesive OVD centrally
STEP 6 - Main Corneal Incision
- Using a 2.2-2.8 mm keratome, construct a clear corneal incision (CCI) - typically temporal or on the steepest corneal axis to reduce pre-existing astigmatism
- The incision is a triplanar, self-sealing tunnel (no sutures required)
- Temporal incisions give better surgical access but carry a slightly higher endophthalmitis risk vs superior incisions
STEP 7 - Continuous Curvilinear Capsulorhexis (CCC)
- Using a cystotome (bent 25G needle) or capsule forceps, create a continuous circular tear in the anterior lens capsule
- Target diameter: 5.0-5.5 mm, centred on the visual axis
- In dense cataracts with poor red reflex, stain the capsule with trypan blue 0.1% first for visibility
- A correctly performed CCC is the foundation of safe phaco - it keeps the capsule intact during nuclear manipulation
STEP 8 - Hydrodissection
- Insert a 25-30G blunt cannula under the capsule edge (just inside the rhexis margin)
- Gently inject BSS (balanced salt solution) to separate the cortex from the posterior capsule
- Observe a fluid wave passing under the lens ("hydrodissection wave") confirming complete separation
- Confirm free nuclear rotation by gently rotating the nucleus with the cannula tip
- Incomplete hydrodissection risks capsular tear during nuclear removal
Hydrodelineation (optional): separate the endonucleus from the epinucleus - produces a "golden ring" sign; useful in posterior polar cataract where hydrodissection risks rupturing the posterior capsule
STEP 9 - Nuclear Emulsification (Phacoemulsification)
The phaco handpiece (titanium hollow needle with irrigation sleeve) is inserted through the main incision. Ultrasonic energy emulsifies the lens; fluid is simultaneously aspirated.
Common techniques:
Divide and Conquer:
- Sculpt two perpendicular grooves into the nucleus (like a + sign) using phaco energy
- Engage opposite walls of the grooves with the phaco tip and second instrument (chopper)
- Apply outward force to crack the nucleus into quadrants
- Emulsify and aspirate each quadrant individually in the iris plane (never in the capsular bag)
Phaco Chop:
- A chopper is passed horizontally or vertically under the capsule to the equator
- The nucleus is cracked into pieces with a chopping motion
- Faster, uses less total phaco energy, but has a steeper learning curve
Stop and Chop: a combination - one central groove first, then chopping
All nuclear removal should be done in the safe zone (iris plane / above the posterior capsule), never directly over the capsule
STEP 10 - Cortical Aspiration (Irrigation/Aspiration - I/A)
- The phaco handpiece is replaced with an I/A handpiece (no ultrasound energy)
- Using vacuum, the residual cortical lens matter (peripheral flap-like segments) is engaged, peeled centrally away from the capsule, and aspirated
- Work 360° around the capsular bag, removing all cortex
- The posterior capsule must be kept taut and intact
- Methods: automated coaxial I/A, bimanual I/A, or manual (Simcoe cannula)
STEP 11 - IOL Implantation
- Fill the capsular bag with cohesive viscoelastic (to keep the bag open and protect the capsule)
- Widen the main incision slightly if needed (typically already 2.4-2.8 mm for microincision IOLs)
- Load a foldable IOL (acrylic or silicone) into an injector cartridge
- Introduce the injector through the main wound
- Slowly inject - the IOL unfolds inside the capsular bag
- Ensure both haptics are in the capsular bag (not in the sulcus)
- If toric IOL: rotate to the correct pre-marked axis alignment before removing viscoelastic
STEP 12 - Viscoelastic Removal
- Re-insert the I/A handpiece
- Aspirate all OVD from:
- In front of the IOL (anterior)
- Behind the IOL (posterior - if accessible)
- From all angles of the AC
- Retained viscoelastic causes acute postoperative IOP spike (and secondary glaucoma) if not removed
- Intracameral moxifloxacin is injected at this stage as prophylaxis against endophthalmitis
STEP 13 - Wound Sealing (Hydrosealing)
- Test the main incision and side ports for watertightness by pressing at the wound margins with a sponge
- If leaking: inject BSS into the corneal stroma at the wound lips (stromal hydration/"hydrosealing") to swell and self-seal the incision
- Sutures are generally not required for properly constructed self-sealing wounds
- If there is a fish-mouth leak or wound gap: place a single 10-0 nylon suture
STEP 14 - Wound Prophylaxis and End of Case
- Intracameral antibiotic: moxifloxacin (preservative-free) or cefuroxime 1 mg/0.1 mL (reduces endophthalmitis risk ~5-fold)
- Optional: subconjunctival injection of antibiotic (e.g. cefuroxime) and/or corticosteroid (dexamethasone)
- Topical antibiotic drops and/or NSAID drops applied to the eye
- The speculum is removed; drape is taken down
- Eye is left open (no patch in most centres unless block was given)
- Patient can typically be discharged the same day
Summary Table
| Step | Action |
|---|---|
| 1 | Anaesthesia (topical drops, sub-Tenon, or peribulbar block ± IV sedation) |
| 2 | Pupil dilation with mydriatics |
| 3 | Prep, drape, and speculum insertion (povidone-iodine minimum 3 min) |
| 4 | Side port paracentesis incision(s) |
| 5 | OVD injection into anterior chamber |
| 6 | Main corneal incision (2.2-2.8 mm keratome) |
| 7 | Continuous curvilinear capsulorhexis (5-5.5 mm) |
| 8 | Hydrodissection (± hydrodelineation) |
| 9 | Nuclear emulsification (divide & conquer / phaco chop) |
| 10 | Cortical aspiration (I/A handpiece) |
| 11 | IOL implantation into capsular bag |
| 12 | Viscoelastic removal + intracameral antibiotic |
| 13 | Wound hydrosealing / watertightness check |
| 14 | Prophylaxis, topical drops, discharge |
Sources:
- Kanski's Clinical Ophthalmology, 10th ed., pp. 335-338 - Phacoemulsification technique
- Miller's Anesthesia, 10th ed., pp. 9724-9737 - Anaesthesia for cataract surgery
- StatPearls - Phacoemulsification (NCBI)
This is a shared conversation. Sign in to Orris to start your own chat.