
Step by step back massage techniques in therapeutic massage
step by step back massage techniques therapeutic massage guide
back massage techniques therapeutic effleurage petrissage
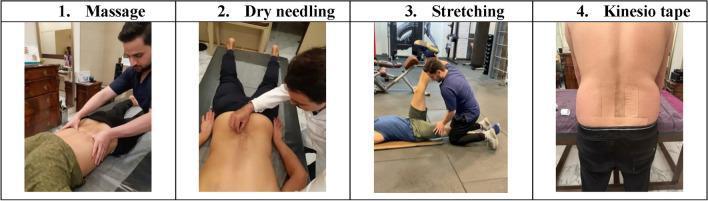
A four-panel clinical photograph montage illustrating therapeutic interventions for low back pain and musculoskeletal rehabilitation. Panel 1 (Massage) shows a practitioner applying manual therapy techniques, such as kneading or effleurage, to the lumbar paravertebral muscles of a patient in a prone position. Panel 2 (Dry Needling) depicts a clinical procedure where fine needles are inserted into myofascial trigger points along the lumbar spine and paraspinal tissues for neuromodulation. Panel 3 (Stretching) demonstrates a Proprioceptive Neuromuscular Facilitation (PNF) technique, with the therapist performing a passive straight leg raise to stretch the hamstring group while the patient is supine. Panel 4 (Kinesio Tape) shows the application of therapeutic elastic tape on the posterior trunk; two I-strips are placed vertically over the erector spinae muscles and two strips are placed horizontally/diagonally across the sacral region to provide sensory input and support. The series emphasizes multimodal physical therapy approaches in managing lumbar dysfunction.
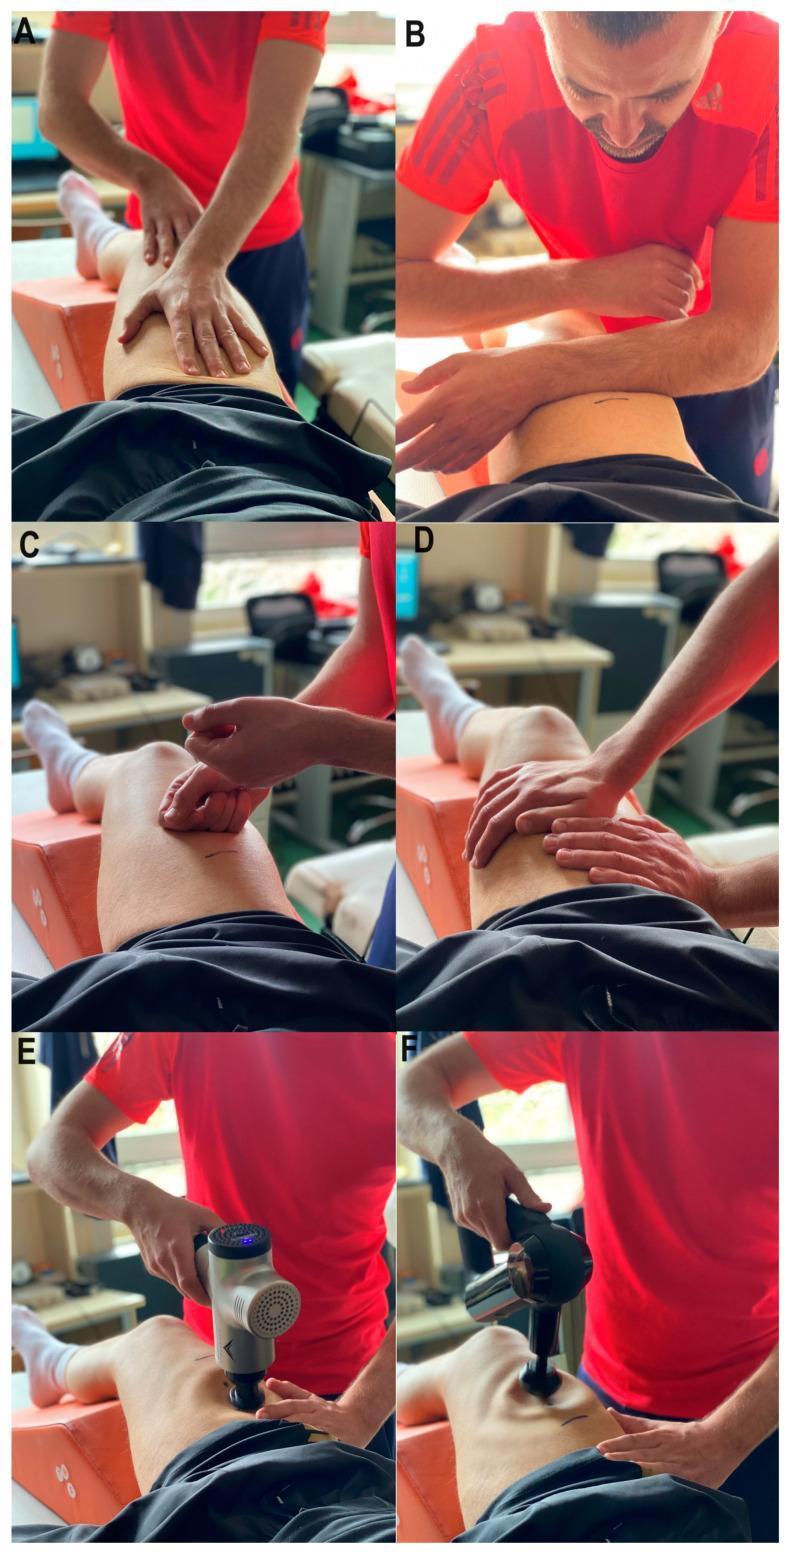
A multi-panel clinical photograph collage demonstrating various manual and mechanical massage techniques applied to the rectus femoris muscle for sports recovery. Panels A-D illustrate manual massage (MM) techniques: (A) Effleurage, showing long, gliding strokes using the palms; (B) Friction, depicting deep circular or linear pressure using the forearms to move tissue over underlying structures; (C) Tapping (Tapotement), showing rhythmic percussion with the hands; and (D) Vibration, demonstrating fine oscillatory movements without breaking skin contact. Panels E and F showcase mechanical recovery tools: (E) Vibro-mechanical massage using a device with a wide, flat attachment to provide high-frequency oscillations; and (F) Percussive mechanical massage using a massage gun with a spherical head to deliver targeted, high-amplitude vertical strokes. The patient is positioned supine with the knee supported, typical for physical therapy and athletic training interventions focused on reducing muscle tension and enhancing neuromuscular contractile properties after fatigue.
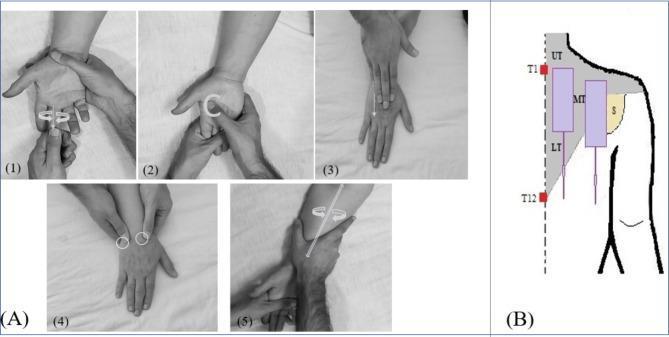
This composite educational graphic illustrates two clinical interventions for post-laparoscopic shoulder pain (PLSP). Panel A contains five clinical photographs demonstrating a hand and forearm massage protocol: (1) finger massage with direct pressure, (2) palm kneading using C-shaped movements, (3) dorsal hand stretching, (4) circular thumb friction around the wrist carpals, and (5) longitudinal forearm effleurage with gentle twisting. Panel B is an anatomical diagram of the upper back and shoulder region, highlighting the trapezius muscle (shaded gray) and scapula (labeled S, shaded yellow). The diagram identifies the anatomical subdivisions of the trapezius: Upper (UT), Middle (MT), and Lower (LT). It specifically marks electrode placement for Transcutaneous Electrical Nerve Stimulation (TENS) therapy, with vertical purple boxes representing the active areas between vertebral landmarks T1 and T12. This figure demonstrates non-pharmacological pain management techniques relevant to physical therapy and postoperative nursing care.
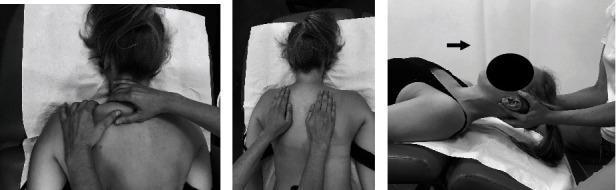
A composite of three clinical photographs demonstrating manual physical therapy techniques for managing idiopathic neck pain. Panels (a) and (b) provide a superior view of a patient in a prone position receiving classical massage. In panel (a), the therapist performs targeted manipulation of the trapezius muscle and cervical paraspinal soft tissues. Panel (b) shows longitudinal effleurage or gliding strokes applied symmetrically across the upper back and shoulder girdle. Panel (c) is a lateral view showing manual cervical traction. The patient is in a supine position with the head cradled by the therapist's hands, specifically supporting the occipital region. A black arrow indicates the horizontal vector of the traction force applied along the longitudinal axis of the cervical spine. These procedural images illustrate conservative interventions aimed at reducing muscle stiffness, increasing range of motion, and alleviating chronic neck pain in a clinical rehabilitation setting.
massage strokes back anatomy erector spinae trapezius
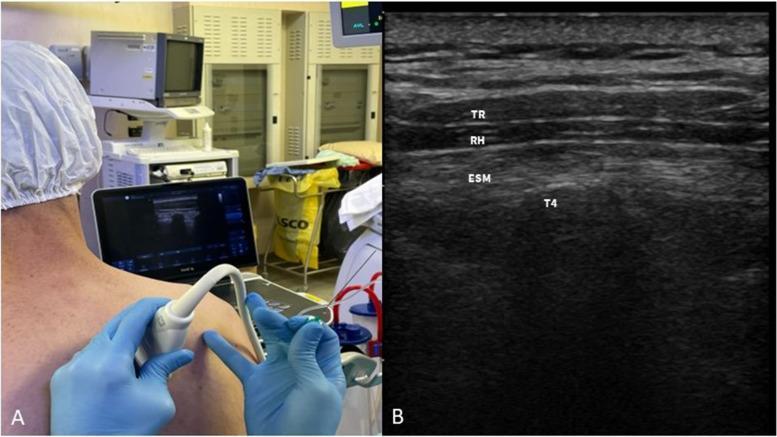
This composite educational image illustrates the clinical performance and sono-anatomy of an Erector Spinae Plane Block (ESPB). Panel A is a clinical photograph showing a patient in a seated position with a high-frequency linear ultrasound probe placed in a sagittal orientation on the upper back, approximately 3 cm lateral to the T4 spinous process. Panel B is a corresponding ultrasound image demonstrating the layered musculoskeletal anatomy of the thoracic region. The layers are identified from superficial to deep: the trapezius muscle (TR) is the most superficial, followed by the rhomboid major muscle (RH), and then the thicker erector spinae muscle (ESM). Deep to the ESM, the T4 transverse process (T4) appears as a distinct, hyperechoic linear structure with associated acoustic shadowing. This visualization is critical for identifying the target fascial plane for local anesthetic injection, located between the anterior fascia of the ESM and the transverse process. The image serves as a guide for regional anesthesia, particularly for cardiothoracic and thoracic surgical analgesia.
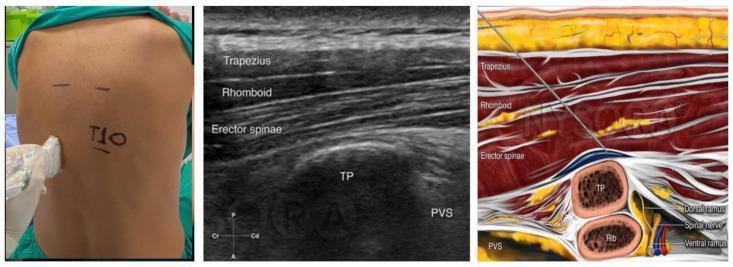
This composite educational graphic illustrates the procedure for a ultrasound-guided erector spinae plane block (ESPB). The left panel is a clinical photograph showing the sagittal positioning of a linear ultrasound transducer on a patient's back, approximately 3 cm lateral to the T10 spinous process. The middle panel is a sagittal diagnostic ultrasound image labeling the relevant sonographic anatomy: the trapezius, rhomboid, and erector spinae muscles as hyperechoic layers, with the hyperechoic shadow of the transverse process (TP) and the adjacent paravertebral space (PVS) visible. The right panel is an anatomical cross-section diagram demonstrating the in-plane needle technique. It shows the needle traversing the trapezius, rhomboid, and erector spinae muscles in a cephalad-to-caudad orientation. The needle tip is correctly positioned in the fascial plane deep to the erector spinae muscle and superficial to the transverse process, where local anesthetic is administered to target the dorsal and ventral rami of the spinal nerves. This material is designed for teaching regional anesthesia techniques and paraspinal anatomy.
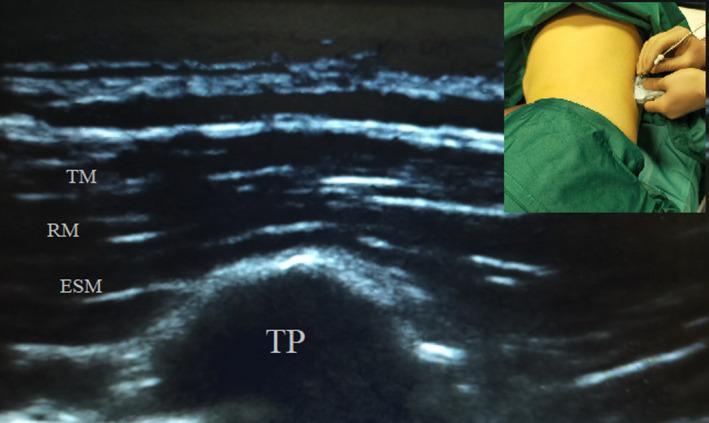
This composite educational image illustrates the performance of an Erector Spinae Plane Block (ESPB). The main diagnostic image is a high-frequency ultrasound of the paraspinal region in a sagittal or parasagittal view. It depicts the layered muscular anatomy superficial to the vertebral column: the trapezius muscle (TM) is the most superficial layer, followed by the rhomboid major (RM), and the thick erector spinae muscle (ESM) deeper. Below the ESM, a hyperechoic, rounded structure with acoustic shadowing is identified as the transverse process (TP) of the thoracic vertebra. The inset in the upper-right corner is a clinical photograph showing the procedural setup, where a practitioner is performing an out-of-plane needle insertion with a lateral-to-medial approach relative to the ultrasound probe placed on the patient's back. This visual material is designed to teach the identification of ultrasound landmarks and needle trajectory for regional anesthesia, specifically targeting the fascial plane deep to the erector spinae muscle and superficial to the transverse process.
Step-by-Step Therapeutic Back Massage Techniques
Setup and Preparation
- Use a massage table (ideal) or a firm mat on the floor. Avoid soft mattresses - they don't allow enough counterpressure.
- Room temperature should be warm (around 72-76°F / 22-24°C).
- Use dim lighting and calming background music if possible.
- Have 2-3 pillows ready: one under the breastbone/chest, one under the forehead (or use a face cradle), and a rolled towel or bolster under the ankles.
- The recipient lies face-down (prone position).
- Place the chest pillow to take pressure off the lower back and allow the spine to decompress.
- The ankle bolster reduces strain on the lumbar spine.
- Drape the person with a sheet and uncover only the back.
- Warm the massage oil in your palms before applying - never apply cold oil directly to the skin.
- Good oils: jojoba, sweet almond, coconut, or arnica-infused oil.
- Keep one hand on the client at all times once the session begins - breaking contact is disruptive.
The Core Sequence (5 Phases)
Phase 1 - Compression (Grounding, ~2 min)
- Place both palms flat on the mid-back, one on each side of the spine.
- Apply slow, even downward pressure, as if pressing the person into the table.
- Hold for 3-5 seconds, then slowly release.
- Move systematically - upper back, mid back, lower back, then back up.
- This signals the nervous system that massage is beginning and helps the muscles "turn off" guarding reflexes.
Never press directly on the spine itself - always work on the paravertebral muscles on either side.
Phase 2 - Effleurage (Warming Strokes, ~5-7 min)
- Stand at the head of the table.
- Place both palms flat on the upper trapezius (the shoulder/neck junction).
- Glide your hands down both sides of the spine with medium pressure, all the way to the sacrum (the base of the spine).
- At the sacrum, fan your hands outward to the hips.
- Glide back up the sides of the torso (lighter pressure on the return).
- Repeat 6-8 times, gradually increasing pressure.
- On later passes, add a slight pinching squeeze at the top of the shoulders before fanning out.
- One hand quickly follows the other up the back in a continuous flowing rhythm, each hand covering the full length of the spine in overlapping passes.
Phase 3 - Petrissage (Kneading, ~8-10 min)
3a. Upper Back and Trapezius
- Standing at the side of the table, grasp the upper trapezius muscle between your thumbs and fingers.
- Lift and squeeze the muscle in a rolling, kneading motion - like kneading dough.
- Work from the neck outward toward the shoulder tip (acromion), then back.
- Repeat 4-6 times per side.
- Use your thumbs to make small, deep circles in the muscular belly of the trapezius, especially at the shoulder-neck junction (a common knot site).
3b. Rhomboids and Mid-Back
- The rhomboids sit between the spine and the scapula (shoulder blade).
- Use your thumbs to apply firm circular friction along the medial border of each scapula.
- Work from top to bottom, pressing slightly under the scapula if the muscle allows.
- You can also use the heel of your hand here with slow, deep circles.
3c. Erector Spinae (Paraspinal Muscles)
- These long muscles run on either side of the entire spine.
- Make loose fists and use your knuckles (knuckling technique) to roll slowly down each side of the spine from thoracic to sacral level.
- Alternatively, use alternating thumbs to make deep, slow circles along the paraspinal groove.
- Apply enough pressure that the client feels it working, but they should never wince or hold their breath.
3d. Lower Back and Quadratus Lumborum
- The lower back (lumbar region) is often the most tension-loaded area.
- Stand at the side, facing the person's head.
- Place both thumbs at the sacrum and glide them slowly upward along the paraspinal muscles to the thoracolumbar junction.
- Use palm circles: place one palm on top of the other and make large, slow circular motions over the entire lower back.
- Use muscle lifting: spread your thumbs wide, fingers pointing away, and gently lift the lumbar muscles by turning your wrists alternately.
- Avoid sustained deep pressure directly over the floating ribs (11th and 12th ribs) - these are unsupported and can be uncomfortable.
Phase 4 - Tapotement and Friction (Stimulating Techniques, ~3-5 min)
Tapotement (Percussion)
- Hacking: Use the ulnar (little-finger) edge of both hands alternately to strike the muscles in a rapid, rhythmic chopping motion. Keep wrists loose and fingers relaxed. Work across the upper trapezius, mid back, and gluteals (avoid the lumbar spine and kidneys).
- Cupping: Cup your palms slightly and alternately strike the back. This creates a hollow sound and stimulates circulation.
- Pounding: Make loose fists and alternately drum across the large muscle groups.
Skip tapotement for purely relaxation-focused sessions - these techniques are more stimulating and activate the nervous system.
Deep Friction
- For specific tight spots (trigger points), use your thumb or index finger reinforced by the middle finger.
- Apply sustained, direct pressure on the spot for 10-30 seconds, or make tiny back-and-forth cross-fiber strokes perpendicular to the muscle fibers.
- The client may feel a referral sensation ("good pain") - this is normal. Back off if they are actually in sharp pain.
Phase 5 - Closing Effleurage and Integration (~3-5 min)
- Repeat the opening effleurage sequence, but make each stroke progressively lighter and slower.
- Finish with extremely light feather strokes using only your fingertips, trailing from the neck all the way down to the sacrum.
- Hold your palms still on the mid-back for 5-10 seconds.
- Slowly lift your hands.
Anatomical Focus Areas
| Region | Key Muscles | Best Technique |
|---|---|---|
| Neck/Shoulder junction | Upper trapezius, levator scapulae | Petrissage kneading, thumb circles |
| Between shoulder blades | Rhomboids, middle trapezius | Scapular border friction |
| Mid back | Erector spinae, multifidus | Knuckling, paraspinal thumb strips |
| Lower back | Quadratus lumborum, iliocostalis | Palm circles, muscle lifting |
| Sacrum / SI joints | Gluteus medius, piriformis | Flat palm pressure, slow circles |
Pressure Guide
- Light pressure: Skin-level contact, for warming and opening/closing.
- Medium pressure: Into the superficial fascia - most effleurage and gentle petrissage.
- Deep pressure: Into the muscle belly - deeper petrissage, friction, trigger point work.
- Rule: If the recipient holds their breath, clenches, or says "ow" - you are too deep.
Contraindications (Do Not Massage)
- Over open wounds, bruises, rashes, sunburn, or skin infections
- Over an acute (fresh, <72 hr) muscle strain or sprain
- Directly over the spine's bony processes
- Over the kidneys (floating ribs area) with deep percussion
- Persons with deep vein thrombosis, blood clots, or recent surgery
- Active cancer (consult an oncology-trained massage therapist)
- Fever or acute infectious illness
Quick Reference: The Full Sequence
- Setup - Position, pillow, drape, warm oil
- Compression - Grounding pressure, whole back
- Effleurage - Long gliding strokes, 6-8 passes to warm tissue
- Petrissage - Upper back → mid back → lower back (kneading, thumb circles, friction)
- Tapotement (optional) - Hacking, cupping for stimulation
- Deep friction (as needed) - Trigger point work on specific knots
- Closing effleurage - Full back, progressively lighter
- Hold and release - Silent finish
Ok tell the step by step techniques only and can I use powder
Step-by-Step Back Massage Techniques
Step 1 - Compression (Grounding)
- Place both palms flat on the mid-back, one on each side of the spine
- Press down slowly and hold 3-5 seconds
- Release gradually
- Move to upper back, then lower back, then back to mid
- Never press on the spine itself - always the muscles beside it
Step 2 - Effleurage (Long Gliding Strokes)
- Place both palms on the upper shoulders
- Glide firmly down both sides of the spine to the sacrum (base of spine)
- Fan hands outward at the hips
- Return up the sides of the torso with lighter pressure
- Repeat 6-8 times, getting slightly deeper each pass
- Keep strokes slow, smooth, and continuous
Step 3 - Petrissage on Upper Back (Kneading)
- Grab the trapezius muscle (shoulder-neck area) between thumbs and fingers
- Squeeze and roll it like kneading dough
- Work from the neck outward to the shoulder tip
- Use thumbs to make deep small circles at the shoulder-neck junction
- Repeat on the other side
Step 4 - Petrissage on Mid Back
- Use thumbs to press along the inner border of each shoulder blade
- Make slow deep circles into the rhomboid muscles
- Work top to bottom along each shoulder blade
- Use the heel of your hand for broader circular pressure here
Step 5 - Petrissage on Lower Back
- Place both thumbs at the sacrum
- Slowly strip upward along the paraspinal muscles (the ridges beside the spine)
- Make large slow palm circles over the entire lower back
- Gently lift the lower back muscles by spreading thumbs and turning wrists alternately
- Avoid deep pressure directly over the floating ribs
Step 6 - Knuckling (Paraspinal Muscles)
- Make loose fists with both hands
- Roll your knuckles slowly down each side of the spine from upper to lower back
- Apply steady even pressure - never sharp or jabbing
- This targets the erector spinae muscles running the length of the spine
Step 7 - Trigger Point Friction (Knots)
- Find tight spots by feeling for hard, ropy bumps in the muscle
- Press your thumb directly into the spot with firm, sustained pressure
- Hold 10-30 seconds - the person may feel a dull aching referral sensation (normal)
- Or make tiny back-and-forth strokes across the muscle fibers
- Back off immediately if they feel sharp or shooting pain
Step 8 - Tapotement / Percussion (Optional - for stimulation)
- Hacking: Use the little-finger edge of both hands to lightly chop alternately across the upper back and shoulders
- Cupping: Cup palms slightly and rhythmically tap across the back
- Keep wrists loose and fingers relaxed
- Skip this step if the goal is relaxation - it wakes the nervous system up
Step 9 - Closing Effleurage
- Repeat the long gliding strokes from Step 2
- Make each pass progressively lighter and slower
- Finish with feather-light fingertip strokes from neck to sacrum
- Place both palms still on the mid-back for 5-10 seconds
- Slowly lift hands to signal the end
Using Powder Instead of Oil
| Powder | Oil | |
|---|---|---|
| Feel | Dry, smooth glide | Slippery, warm glide |
| Best for | Light-to-medium pressure, clothed or hairy skin | Deep tissue, long strokes |
| Absorption | Absorbs sweat, stays dry | Can feel greasy |
| Drawback | Less glide for very deep strokes, avoid inhaling | Stains sheets, messy |
| Best types | Talcum, cornstarch, rice powder | Jojoba, almond, coconut |
- Sprinkle a small amount into your palms first - never pour directly onto the skin
- Rub your hands together before touching the back
- Reapply in small amounts as needed - less is more
- Avoid using near the face or when the person has any open skin