
Standard guidelines of performing different skills in hospitals including suctioning and all others
hospital standard guidelines clinical skills suctioning catheterization wound care nursing procedures 2024
tracheal suctioning procedure technique catheter
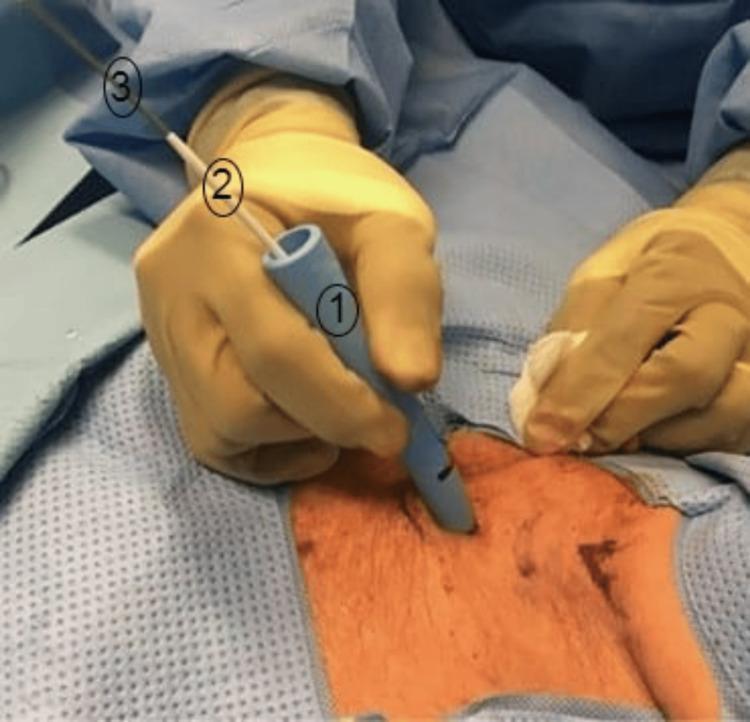
A clinical photograph depicting a percutaneous tracheostomy procedure using the Seldinger technique. The image shows a close-up of the anterior neck of a patient under sterile conditions, draped in blue surgical material. A clinician's gloved hand is performing tracheal dilation. Three primary medical components are numbered: (1) a light blue percutaneous tube dilator with a tapered tip inserted into the tracheal stoma; (2) a white guiding catheter positioned within the proximal end of the dilator; and (3) a thin, metallic guidewire extending through the guiding catheter. The insertion site shows evidence of surgical preparation with reddish-brown antiseptic solution. In the background, a second gloved hand holds a gauze pad near the incision. This visual demonstrates the mechanical dilation phase of airway management, specifically showing the relationship between the guidewire, guiding catheter, and single-stage dilator during the creation of a percutaneous airway.
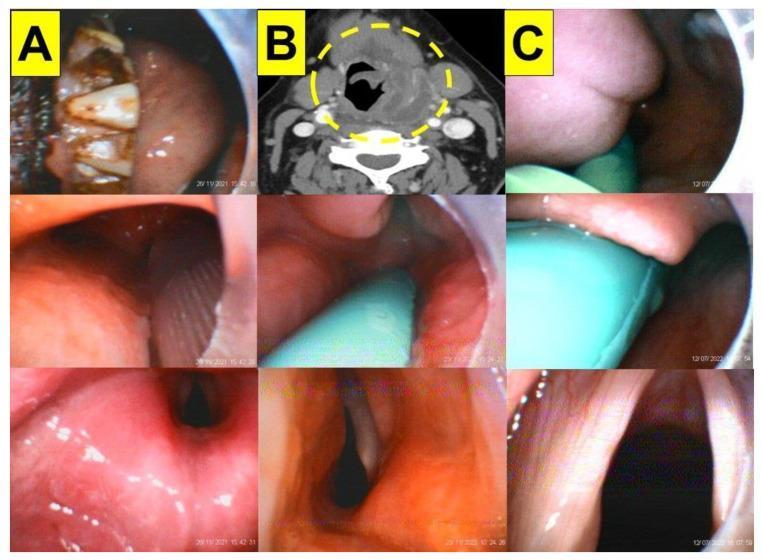
This composite clinical image demonstrates the application of a video stylet (VS) technique for tracheal intubation across three different clinical scenarios (A, B, C). Section A displays a case of facial trauma, showing external injuries in the top panel and progressing to endoscopic views of the oropharynx and glottis in the middle and lower panels. Section B features a contrast-enhanced axial CT scan of the neck in the top panel, highlighting a surgically drainable deep neck abscess in the left parapharyngeal space (yellow dashed circle) exhibiting the 'rim enhancement sign.' The corresponding endoscopic panels in B show the advancement of a suction catheter–nasopharyngeal airway assembly to navigate the narrow airway. Section C illustrates rapid sequence induction and intubation (RSII), with the middle panel showing the VS view above the epiglottis and the lower panel providing clear visualization of the full glottis and vocal cords. The series highlights how the VS technique, combined with suctioning, facilitates airway management in patients with difficult anatomy or secretions.
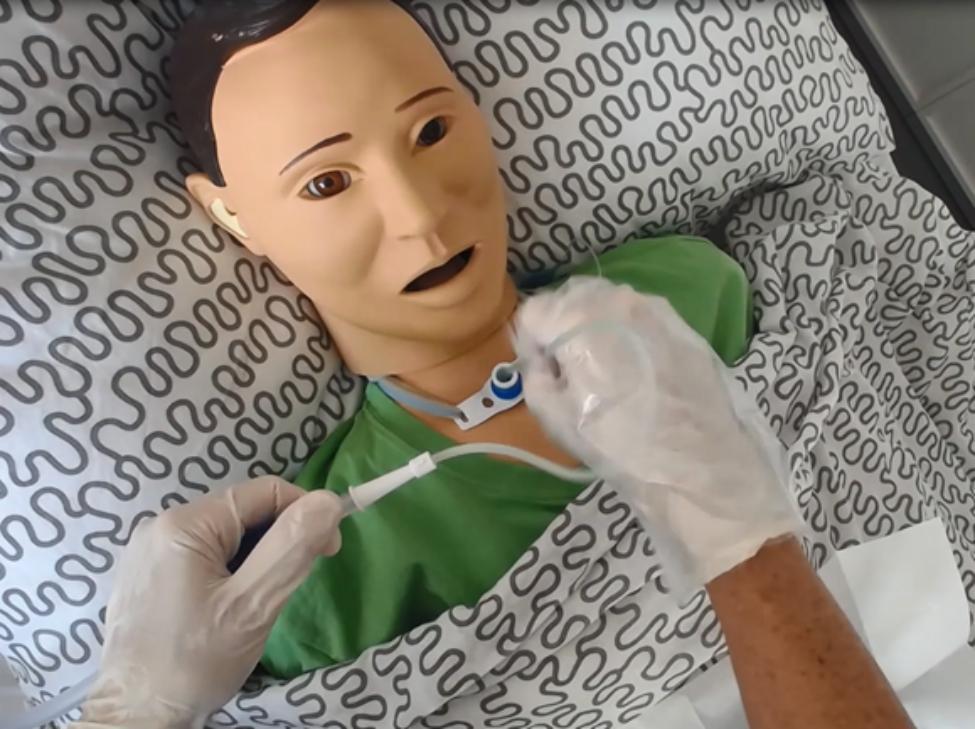
A clinical photograph of a simulated endotracheal suctioning (ETS) procedure performed on a medical training manikin. The manikin is positioned supine in a hospital bed with patterned linens, wearing a green patient gown. It features an indwelling tracheostomy tube secured by a white neck strap and a connector with a blue port. A healthcare provider, wearing translucent disposable gloves to demonstrate aseptic technique, is shown manipulating the suction equipment. The provider’s right hand is guiding a flexible, clear suction catheter toward the tracheostomy opening, while the left hand holds the suction control valve. This procedural image illustrates a critical nursing and respiratory care skill used to clear airway secretions in ventilated patients or those with a permanent tracheostoma. The focus is on the correct manual handling of equipment and the anatomical positioning required for the procedure within a medical simulation environment.
Standard Hospital Clinical Skills Guidelines
1. AIRWAY SUCTIONING
A. Oropharyngeal / Upper Airway Suctioning
- Airway obstruction from vomitus, blood, secretions, or particulate debris
- Failure of positioning and airway-opening maneuvers alone
- Large-bore dental-type suction tip (e.g. HI-D Big Stick) - preferred for vomitus; 5/8 to 3/4 inch diameter tubing significantly decreases suction time for viscous material
- Tonsil tip (Yankauer) - for hemorrhage and secretions; less traumatic but too small for vomitus
- Suction canister + tubing; functional suction unit
- Keep suctioning equipment connected and ready to operate at all times during airway management
- Perform under direct vision or with laryngoscope when feasible - blind insertion can convert partial to complete obstruction
- Do NOT exceed 15 seconds per suctioning interval
- Administer supplemental O2 before and after each suctioning pass
- Nasal suction is seldom required in adults (most obstruction is oropharyngeal)
- Hypoxia from prolonged suctioning
- Tissue trauma from blind insertion
B. Tracheal / Endotracheal (ET) Suctioning
- Secretion clearance in intubated/tracheostomised patients
- Ventilated patients with impaired cough
- Suction catheter size (French) = 2 × (tracheal tube size - 2)
- Closed-system suction catheter (preferred - maintains ventilation, sterility)
- Vacuum pressure: ≤80 mmHg in infants; ≤150 mmHg in adults
- Initiate continuous pulse oximetry, cardiac monitoring, capnography
- Elevate head of bed to 30 degrees (mechanically ventilated patients)
- Awake patients: sit upright, head neutral
- Preoxygenate for at least 30-60 seconds - FiO2 to 100% for ventilated patients; 10-15 L/min high-flow O2 for non-ventilated
- Humidify air to reduce secretion viscosity
- Routine normal saline instillation is no longer recommended (no proven clinical benefit)
- Use aseptic technique throughout
- Insert suction catheter through inner cannula
- Advance to desired depth (if carina is reached, withdraw 1-2 cm before applying suction)
- Apply suction while slowly withdrawing the catheter, gently rotating to facilitate secretion removal
- Duration must not exceed 10-15 seconds per pass
- Allow reoxygenation between passes
- Stop immediately if dysrhythmia, hypoxia, or rising end-tidal CO2 develops
| Complication | Prevention/Management |
|---|---|
| Dysrhythmias (bradycardia) | Pre-treat with nebulized/IV atropine if at risk; digoxin patients at higher risk |
| Increased ICP | Adequate sedation; hyperventilate (30 breaths/min) 1 min before; instill lidocaine 1-1.5 mg/kg 2% intra-tracheal 10 min before |
| Atelectasis | Catheter < half inner diameter of tube; minimize pressure; use closed system + PEEP after |
| Mucosal injury | Minimize frequency and pressure; do not force catheter |
| Tracheitis | Correct sterile technique; avoid over-suctioning |
2. URINARY BLADDER CATHETERIZATION (Foley Catheterization)
Indications
- Acute urinary retention
- Uncontaminated urine specimen (especially in females)
- Diagnostic studies (cystogram, voiding cystourethrogram, urodynamics)
- Intraoperative urine output monitoring
- Measurement of post-void residual volume
- Bladder irrigation or medication instillation
- Surgery requiring anesthesia
- Chronic urinary retention / neurogenic bladder
- Incontinence with skin breakdown
- Comfort measure in terminally ill patients with incontinence
Contraindications
- Suspected urethral disruption (pelvic trauma, blood at meatus, perineal hematoma, high-riding prostate)
- Recent urethral/bladder neck reconstructive surgery
- Known urethral stricture (relative)
- Acute urethritis or prostatitis (relative)
- Uncooperative/combative patient (relative)
Equipment
- Robinson catheter (straight, rounded tip) - for short-term/intermittent use
- Foley catheter (16-18 Fr in adults) - self-retaining with balloon; 2-lumen (standard) or 3-lumen (for irrigation); silicone preferred for long-term use
- Coudé catheter - curved tip (12 o'clock position); used for enlarged prostate or elevated bladder neck; recommended for males >50 years by some clinicians
- Sterile drape, antiseptic solution, water-soluble lubricant/anesthetic jelly, sterile gloves, drainage bag
Procedure (Male)
- Position patient supine; cleanse glans with antiseptic
- Apply sterile drape; inject anesthetic jelly into urethra
- Hold penis perpendicular to body (90 degrees) to straighten urethra
- Insert catheter gently - do NOT force
- Two common obstruction points: bulbous-membranous urethra junction and bladder neck
- Advance until urine flows; advance another 1-2 cm then inflate balloon with 10 mL sterile water
- Pull catheter back gently until balloon rests at bladder neck
- Secure catheter to thigh to prevent urethral trauma
- In uncircumcised males, always reduce foreskin after placement to prevent paraphimosis
Procedure (Female)
- Position supine with knees flexed, feet together (frog-leg)
- Cleanse urethral meatus with antiseptic
- Identify meatus (shorter urethra, avg 2 inches); angle toward umbilicus in younger women, toward sacrum in older women
- Insert catheter gently; advance until urine returns, then inflate balloon
- For difficult catheterization (obese, postmenopausal): locate meatus with index finger tip and slide catheter along it
Catheter Sizes
- French unit = 0.33 mm; higher Fr = larger catheter
- Adults: 16-18 Fr standard; 12 Fr for stricture/difficulty
- Infants/children: smaller sizes
3. NASOGASTRIC (NG) TUBE INSERTION
- Gastric decompression (bowel obstruction, ileus, post-op)
- Enteral feeding (nasogastric or nasojejunal)
- Gastric lavage (overdose, upper GI bleed)
- Medication administration
- NG tube (14-18 Fr for adults; fine-bore feeding tube for nutrition)
- Water-soluble lubricant
- 60 mL syringe, pH paper or X-ray for confirmation
- Tape for securing
- Sit patient upright (45-90 degrees) or head of bed elevated
- Measure tube length: tip of nose to earlobe, then earlobe to xiphisternum (approximately 55-65 cm in adults)
- Lubricate the distal tip with water-soluble lubricant
- Insert tube through nostril, advancing posteriorly (not upward) along the nasal floor
- Ask the patient to swallow sips of water as the tube passes through the oropharynx
- Advance to measured length
- Confirm placement before use:
- Aspirate gastric content and test pH (pH <5 = gastric)
- Chest X-ray is the gold standard to confirm placement below diaphragm, past bronchial bifurcation
- Never rely on the "whoosh" test (auscultation of injected air) - this is unreliable
- Secure to nose with tape; record insertion length
- Do not use if suspected base of skull fracture (use oral route)
- Monitor for respiratory distress (indicates bronchial placement)
- X-ray confirmation is mandatory before commencing feeds
4. WOUND CARE AND DRESSING CHANGES
- Use aseptic non-touch technique (ANTT) throughout
- Reassess wound at each dressing change
- Document wound size, depth, exudate, odor, and surrounding skin condition
- Sterile gloves, dressing pack, sterile saline or approved wound cleansing solution
- Appropriate dressing (see table below)
- Tape or bandage for securing
- Perform hand hygiene; prepare sterile field
- Don clean gloves; remove old dressing - note character of exudate
- Remove clean gloves; don sterile gloves
- Irrigate wound with sterile normal saline (not hydrogen peroxide routinely - it damages granulation tissue)
- Assess wound bed: note color (red = granulating, yellow = sloughy, black = necrotic), depth, undermining, and wound edges
- Select and apply appropriate dressing
- Secure dressing; document findings
| Wound Type | Recommended Dressing |
|---|---|
| Clean, healing (low exudate) | Transparent film or thin hydrocolloid |
| Moderate exudate | Foam dressing |
| High exudate | Alginate or hydrofiber |
| Infected/necrotic | Antimicrobial (silver) dressing; refer for debridement |
| Cavity wound | Alginate/hydrofiber rope packing; avoid tight packing |
| Negative Pressure Wound Therapy (NPWT) | For complex/non-healing wounds; disposable NPWT now recognized for low-to-moderate exudate outpatient wounds (2024 NPIAP/EWMA guidelines) |
5. OXYGEN THERAPY
| Device | Flow Rate | FiO2 Delivered |
|---|---|---|
| Nasal cannula | 1-6 L/min | 24-44% |
| Simple face mask | 6-10 L/min | 35-55% |
| Non-rebreather mask (NRB) | 10-15 L/min | 60-90% |
| Venturi mask | Variable (set per color) | 24-60% (precise) |
| Bag-valve-mask (BVM) | 15 L/min | ~100% with good seal |
- Target SpO2 94-98% for most patients; 88-92% for COPD/hypercapnia risk
- Use lowest FiO2 to achieve target - avoid unnecessary hyperoxia
- Humidify oxygen if flow >4 L/min or for prolonged use
- For pre-oxygenation before intubation: use NRB or BVM at 15 L/min for at least 3-5 minutes
6. BLOOD GLUCOSE MONITORING (Capillary BGM)
- Perform hand hygiene; identify patient
- Warm finger if needed; clean fingertip with alcohol swab and allow to dry
- Use lancet device on side of fingertip (less painful, better blood flow)
- Wipe away first drop of blood
- Apply second drop to glucometer test strip
- Read result; document and act on value per protocol
- Apply pressure to puncture site; dispose of lancet in sharps container
- Hypoglycemia: <4.0 mmol/L (72 mg/dL)
- Severe hyperglycemia: >20 mmol/L (360 mg/dL)
7. MEDICATION ADMINISTRATION - THE "RIGHTS"
- Right patient (2 identifiers)
- Right medication
- Right dose
- Right route
- Right time
- Right documentation
- Right reason (indication verified)
- Right response (monitor effect)
- Right to refuse (patient)
- Right education (patient informed)
8. HAND HYGIENE (WHO 5 Moments)
- Before touching a patient
- Before a clean/aseptic procedure
- After body fluid exposure risk
- After touching a patient
- After touching the patient's surroundings
9. GENERAL PRINCIPLES ACROSS ALL SKILLS
| Principle | Application |
|---|---|
| Informed consent | Explain procedure, risks, and alternatives before starting |
| Patient ID | Use 2 identifiers every time |
| Hand hygiene | Before and after every procedure |
| Aseptic technique | Sterile field for invasive procedures; ANTT for wound care |
| PPE | Gloves minimum; gown/mask/goggles for splash/aerosolization risk |
| Positioning | Optimise patient position to facilitate procedure and patient comfort |
| Documentation | Record indication, technique, findings, and patient response |
| Monitoring post-procedure | Observe for complications; vital signs as indicated |
| Sharps safety | Never recap needles; dispose immediately in sharps container |
- Roberts and Hedges' Clinical Procedures in Emergency Medicine, 7th Ed. (Chapters 3, 7)
- Pfenninger and Fowler's Procedures for Primary Care, 3rd Ed. (Chapters 110, 112)
- Tintinalli's Emergency Medicine: A Comprehensive Study Guide, 9th Ed. (Chapters 28-30)
- 2024 NPIAP/EWMA Wound Care Guidelines - Nursing CE Central summary