
Sphygmomanometer in one image notes with diagram
sphygmomanometer parts diagram blood pressure measurement
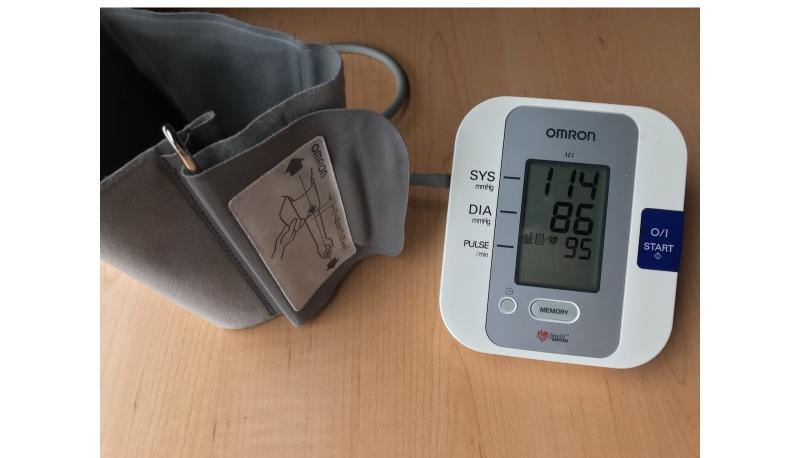
A clinical photograph of a portable electronic sphygmomanometer, specifically an Omron M3 digital blood pressure monitor, used for cardiovascular health assessment. The image displays the digital base unit and the associated upper-arm cuff. The LCD screen on the base unit shows live readings: Systolic (SYS) blood pressure at 114 mmHg, Diastolic (DIA) blood pressure at 86 mmHg, and a pulse rate of 95 beats per minute (bpm). To the left, the gray fabric blood pressure cuff is visible, featuring a metal D-ring for secure tightening and a printed instructional label. This label provides a visual diagram demonstrating correct cuff placement relative to the elbow joint and brachial artery to ensure measurement accuracy. The device is a standard tool for monitoring hypertension and heart rate in clinical and home settings. Key educational components include the interface of digital diagnostic equipment and the importance of standardized placement for reliable vital sign data collection.
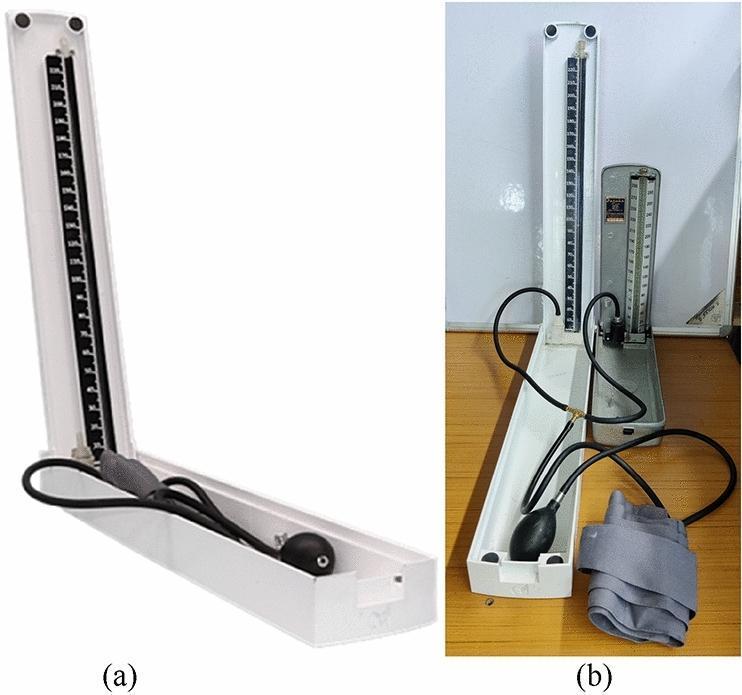
This clinical photograph displays a comparative analysis of sphygmomanometer devices used for blood pressure measurement. Panel (a) shows the 'Merkfree' alpha-prototype, a mercury-free sphygmomanometer featuring a white 3D-printed thermoplastic (PLA) enclosure. The design includes a horizontal base compartment containing a black rubber inflation bulb and tubing, and a vertical measuring scale with high-contrast markings calibrated for mmHg. The device utilizes Galinstan, a non-toxic liquid metal alloy, as the measuring fluid within a glass tube, maintaining the traditional vertical column interface. Panel (b) provides a technical comparison between the Merkfree prototype and a standard Mercurial Sphygmomanometer (MS). Both devices are connected via a T-connector joint to a single inflation bulb and blood pressure cuff (visible in the foreground) to ensure simultaneous pressure application during validation trials. The comparison highlights differences in enclosure materials—white polymer for the prototype versus metallic for the conventional unit—while demonstrating the similar structural logic intended to maintain clinician familiarity and reduce rounding-off errors through improved scale calibration.
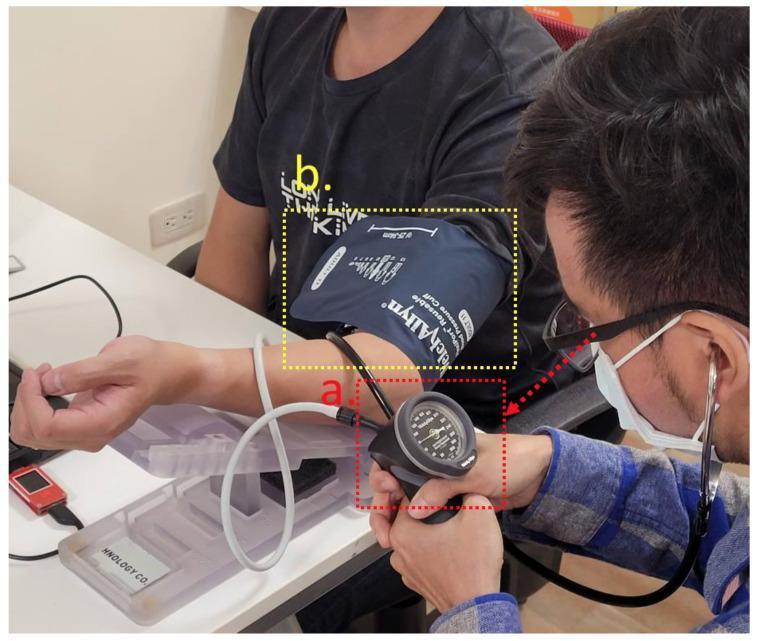
Clinical photograph demonstrating the auscultatory method of blood pressure measurement in a research or clinical setting. The image is divided into two highlighted sections: (a) shows a Welch Allyn DS66 aneroid sphygmomanometer, featuring a circular gauge with a black face and white numerical scale, connected to a black rubber inflation bulb held by a researcher. (b) displays a dark blue reusable adult blood pressure cuff (Welch Allyn) secured around the subject's left upper arm. A stethoscope chest piece is placed over the brachial artery beneath the distal edge of the cuff to detect Korotkoff sounds. The researcher is shown wearing the stethoscope and manually inflating the cuff. This visual illustrates the gold standard for non-invasive blood pressure monitoring used to validate novel pulse wave sensors and algorithms. Key educational concepts include proper cuff placement, manual sphygmomanometry technique, and clinical cardiovascular assessment.
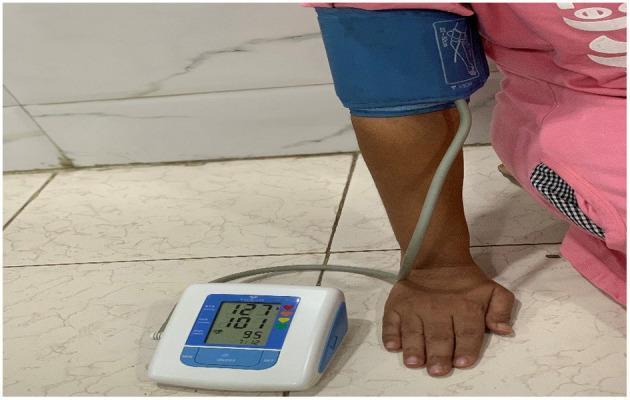
A clinical photograph demonstrating the measurement of vital signs using an automated digital sphygmomanometer on a human patient. The setup includes a blue inflatable compression cuff wrapped around the patient's upper arm, connected via flexible gray tubing to a portable digital monitor. The monitor features a liquid crystal display (LCD) showing three stacked numerical values: 127 (systolic pressure), 101 (diastolic pressure), and 95 (pulse rate), accompanied by colored heart icons and time indicators. This device is used for non-invasive blood pressure (NIBP) monitoring and pulse rate assessment, essential in evaluating cardiovascular health and risk factors such as hypertension. The patient is positioned with their arm resting on a flat surface to ensure accurate measurement levels. This visual represents standard clinical practice for gathering biometric data in both primary care and remote health monitoring settings.
sphygmomanometer labeled diagram components inflatable cuff manometer bulb valve
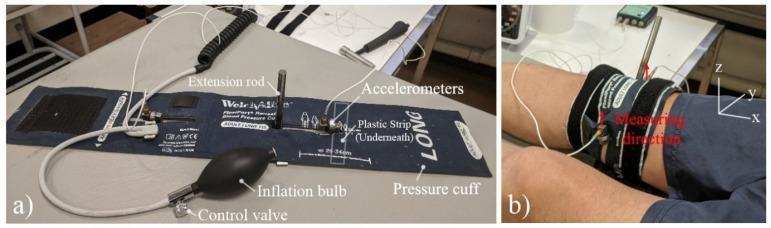
This procedural image illustrates a prototype diagnostic device designed for vibration-based assessment of bone stiffness and fracture healing. Figure (a) displays the device components: a standard inflatable pressure cuff integrated with a metal extension rod, two accelerometers, a plastic reinforcement strip, and an inflation bulb with a control valve. Figure (b) demonstrates the clinical application of the device on a human participant. The pressure cuff is secured around the distal femur, proximal to the knee joint. The accelerometers are positioned over the medial and lateral epicondyles to capture the modal response of the bone. A coordinate system indicates the 'Measuring direction' in the anterior-posterior orientation (positive z-direction). This setup is used to quantitatively measure the bone's vibration response to a mechanical impulse (e.g., from an impact hammer), providing a radiation-free, non-invasive method for monitoring orthopedic recovery. The focus is on orthopedic diagnostic technology and musculoskeletal biomechanics.
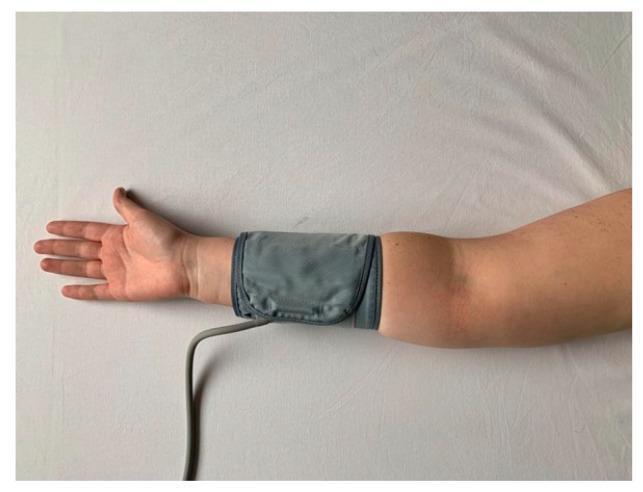
This clinical photograph demonstrates the distal placement of an inflatable blood pressure cuff on a human left forearm. The subject's arm is extended and supinated, with the palm facing upward. The gray fabric sphygmomanometer cuff is positioned distal to the antecubital fossa and proximal to the wrist. A flexible gray inflation tube is visible, extending from the distal margin of the cuff. This specific procedural setup is used in clinical research and vascular physiology to assess flow-mediated dilation (FMD). Distal cuff occlusion is a standardized technique intended to induce reactive hyperemia and investigate nitric oxide-dependent endothelial function in the brachial artery, contrasting with proximal occlusion models that may involve different vasoactive mechanisms. The skin surface is intact with no visible lesions, and the surrounding environment is a neutral white textile background, consistent with a controlled clinical or laboratory setting.
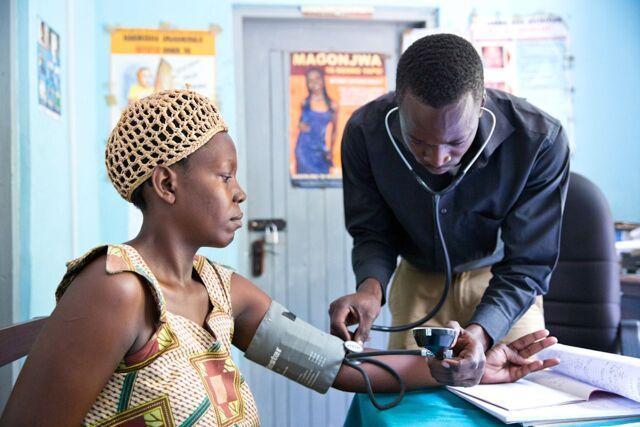
A clinical photograph depicting a healthcare provider, identified as a clinical officer, performing a physical assessment on a female patient in a community health facility. The primary activity shown is the measurement of arterial blood pressure using a manual aneroid sphygmomanometer and a stethoscope. The provider is seen adjusting the inflation bulb and observing the manometer gauge while the cuff is secured around the patient's left upper arm. The setting is a clinical workspace featuring health education posters (one labeled 'MAGONJWA') and medical documentation. This visual illustrates routine preoperative screening or vital sign monitoring within the context of reproductive health services, specifically related to assessing eligibility for surgical contraception such as tubal ligation. The image emphasizes clinical interactions and the use of basic diagnostic devices in primary care or rural healthcare settings.
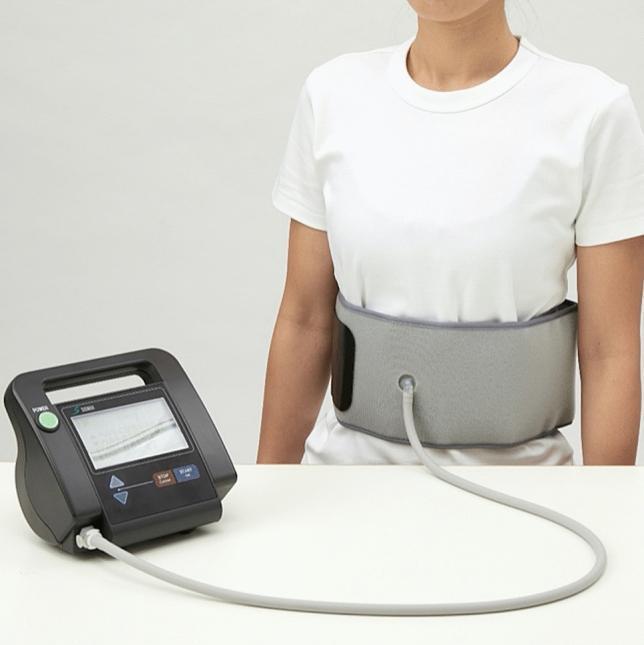
A clinical photograph of an innovative medical exercise device designed for abdominal trunk muscle strengthening and strength measurement. The setup consists of a wide, gray inflatable fabric cuff positioned around the subject's midsection and a black mechanical manometer resting on a flat surface. A flexible gray connecting tube links the cuff's anterior port to the manometer's base. The manometer features a digital screen displaying real-time pressure waveforms (measured in kPa), alongside a power button and operational controls. This device is utilized in physical therapy and rehabilitation settings to facilitate lumbar stabilization exercises and measure core muscle strength through intermittent abdominal contractions against baseline pressure. The system is particularly relevant for managing chronic lower back pain and improving spinal stability by activating the diaphragm, abdominal, and pelvic floor muscles without requiring painful spinal flexion or extension.
Sphygmomanometer - One Image Notes
Diagram
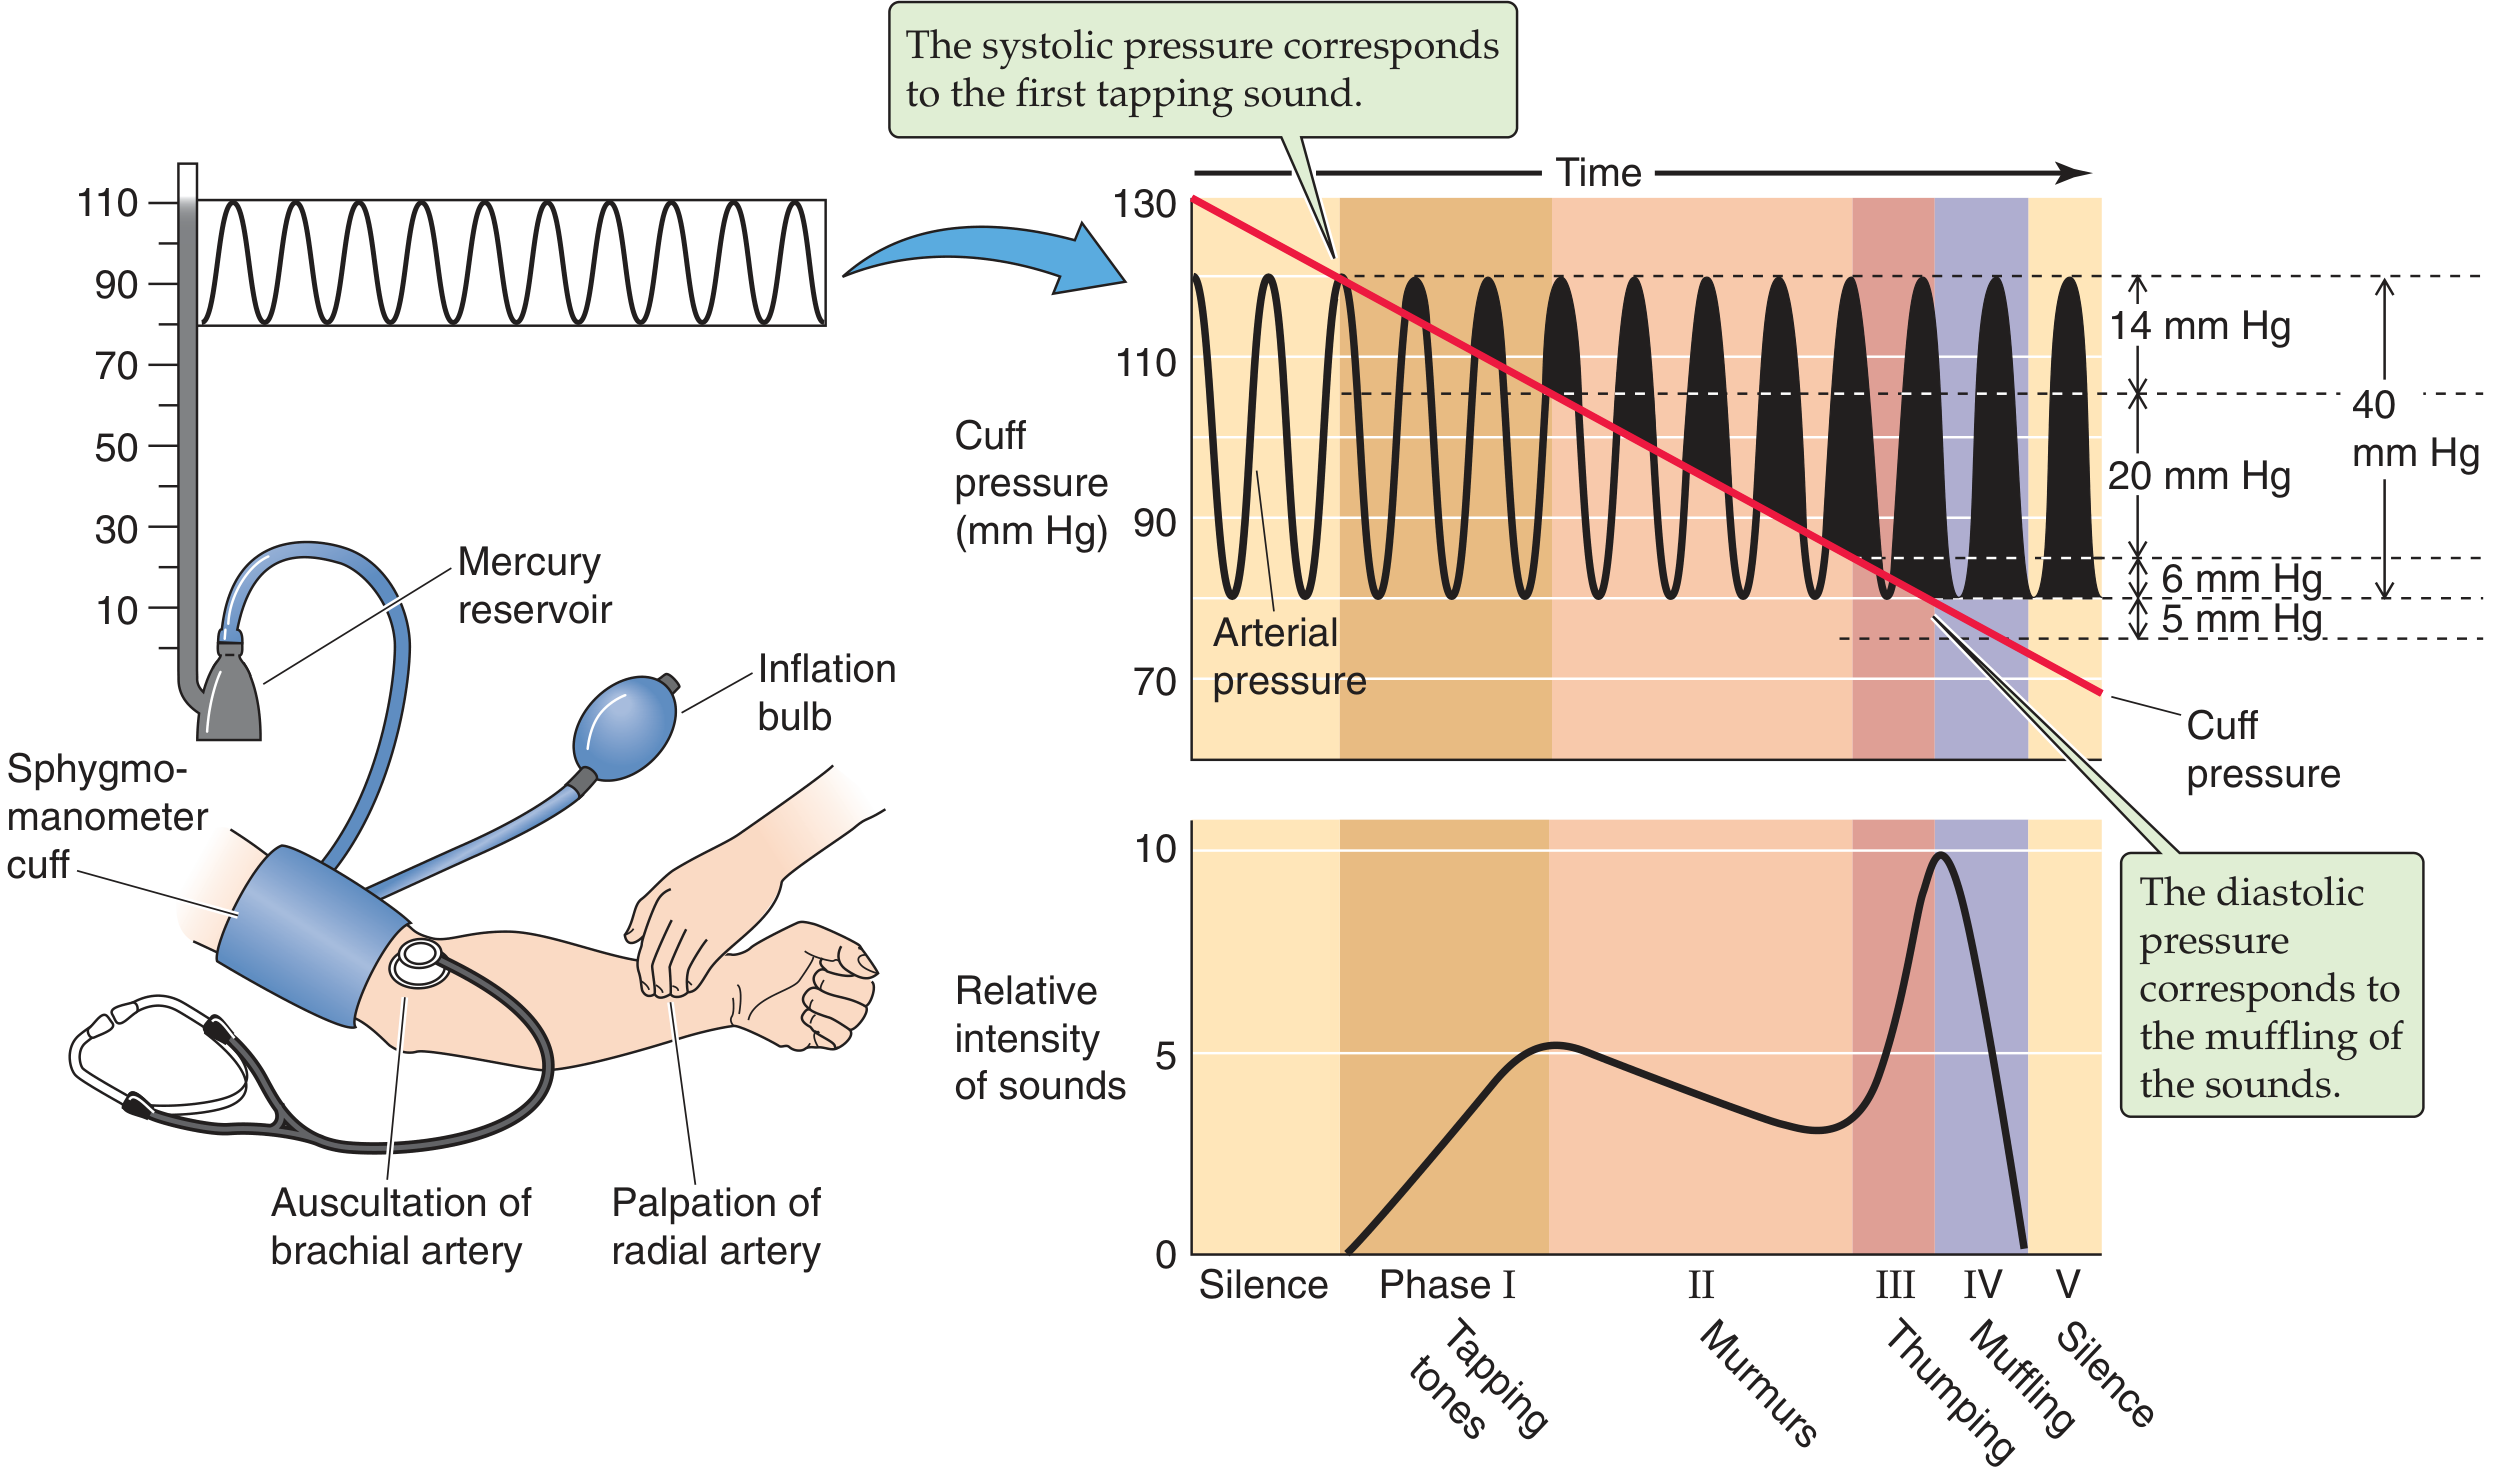
What is a Sphygmomanometer?
Parts
| Part | Function |
|---|---|
| Inextensible cuff | Wraps around the upper arm; contains an inflatable rubber bladder |
| Rubber squeeze bulb (inflation bulb) | Pumps air into the cuff to raise pressure |
| Release valve | Slowly deflates the cuff in a controlled manner |
| Manometer | Measures cuff pressure - either mercury (most accurate) or aneroid (dial-type) |
| Stethoscope | Placed over the brachial artery at the antecubital fossa to detect Korotkoff sounds |
Types
- Mercury sphygmomanometer - most accurate (gold standard); uses a mercury column; being phased out due to mercury toxicity
- Aneroid sphygmomanometer - uses a mechanical dial gauge; portable
- Digital (oscillometric) - automated; detects arterial wall oscillations; no stethoscope needed
Method of Blood Pressure Measurement
Two Methods:
- Cuff inflated above expected systolic pressure (brachial artery occluded, no sound)
- Cuff slowly deflated
- Stethoscope placed over brachial artery in antecubital fossa
- Korotkoff sounds detected
- Radial pulse is felt at the wrist
- Cuff deflated until pulse is just palpable = Systolic pressure only
- Slightly underestimates systolic pressure
Korotkoff Sounds (5 Phases)
| Phase | Sound | Clinical Significance |
|---|---|---|
| Phase I | Sharp tapping | = Systolic Pressure (first tap heard) |
| Phase II | Blowing / swishing murmur | Turbulent flow through narrowed artery |
| Phase III | Loud thumping | Louder turbulence |
| Phase IV | Muffled, softer | Approaching diastolic; continuous flow |
| Phase V | Silence (sounds disappear) | = Diastolic Pressure (most commonly used) |
Note: Phase IV (muffling) is used as diastolic in children, pregnant women, exercise, hyperthyroidism, and aortic regurgitation (where sounds may never disappear).
Reading Blood Pressure
- Systolic BP = cuff pressure at which Phase I tapping is first heard
- Diastolic BP = cuff pressure at which Phase V sounds disappear (or Phase IV muffling in special cases)
- Normal: <120/80 mmHg
Cuff Size Rules (AHA Guidelines)
- Bladder should be 20% wider than arm diameter
- Should extend at least halfway around the limb
- Centered over the artery
- Too small cuff = falsely HIGH reading
- Too large cuff = falsely LOW reading
- Special cuffs needed for: children, obese adults, thigh measurements
Errors / Pitfalls
| Error | Effect on BP |
|---|---|
| Cuff too small | Overestimates (falsely high) |
| Cuff too large | Underestimates (falsely low) |
| Arm above heart level | Underestimates |
| Arm below heart level | Overestimates |
| Deflating too fast | Underestimates systolic, overestimates diastolic |
| Auscultatory gap | False low systolic or false high diastolic (common in elderly/hypertensives) |
| Not supporting the arm | Isometric contraction raises BP |
Why Korotkoff Sounds Occur
Quick Memory Trick
"S = Systolic (first tap)" | "D = Diastolic (muffling/silence)"
Now translate this in Bengali
স্ফিগমোম্যানোমিটার - এক পৃষ্ঠায় নোটস
ডায়াগ্রাম
স্ফিগমোম্যানোমিটার কী?
যন্ত্রাংশ (Parts)
| যন্ত্রাংশ | কাজ |
|---|---|
| অপ্রসারণযোগ্য কাফ (Cuff) | বাহুর চারদিকে জড়ানো হয়; ভেতরে ফোলানো রাবারের থলি থাকে |
| রাবার স্কুইজ বাল্ব (Inflation Bulb) | কাফে বায়ু পাঠিয়ে চাপ বাড়ায় |
| রিলিজ ভাল্ব (Release Valve) | ধীরে ধীরে কাফের চাপ কমায় |
| ম্যানোমিটার (Manometer) | কাফের চাপ পরিমাপ করে - পারদ বা অ্যানেরয়েড (ডায়াল) ধরনের |
| স্টেথোস্কোপ (Stethoscope) | কনুইয়ের ভাঁজে ব্র্যাকিয়াল ধমনীর উপর রেখে Korotkoff শব্দ শোনা যায় |
প্রকারভেদ (Types)
- পারদ স্ফিগমোম্যানোমিটার - সবচেয়ে নির্ভুল (স্বর্ণমান); পারদ বিষাক্ততার কারণে বর্তমানে কম ব্যবহৃত
- অ্যানেরয়েড স্ফিগমোম্যানোমিটার - যান্ত্রিক ডায়াল গেজ ব্যবহার করে; বহনযোগ্য
- ডিজিটাল (অসিলোমেট্রিক) - স্বয়ংক্রিয়; ধমনীর প্রাচীরের কম্পন শনাক্ত করে; স্টেথোস্কোপ লাগে না
রক্তচাপ পরিমাপের পদ্ধতি
দুটি পদ্ধতি:
- কাফ প্রত্যাশিত সিস্টোলিক চাপের উপরে ফোলানো হয় (ব্র্যাকিয়াল ধমনী বন্ধ হয়, কোনো শব্দ নেই)
- কাফ ধীরে ধীরে ছাড়া হয়
- কনুইয়ের ভাঁজে (antecubital fossa) ব্র্যাকিয়াল ধমনীর উপর স্টেথোস্কোপ রাখা হয়
- Korotkoff শব্দ শোনা যায়
- কব্জিতে রেডিয়াল নাড়ি অনুভব করা হয়
- কাফ ছাড়তে থাকলে যখন প্রথম নাড়ি পাওয়া যায় = শুধুমাত্র সিস্টোলিক চাপ
- সিস্টোলিক চাপ সামান্য কম দেখায়
কোরোটকভ শব্দের ৫টি পর্যায় (Korotkoff Sounds)
| পর্যায় | শব্দ | ক্লিনিক্যাল গুরুত্ব |
|---|---|---|
| পর্যায় I | তীক্ষ্ণ টোকার শব্দ | = সিস্টোলিক চাপ (প্রথম টোকা শোনা যায়) |
| পর্যায় II | ফুঁ দেওয়া / শোঁ শোঁ শব্দ | সরু ধমনী দিয়ে অস্থির রক্ত প্রবাহ |
| পর্যায় III | জোরালো থাপ্পড়ের শব্দ | আরও জোরালো অস্থির প্রবাহ |
| পর্যায় IV | ম্লান, নরম শব্দ | ডায়াস্টোলিকের কাছাকাছি; ক্রমাগত প্রবাহ |
| পর্যায় V | নিঃশব্দ (শব্দ মিলিয়ে যায়) | = ডায়াস্টোলিক চাপ (সাধারণত ব্যবহৃত) |
বিশেষ দ্রষ্টব্য: শিশু, গর্ভবতী মহিলা, ব্যায়ামের পরে, হাইপারথাইরয়েডিজম এবং অ্যাওর্টিক রিগার্জিটেশনে - পর্যায় IV (ম্লান শব্দ) কে ডায়াস্টোলিক চাপ হিসেবে ধরা হয়।
রক্তচাপ পড়ার নিয়ম
- সিস্টোলিক BP = যখন পর্যায় I-এর টোকার শব্দ প্রথম শোনা যায় সেই কাফের চাপ
- ডায়াস্টোলিক BP = যখন পর্যায় V-এর শব্দ মিলিয়ে যায় সেই কাফের চাপ
- স্বাভাবিক মান: <১২০/৮০ mmHg
কাফের আকারের নিয়ম (AHA নির্দেশিকা)
- রাবারের থলি বাহুর ব্যাসের ২০% চওড়া হওয়া উচিত
- বাহুর অন্তত অর্ধেক পর্যন্ত মোড়ানো উচিত
- ধমনীর উপর কেন্দ্রে রাখতে হবে
- কাফ ছোট হলে = চাপ বেশি দেখাবে (মিথ্যা উচ্চ)
- কাফ বড় হলে = চাপ কম দেখাবে (মিথ্যা নিম্ন)
ভুল ও সমস্যাসমূহ (Errors & Pitfalls)
| ভুল | BP-তে প্রভাব |
|---|---|
| কাফ ছোট | অতিরিক্ত উচ্চ দেখায় |
| কাফ বড় | অতিরিক্ত কম দেখায় |
| বাহু হৃদয়ের উপরে | কম দেখায় |
| বাহু হৃদয়ের নিচে | বেশি দেখায় |
| খুব দ্রুত কাফ ছাড়া | সিস্টোলিক কম, ডায়াস্টোলিক বেশি দেখায় |
| শ্রবণ গ্যাপ (Auscultatory Gap) | মিথ্যা কম সিস্টোলিক বা মিথ্যা বেশি ডায়াস্টোলিক (বৃদ্ধ ও উচ্চ রক্তচাপের রোগীতে সাধারণ) |
| বাহু সাপোর্ট না করা | আইসোমেট্রিক সংকোচনে BP বাড়ে |