
How to put umbilical catheter in new born
Reading File
Now I'll search the medical library for umbilical catheter insertion content in parallel.
Finding Sources
Finding Sources
The Harriet Lane Handbook references Chapter 4 for umbilical catheter placement. Let me also check Roberts & Hedges (Emergency Procedures) and Pfenninger for the full procedural content.
Finding Sources
Finding Sources
Let me look at Chapter 4 in the Harriet Lane Handbook (block4) and the Pfenninger/Roberts chapters simultaneously.
Finding Sources
Reading File
The Pfenninger content was for suprapubic aspiration. Let me now read the correct sections: Harriet Lane block1 (G. Umbilical Artery and Umbilical Vein Catheterization) and block4 (B. Umbilical Lines).
Reading File
Reading File
Excellent content found. Let me continue reading block1 to get the UVC procedure and the image URL.
Reading File
I now have all the content needed. Let me fetch the key images to include in the response.
Loading Image
Loading Image
I now have everything needed for a comprehensive answer. Here is the full guide:
Umbilical Catheter Insertion in the Newborn
(Source: The Harriet Lane Handbook, 23rd ed., Chapter 4)
Overview: Two Types of Umbilical Catheters
| Feature | Umbilical Arterial Catheter (UAC) | Umbilical Venous Catheter (UVC) |
|---|---|---|
| Vessel | One of two small, thick-walled arteries | Single large, thin-walled vein |
| Primary use | BP monitoring, blood gas monitoring | Emergency vascular access, drug/fluid delivery |
| Tip position | High line: T6-T9 (preferred); Low line: L3-L4 | Inferior vena cava, above ductus venosus/hepatic veins, below right atrium |
| Direction of catheter | Aims toward feet initially (into iliac artery, then ascends aorta) | Aims toward right shoulder (immediately ascends) |
Indications
- Vascular access in critically ill neonates (via UVC)
- Blood pressure monitoring (via UAC)
- Blood gas monitoring (via UAC)
Contraindications
- Omphalitis
- Peritonitis
- Possible or confirmed necrotizing enterocolitis (NEC)
- Intestinal hypoperfusion
Complications
- Infection
- Bleeding or perforation of vessel
- Thrombosis with distal embolization
- Ischemia or infarction of lower extremities, bowel, or kidney
- Arrhythmia (if catheter tip reaches the heart)
- Air embolus
Catheter Length Calculation
Use either a shoulder-umbilical length graph or the birth weight (BW) regression formula:
- UAC high line (cm) = (3 × BW [kg]) + 9
- UVC length (cm) = 0.5 × UAC high line (cm) + 1
Example: 2 kg infant → UAC high line = (3×2)+9 = 15 cm; UVC = (0.5×15)+1 = 8.5 cm
Cord Anatomy
The cut cord contains 3 vessels: one large thin-walled vein (usually at 12 o'clock) and two smaller thick-walled arteries.
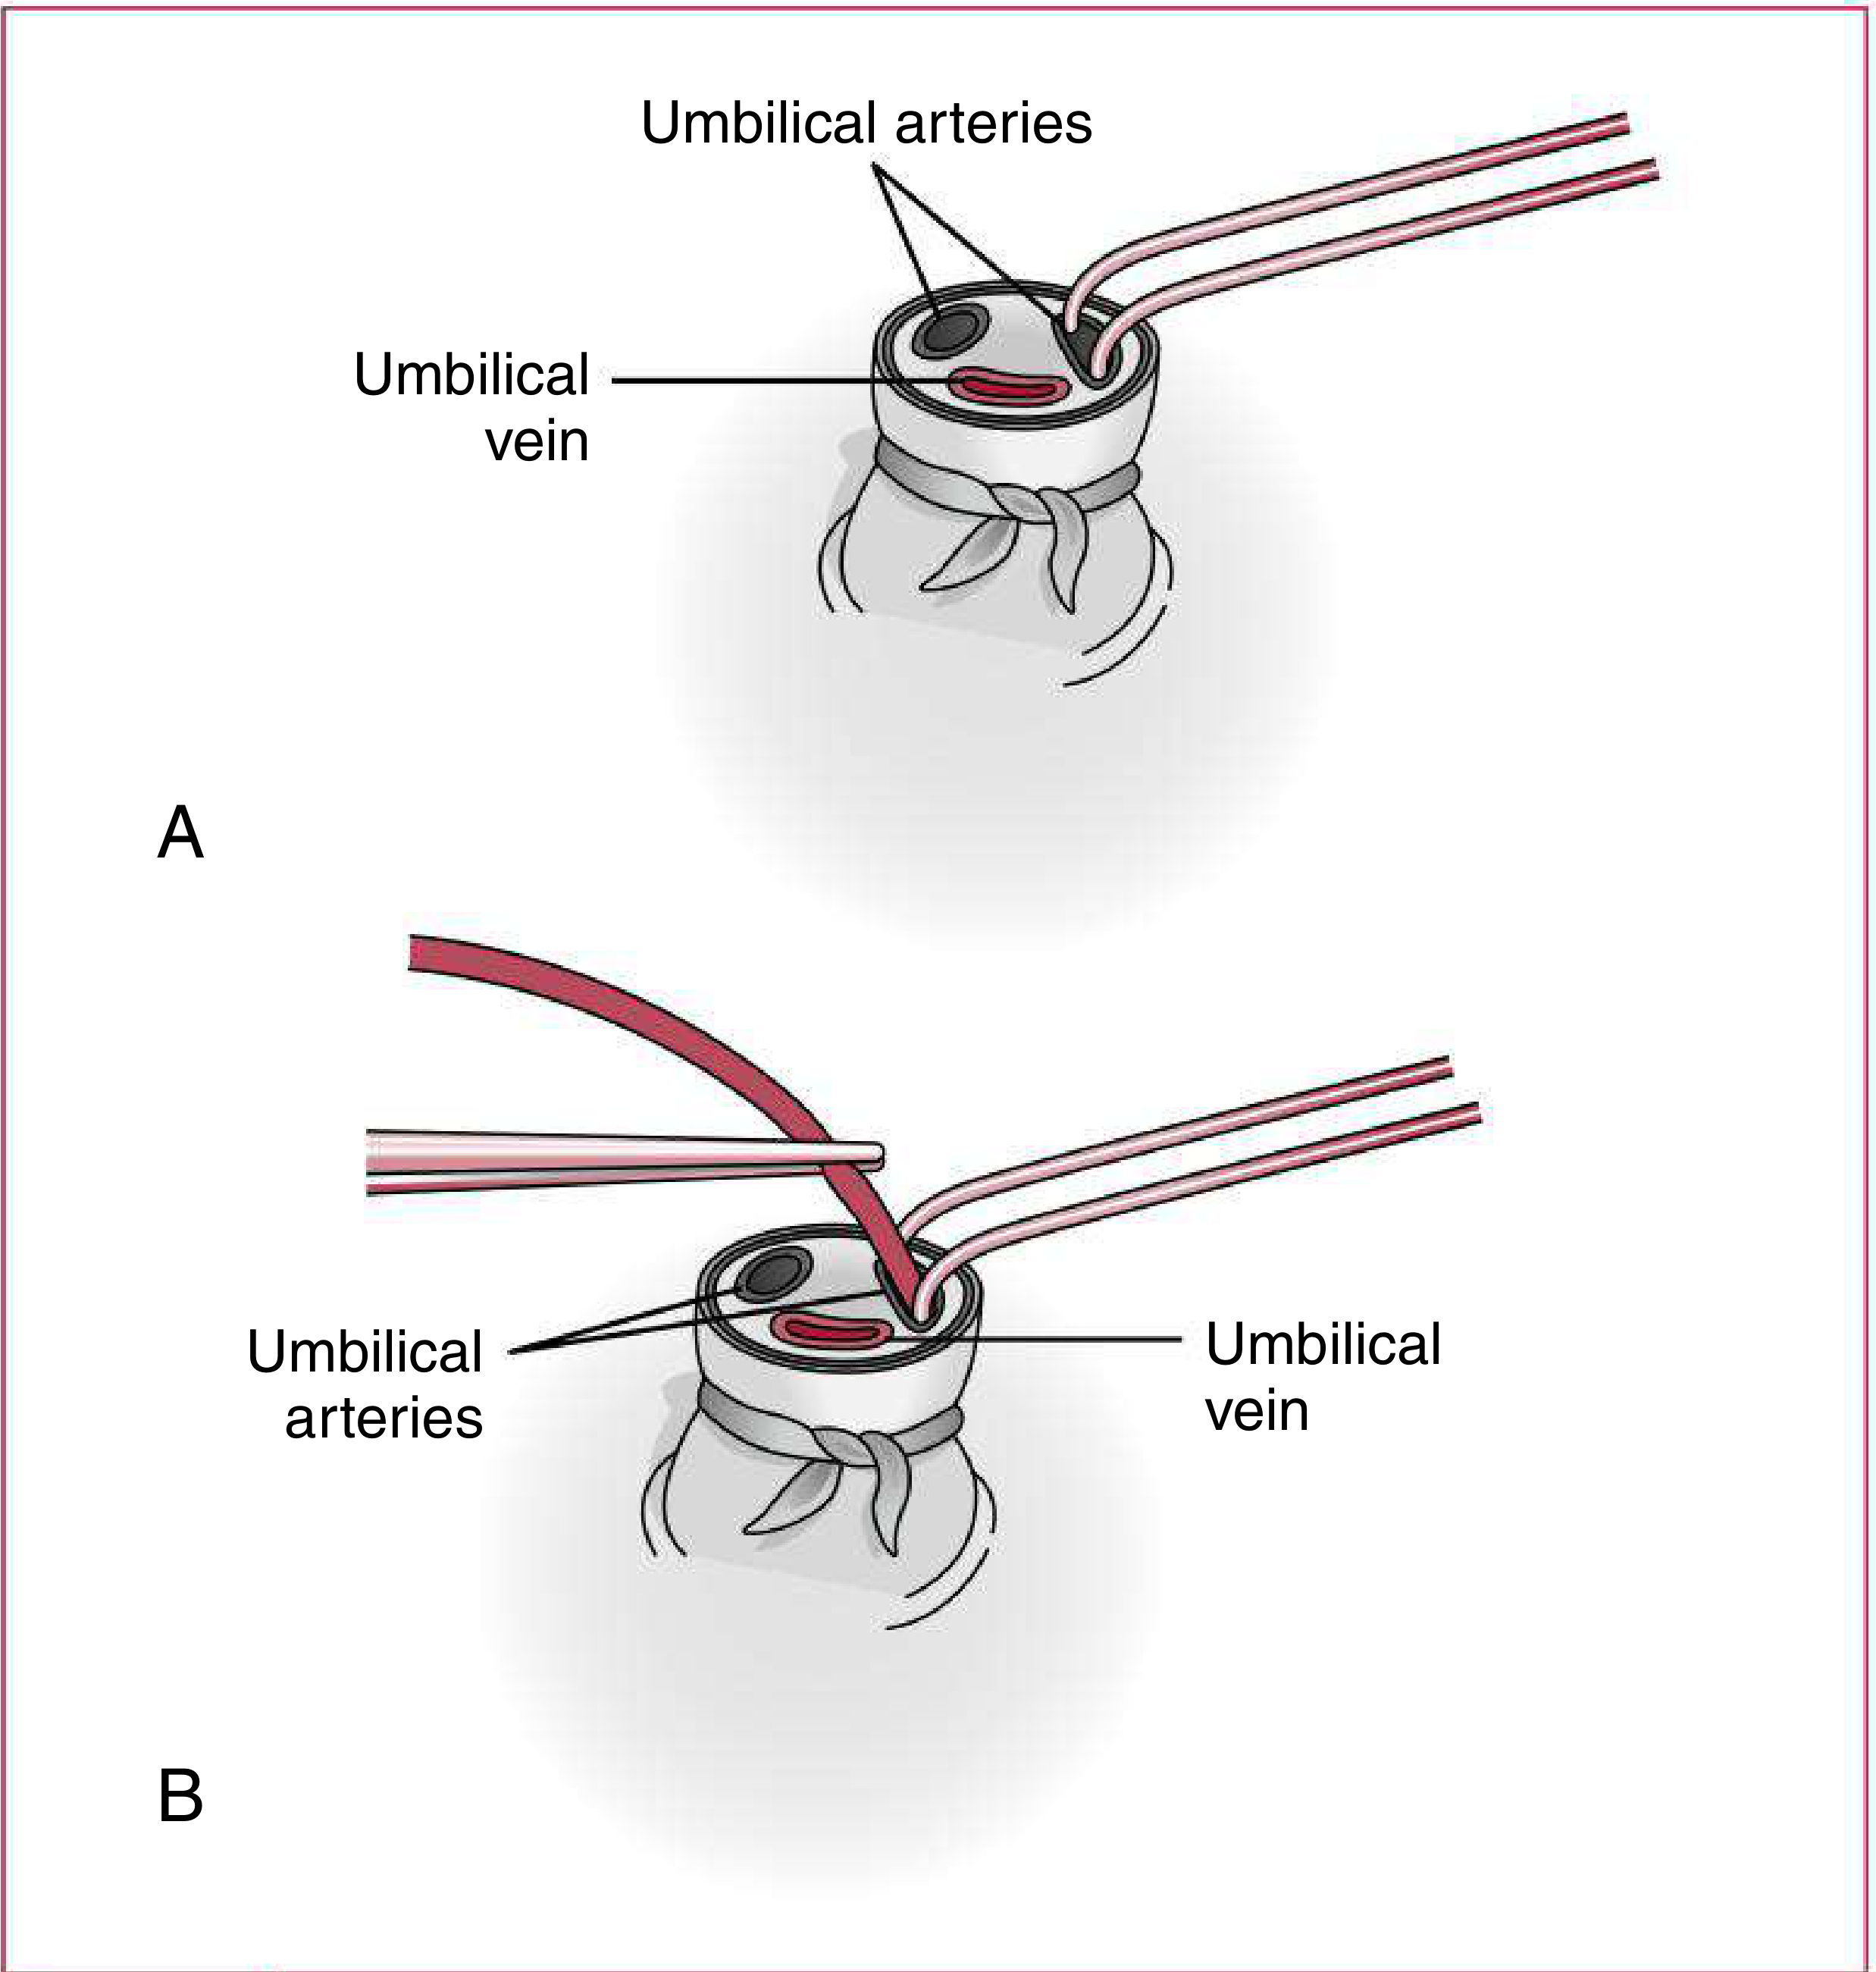
Fig 4.5 - (A) Dilating the umbilical artery lumen; (B) Inserting the catheter
UAC Insertion Procedure (Step by Step)
Step 1 - Calculate the length for high (T6-T9) or low (L3-L4) position.
Step 2 - Restrain the infant. Maintain temperature throughout. Prepare and drape the umbilical cord and adjacent skin using strict sterile technique.
Step 3 - Flush the catheter with sterile saline before insertion. Ensure no air bubbles are in the catheter or attached syringe.
Step 4 - Secure the cord base - Tie sterile umbilical tape around the base of the cord, tight enough to prevent bleeding. Cut the cord horizontally about 1.5-2 cm from the skin.
Step 5 - Identify vessels - Identify the 1 large thin-walled UV and 2 smaller thick-walled arteries.
Step 6 - Dilate the artery - Use one tip of open, curved forceps to gently probe and dilate one artery. Then use both points of closed forceps and dilate the artery by allowing forceps to open gently.
Step 7 - Insert catheter - Grasp the catheter 1 cm from its tip with toothless forceps. Insert into the artery lumen, aiming the tip toward the feet. Gently advance to the desired distance. Do not force.
- If resistance is encountered: loosen umbilical tape, apply steady gentle pressure, or manipulate the angle of the cord to the skin
- There should be good blood return when the catheter enters the iliac artery
- A "false luminal tract" is a common cause of resistance
Step 8 - Confirm position - Confirm catheter tip position with x-ray or ultrasound. Secure with a suture through the cord, a marker tape, and a tape bridge.
Important: The catheter may be pulled back but NOT advanced once the sterile field is broken.
Step 9 - Monitor for complications: blanching or cyanosis of lower extremities, perforation, thrombosis, embolism, or infection. Remove catheter if any occur.
Step 10 - Maintenance fluids - Use isotonic fluids containing heparin per institutional policy. Never use hypo-osmolar fluids in the UA.
UVC Insertion Procedure
Steps 1-4 are identical to UAC placement (calculate length, restrain, flush, cut cord, tie umbilical tape).
Step 5 - Isolate the thin-walled UV (the large single vessel). Clear any thrombi with forceps.
Step 6 - Insert the catheter, aiming toward the right shoulder. Gently advance to desired distance. Do not force.
- Resistance is commonly met at the abdominal wall and again at the portal system
- Do not infuse anything if the catheter tip is in the liver (hepatic necrosis risk)
Step 7 - Confirm position with x-ray or ultrasound. Secure as above.
Radiographic Confirmation
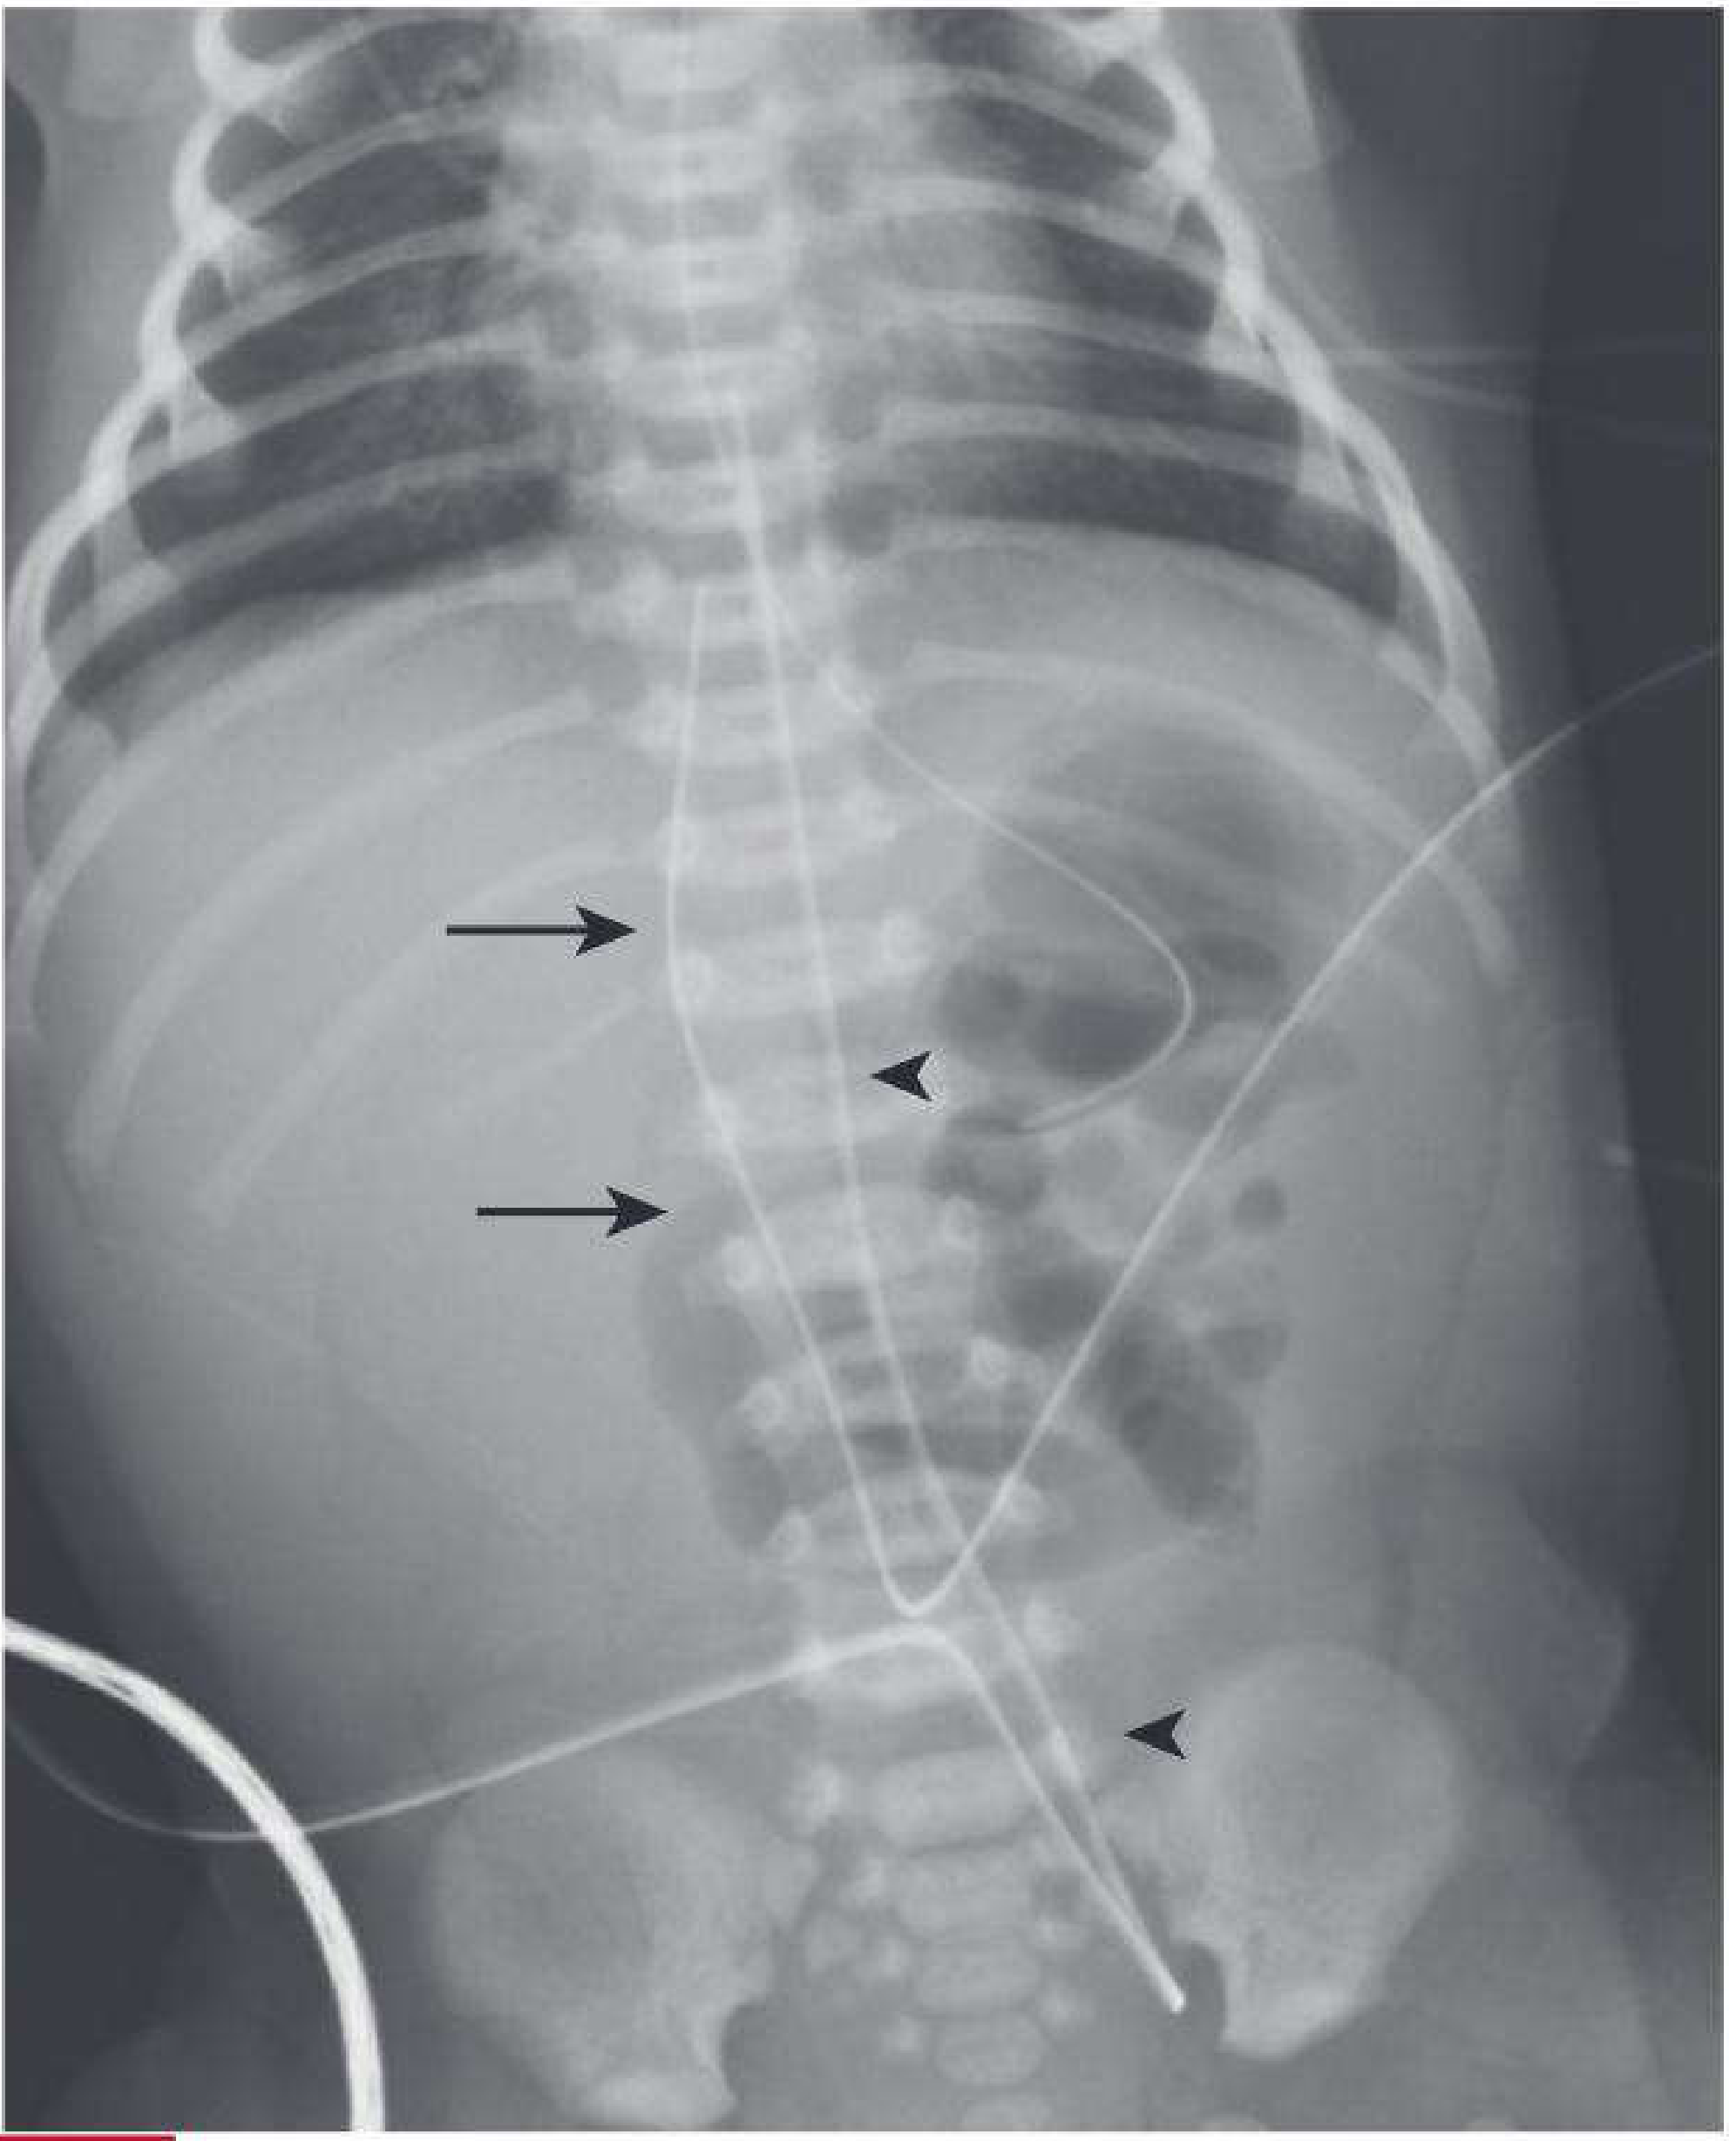
Fig 26.12 - UAC (arrowheads) first descends the iliac artery before ascending the aorta (classic "high" position at T7). UVC (arrows) terminates at the inferior cavo-atrial junction.
Key radiographic distinction:
- UVC - extends immediately superior (upward) from umbilicus; more anterior on lateral view
- UAC - takes an initial downward course into the internal iliac artery, then ascends into the common iliac artery and aorta
Quick Reference: Ideal Tip Positions
| Catheter | Ideal Tip |
|---|---|
| UAC high (preferred) | T6-T9 (above diaphragm) |
| UAC low | L3-L4 (just above aortic bifurcation) |
| UVC | Inferior vena cava at cavo-atrial junction |
- The Harriet Lane Handbook (Johns Hopkins Hospital), 23rd ed., pp. 120-121 and p. 908
This is a shared conversation. Sign in to Orris to start your own chat.