Lachmann test with diagram
Reading File
Finding Sources
Searching the Web
Lachmann test ACL diagram technique clinical examination
Reading File
Loading Image
Loading Image
Loading Image
Here is a complete overview of the Lachmann (Lachman) test, with diagrams from Campbell's Operative Orthopaedics 15th Ed.
Lachman Test
Purpose
The Lachman test is the preferred clinical test for ACL (anterior cruciate ligament) integrity. It is especially useful when the knee is swollen, painful, or has significant hamstring guarding - situations where the classic 90° anterior drawer test is unreliable.
Why Not the Anterior Drawer Test at 90°?
The diagram below explains the anatomical rationale:
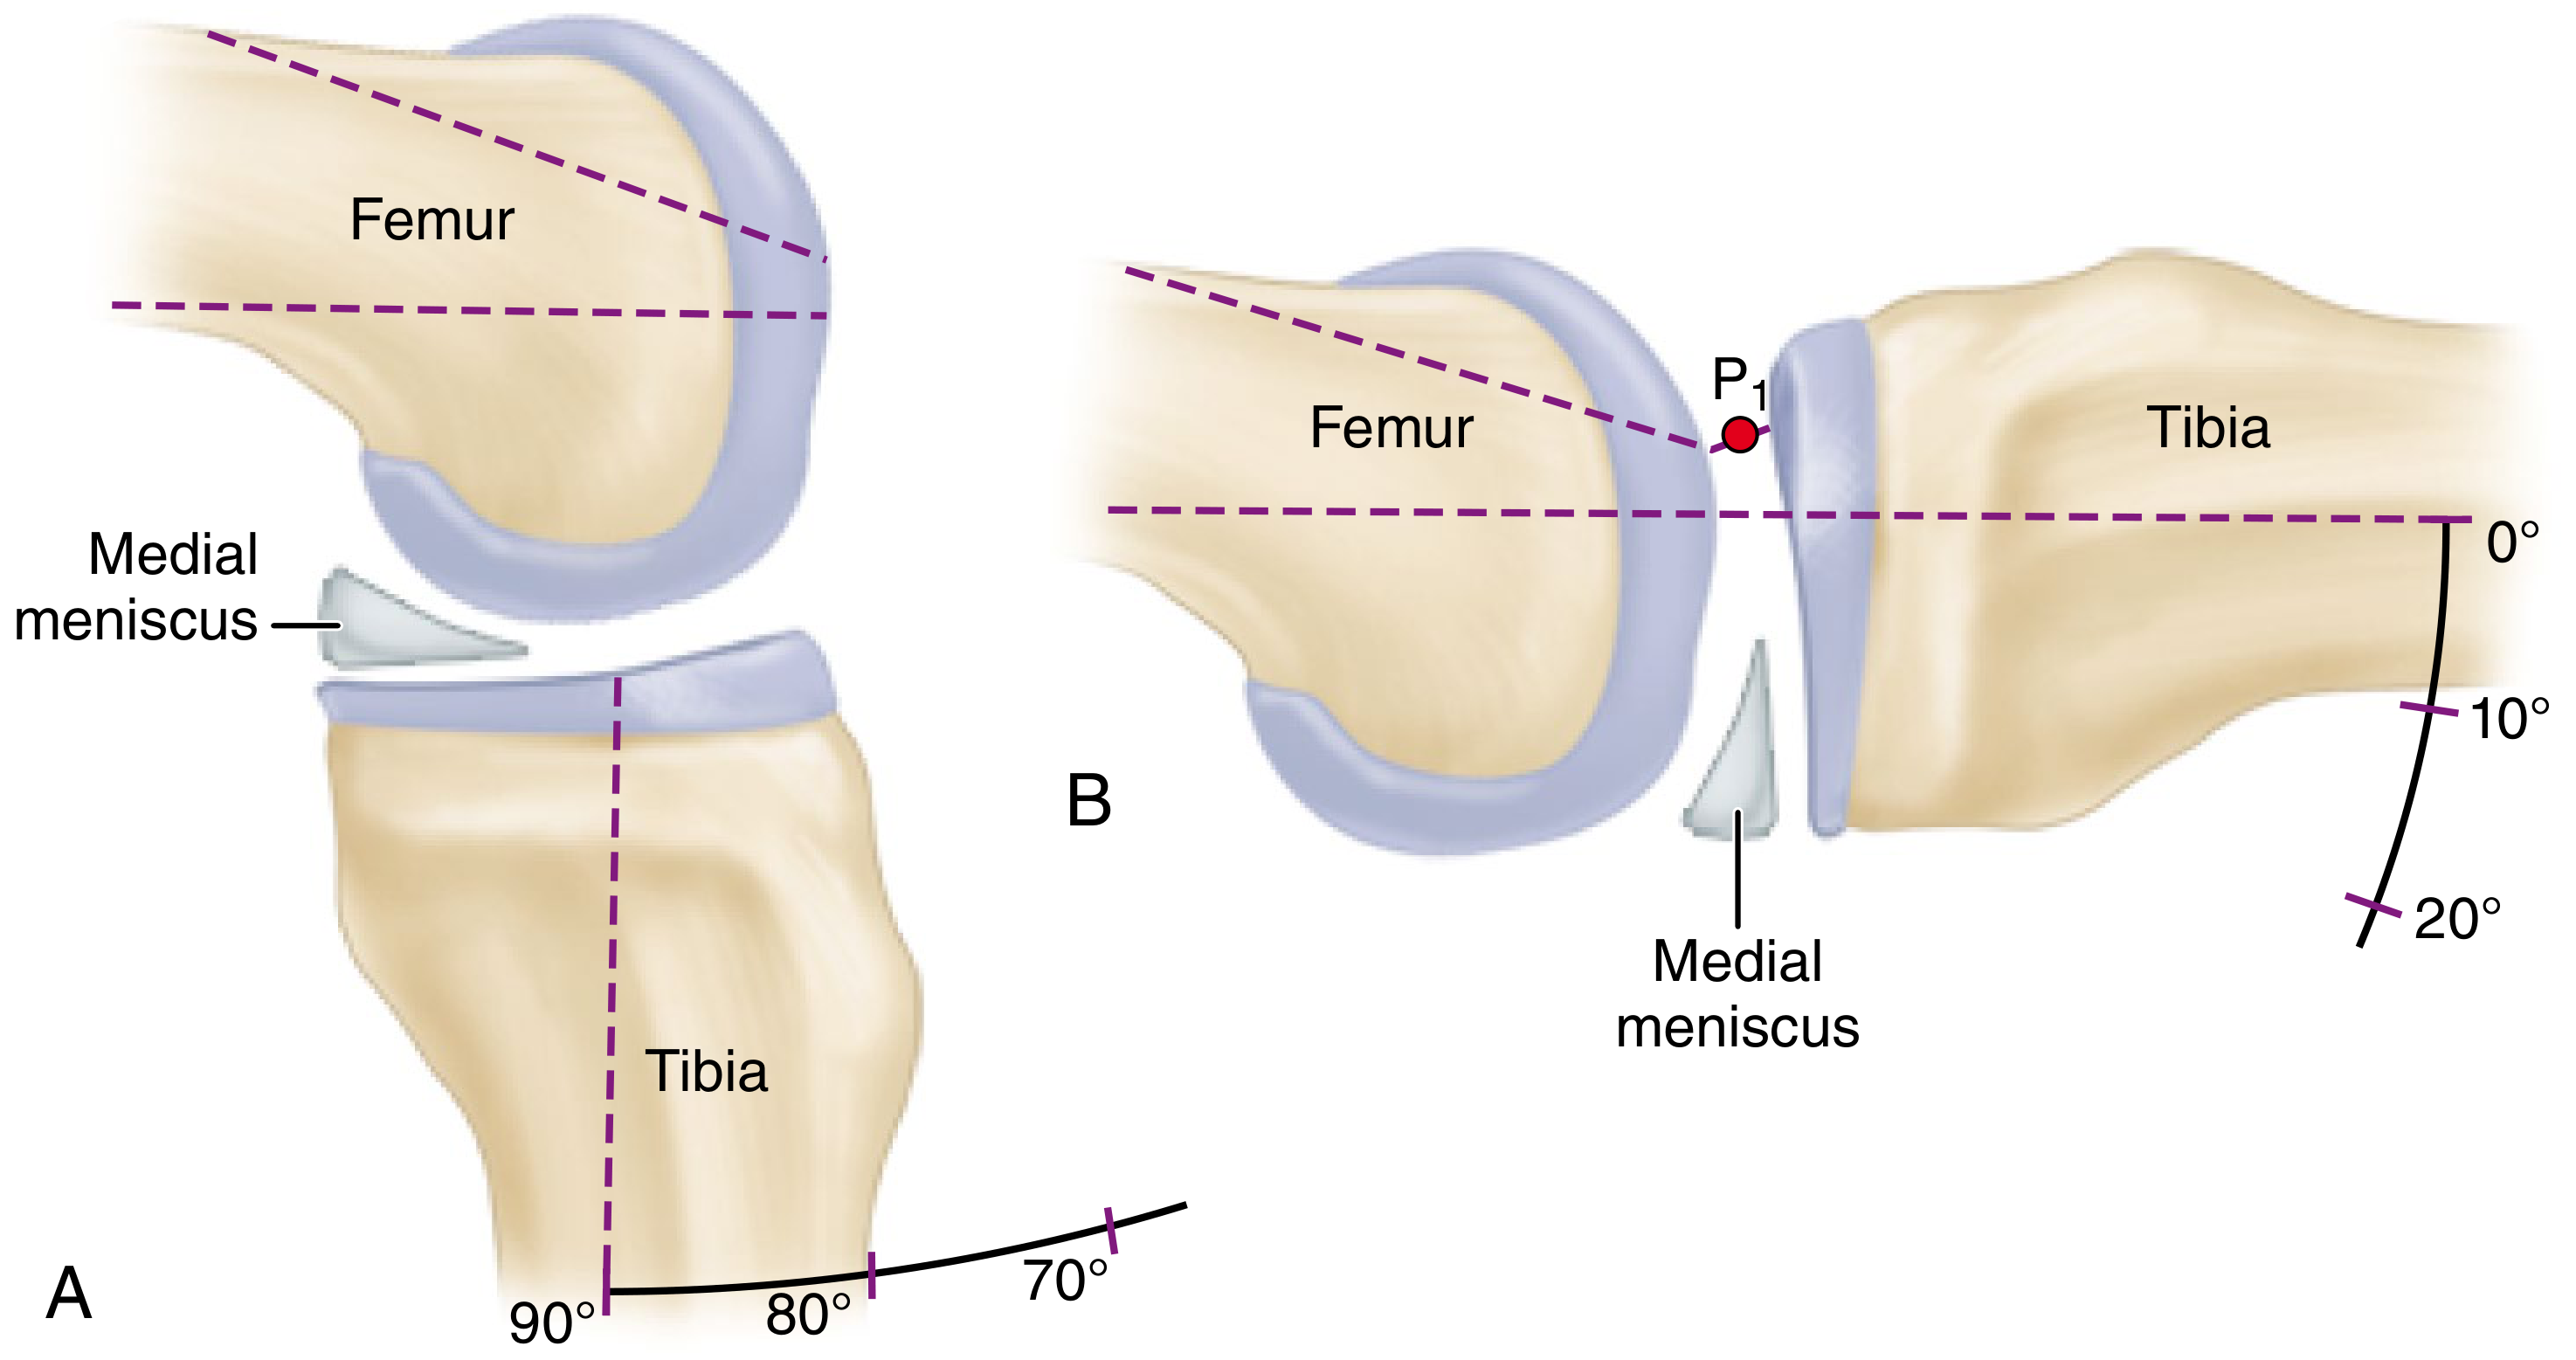
- A (90° flexion): The medial meniscus, being attached to the tibia, abuts against the acutely convex surface of the medial femoral condyle and has a "doorstop" effect - preventing or hindering anterior translation of the tibia. This is why the anterior drawer test can give false negatives.
- B (15-20° flexion): The comparatively flat weight-bearing surface of the femur does NOT obstruct forward motion of the meniscus and tibia when anterior stress is applied - making anterior tibial translation much more detectable.
How to Perform the Lachman Test
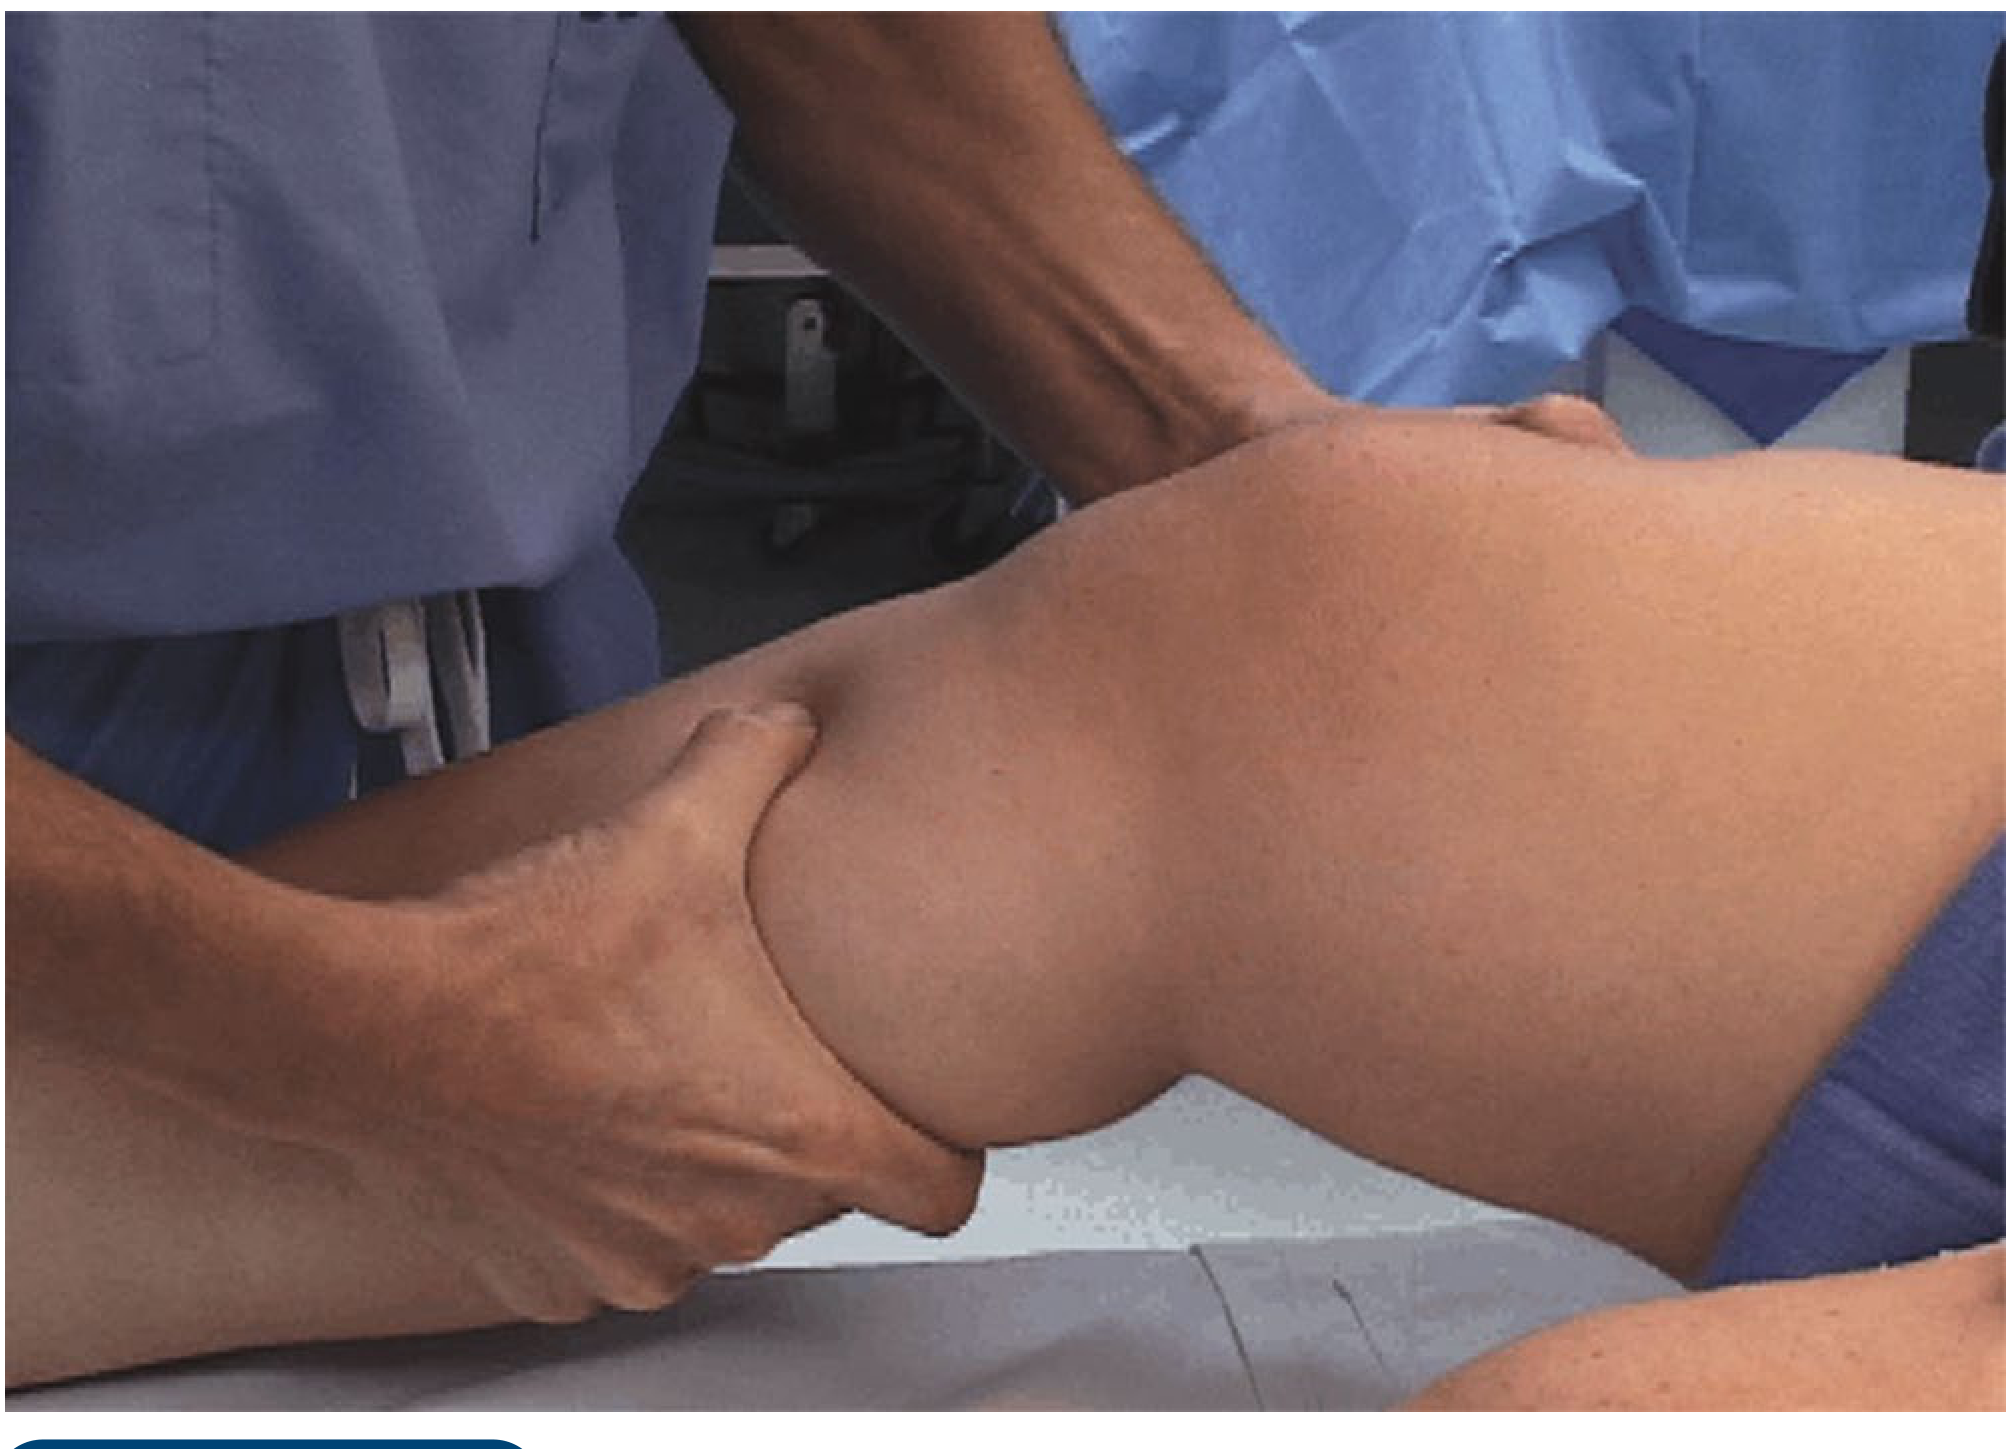
Patient position:
- Supine, relaxed on the examination table
- Involved extremity slightly externally rotated
- Knee flexed to 15-20 degrees (some sources say up to 30°)
Examiner hand placement:
- One hand firmly stabilizes the distal femur - fingers posteriorly palpating hamstring tension
- Other hand grips the proximal tibia with the thumb on the anteromedial joint line margin
Maneuver:
- Apply a firm anterior (lifting) force with the palm and fingers on the tibia
- Rapidly accelerate the tibia anteriorly (like snapping a 30 mm length of rope taut)
- The thumb on the anteromedial joint line palpates the degree of anterior tibial translation
Critical points:
- Hamstrings must be fully relaxed - any tension prevents anterior translation and causes false negatives
- The patient must be supine (not sitting - sitting rotates the pelvis and stretches the hamstrings)
- Palpate for hamstring relaxation with the femoral hand before pulling
Interpreting the Result
| Grade | Anterior Translation (vs. contralateral knee) | End Point |
|---|---|---|
| Grade 1A | 1-5 mm | Firm/hard |
| Grade 1B | 1-5 mm | Soft |
| Grade 2A | 6-10 mm | Firm/hard |
| Grade 2B | 6-10 mm | Soft |
| Grade 3A | >10 mm | Firm/hard |
| Grade 3B | >10 mm | Soft |
Positive test: Anterior translation of tibia with a soft end point = ACL tear.
A hard/firm end point suggests the ACL is intact (or partially intact). The feel of the end point is often more diagnostically important than the absolute amount of translation.
Sensitivity & Specificity
The Lachman test is the most sensitive clinical test for ACL injury:
- Sensitivity: ~85-98%
- Specificity: ~94-99%
It outperforms the anterior drawer test, particularly in the acute setting with pain and swelling.
Why It Works - Anatomy
The ACL runs from the anterior intercondylar area of the tibia, passing posteriorly, laterally, and upward to attach on the medial side of the lateral femoral condyle. Its primary function is to prevent forward sliding of the tibia on the femur and resist hyperextension. At 15-20° of flexion, the ACL is the primary restraint to anterior tibial translation, so its absence is immediately detectable.
Source: Campbell's Operative Orthopaedics, 15th Ed. (2026), Chapter 50
This is a shared conversation. Sign in to Orris to start your own chat.