
gastrectomy steps with explaination
gastrectomy surgical steps stomach resection
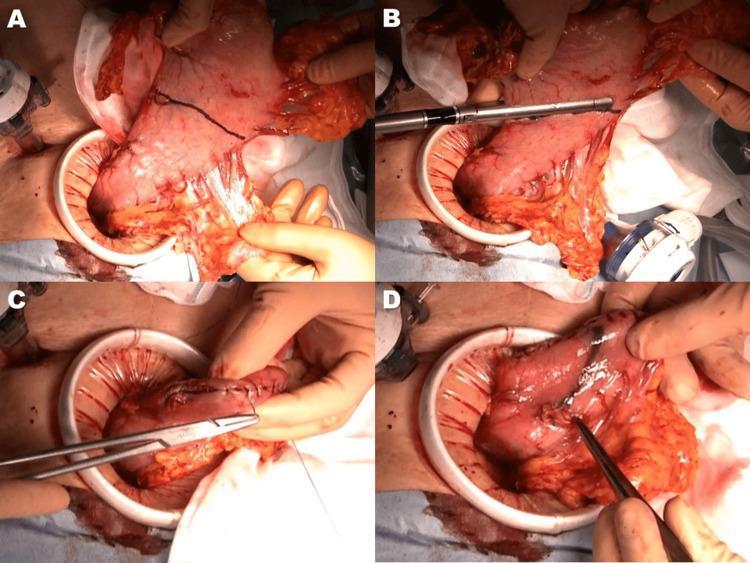
A series of four clinical photographs (A-D) demonstrating the intraoperative steps of a proximal gastrectomy and remnant stomach preparation. Panel A shows the stomach exteriorized through a mini-laparotomy incision, with the intended transection line marked across the corpus using Gentian Violet ink. Panel B illustrates the application of an endoscopic linear stapler along the marked line to achieve gastric transection. Panel C depicts the subsequent reinforcing of the stapled stump of the remnant stomach with seromuscular hand-sewn sutures using a needle driver. Panel D shows the creation of a small enterotomy on the anterior wall of the remnant stomach, located approximately 45 mm distal to the proximal stump, to facilitate subsequent esophagogastric reconstruction. The images highlight surgical techniques for gastric cancer management, focusing on resection margins and preparation for anastomosis. Key landmarks include the greater and lesser curvatures of the stomach and the surrounding omental tissue.
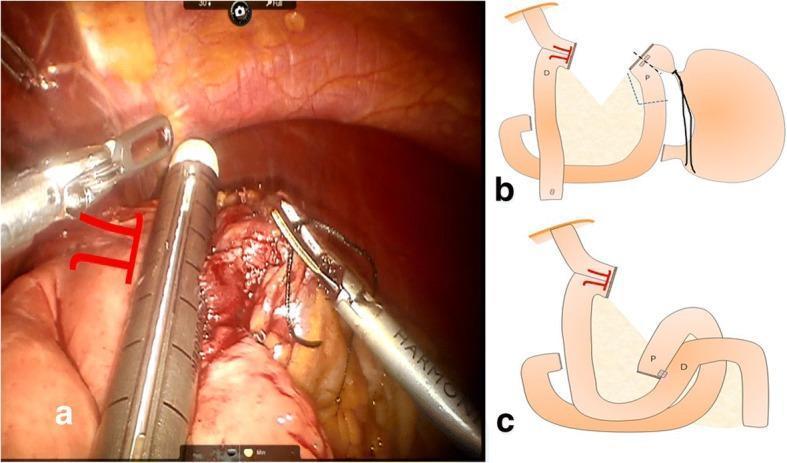
Educational medical composite depicting steps of an intracorporeal esophagojejunostomy following total gastrectomy. Figure A is a clinical laparoscopic photograph showing a 60-mm linear stapler being fired to convert two enterotomies into a single common entry hole, facilitating a functional end-to-end esophagojejunal anastomosis. Surgical graspers are visible manipulating the esophagus and jejunal limb, which is marked with red surgical dye. Figure B is a schematic diagram illustrating the resection phase, showing the stomach being detached along a primary resection line (black) and an optional proximal jejunal resection line (blue). Figure C is a schematic of the reconstructive phase, specifically a side-to-side jejunojejunostomy. Labels 'P' (proximal) and 'D' (distal) indicate the orientation of the bowel loops. The diagrams highlight the 'π-shaped' configuration of the anastomosis. This content is designed for surgical education regarding robotic-assisted or laparoscopic gastric bypass and oncological reconstruction techniques.
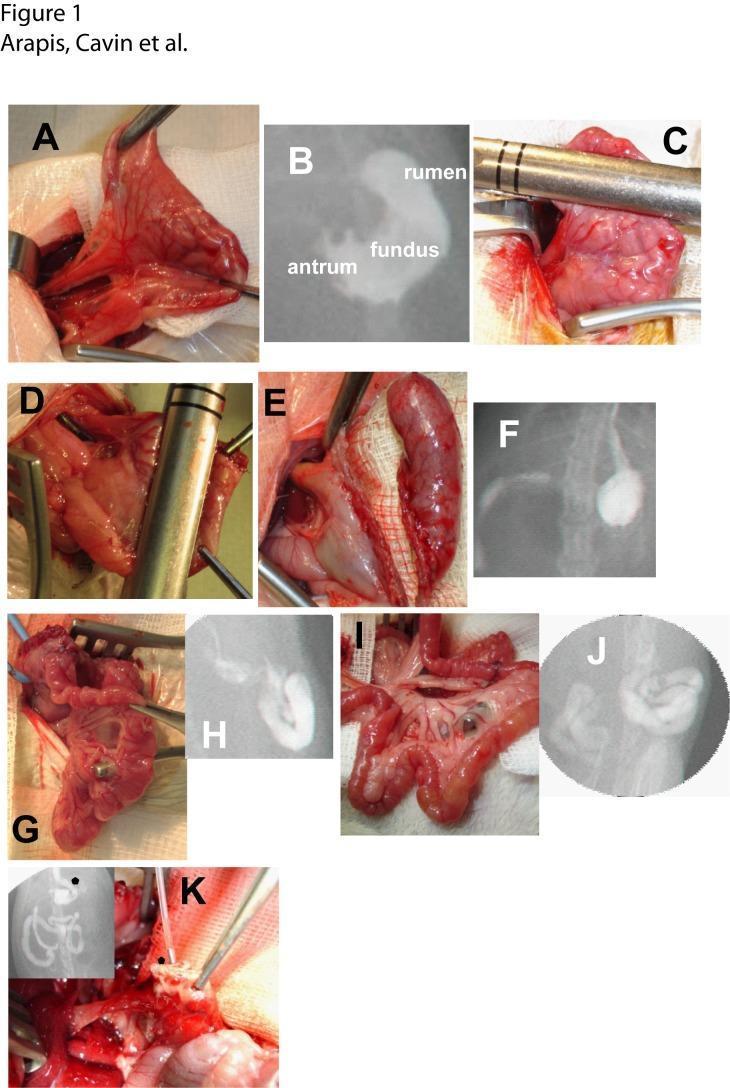
This composite figure illustrates the surgical steps and radiological outcomes of Vertical Sleeve Gastrectomy (VSG) and Roux-en-Y Gastric Bypass (RYGB) procedures using a rat model. (A-B) Baseline anatomy of the stomach, identifying the rumen (forestomach), fundus, and antrum via clinical photography and contrast radiography. (C-E) Intraoperative VSG steps demonstrating the use of a metallic staple gun for vertical resection of the rumen and fundus to reduce gastric volume. (F) Post-VSG radiography showing a tubularized gastric pouch. (G-J) RYGB procedure, including the creation of a small gastric pouch, gastro-jejunal anastomosis (G, H), and end-to-lateral jejuno-jejunal anastomosis (I, J) to form the alimentary limb, verified by contrast opacification. (K) Macroscopic necropsy view and radiographic insert (star) depicting a gastric fistula, a significant post-operative complication. The visual material details bariatric surgical techniques, gastrointestinal anastomotic structures, and radiographic verification of altered anatomy and complications such as leaks.
This composite of four laparoscopic intraoperative clinical photographs (A-D) illustrates key steps in a bariatric/metabolic surgical procedure, specifically a sleeve gastrectomy followed by a duodenoileal anastomosis. Panel A shows the initial duodenal transection using a linear surgical stapler distal to the pylorus. Panel B demonstrates the sequential firing of a laparoscopic linear stapler along the greater curvature of the stomach to create the gastric sleeve, with visible staple lines and gastric tissue compression. Panel C depicts the first row of a manual or stapled duodenoileal anastomosis, showing the approximation of the proximal duodenum to a loop of ileum. Panel D displays the final aspect of the end-to-side duodenoileal anastomosis, characterized by a secure, sutured junction between the digestive segments with healthy, well-perfused tissue margins and minimal surgical bleeding. The images highlight critical anatomical landmarks including the pyloric region, duodenum, and ileum, emphasizing surgical techniques for tissue resection and reconstruction in laparoscopic gastrointestinal surgery.
Billroth gastrectomy reconstruction anastomosis diagram
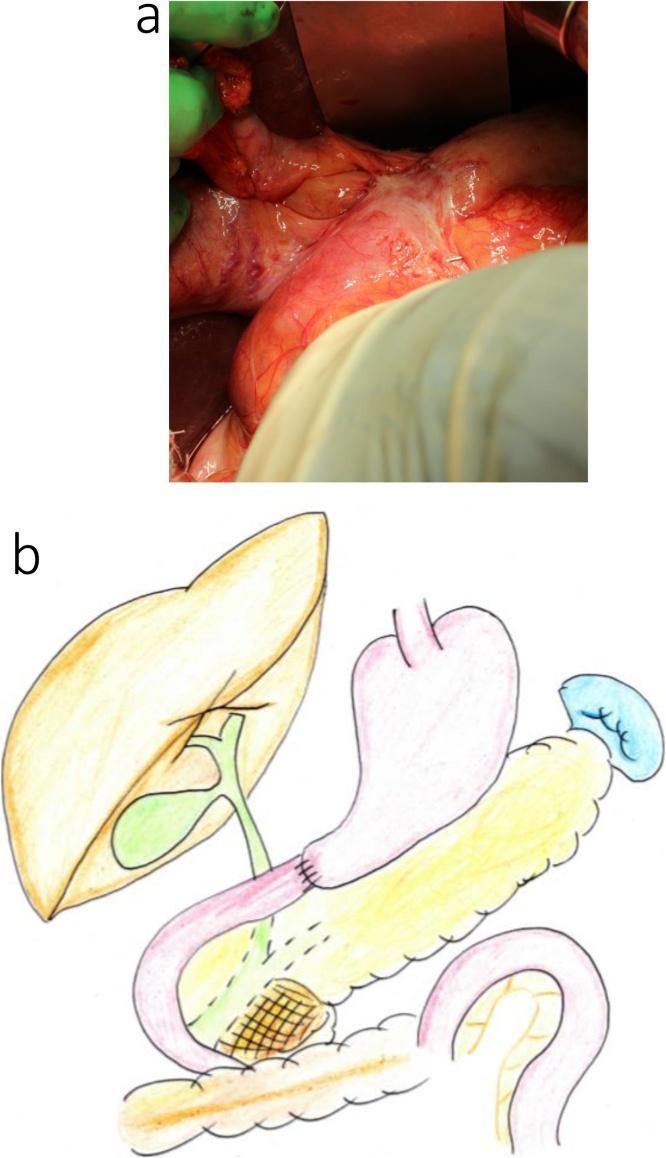
This composite educational material consists of an intraoperative clinical photograph (6a) and a corresponding surgical anatomical diagram (6b) illustrating a complex abdominal surgical revision. Image 6a displays the intraoperative findings in a patient with a prior Billroth II gastric reconstruction, specifically highlighting significant adhesions and fibrotic tissue at the site of the gastrojejunal anastomosis. The surgical field shows the interface between the stomach remnant and the jejunal loop with visible scar tissue and anatomical distortion. Diagram 6b provides a schematic representation of the upper gastrointestinal anatomy, including the liver, biliary tree, stomach, and pancreas. A red line in the diagram demarcates the intended excision range for a subtotal stomach-preserving pancreatoduodenectomy (SSPPD). This boundary indicates the planned resection of the previous gastrojejunal anastomosis and the pancreatic head to address a secondary pathology (IPMN). The visual set demonstrates the challenges of reoperative abdominal surgery, specifically the management of previous anastomotic sites and the planning of complex biliary-pancreatic reconstructions in the setting of prior gastrectomy.
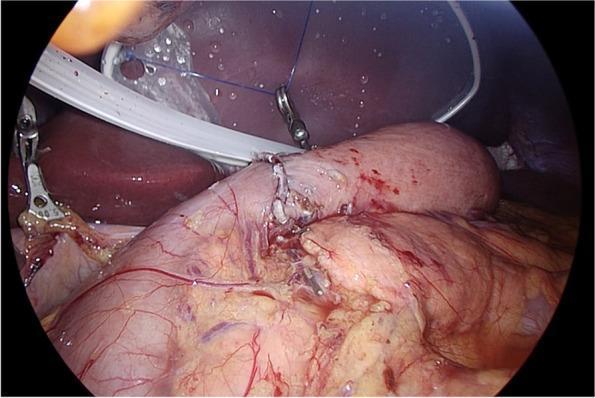
This laparoscopic clinical photograph illustrates a Billroth I reconstruction featuring a delta-shaped anastomosis. The image shows the surgical joining of the remnant stomach and the duodenum following a partial gastrectomy. The anastomosis site is centrally located, characterized by a visible line of interrupted blue sutures and metallic surgical clips that approximate the pink, vascularized tissue edges. To the left, a metallic surgical grasper is seen manipulating the tissue, while a white stabilization device or retractor is positioned superiorly. The surrounding anatomy includes the liver (dark red/brown organ) and omental fat. This image demonstrates the intraoperative appearance of a functional gastrointestinal anastomosis, focusing on tissue viability, suturing technique, and the use of mechanical stapling/clipping devices in oncological gastric surgery.
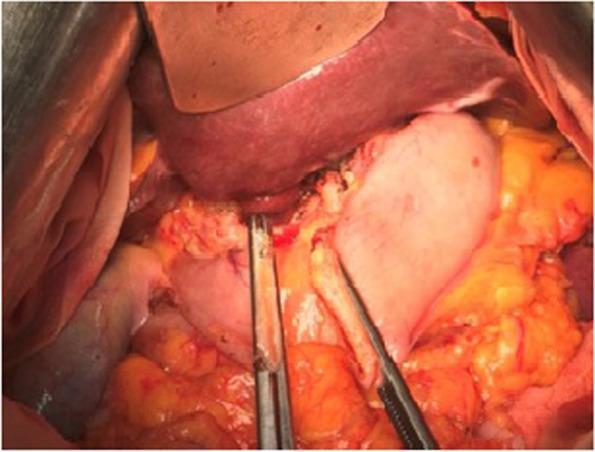
This clinical photograph shows an intraoperative open view of a surgical field during a Billroth I (B1) gastroduodenostomy, a common reconstruction technique following a distal subtotal gastrectomy. The liver is visible at the top of the field, retracted superiorly to provide access. Below the liver, the gastric stump is being prepared for anastomosis. Surgical clamps and forceps are seen manipulating the stomach and duodenal tissues to ensure proper alignment and tension-free connection. The surrounding area shows visceral fat (omentum) and evidence of surgical dissection, including minor hemostatic changes. The image illustrates the anatomical relationship between the gastric remnant and the duodenum in the upper abdomen. This visual is typical for educational materials focused on gastrointestinal surgical oncology, specifically the management of tumors located in the lower-third or antral segment of the stomach where distal resection is indicated.
Gastrectomy - Surgical Steps with Explanation
Overview
- Total gastrectomy - entire stomach removed (proximal, mid, or diffuse tumours)
- Subtotal (distal) gastrectomy - distal 4/5 of stomach removed, proximal remnant preserved (distal tumours)
- Proximal gastrectomy - upper stomach removed (small GEJ tumours)
Pre-operative Preparation
- Staging workup: CT chest/abdomen/pelvis, endoscopy with biopsy, PET scan if indicated
- Nutritional optimisation (many patients are malnourished)
- ERAS (Enhanced Recovery After Surgery) protocol initiation - carbohydrate loading, DVT prophylaxis, antibiotic cover
- Patient positioned supine, general anaesthesia with endotracheal intubation
- Urinary catheter and IV access secured
Step 1: Incision and Abdominal Entry
Why: The upper midline incision gives direct access to the entire upper abdomen, is faster to open and close, and causes less postoperative pain compared to subcostal incisions.
Step 2: Abdominal Exploration
- All peritoneal surfaces checked for metastatic deposits
- Liver surface palpated and inspected for metastases
- Extent of primary tumour assessed for local invasion
Why: This is the final staging step. If distant metastases or unresectable disease are found, the plan may switch to palliative intent or be abandoned. Skipping this step risks an unnecessary radical resection.
Step 3: Greater Curvature Mobilization
- The left gastroepiploic vessels (branch of the splenic artery/vein) are identified and divided near their origin
- The short gastric vessels (connecting stomach to spleen) are individually ligated and divided
- Dissection proceeds rightward along the greater curvature
- The right gastroepiploic vessels are ligated and divided at their origin (infrapyloric mobilization)
- The subpyloric lymph node group (station 6) is included with the specimen
Why: This step frees the entire greater curvature and separates the stomach from the transverse colon. Dividing vessels at their origin maximises lymph node clearance (oncological principle). Modern data support omental preservation rather than total omentectomy, as it gives equivalent oncologic results with less blood loss and shorter operative time.
Step 4: Lesser Curvature (Suprapyloric) Mobilization
- The lesser omentum (hepatogastric ligament) is opened
- The right gastric artery is identified arising from the proper hepatic artery and divided at its origin (suprapyloric dissection)
- The suprapyloric lymph nodes (station 5) are cleared with the specimen
Why: This exposes the hepatoduodenal ligament and porta hepatis for the subsequent lymph node dissection, and fully mobilises the pyloric region.
Step 5: Duodenal Transection
Why: Transecting the duodenum early in the operation gives better access to the posterior dissection plane and enables the lymphadenectomy. The duodenal stump is left closed; reconstruction will be performed later.
Step 6: D2 Lymphadenectomy
| Station | Location | Vessels Involved |
|---|---|---|
| 7 | Left gastric artery nodes | Left gastric a./v. |
| 8 | Common hepatic artery nodes | Common hepatic a. |
| 9 | Celiac axis nodes | Celiac trunk |
| 11 | Splenic artery nodes | Splenic a. |
| 12 | Porta hepatis nodes | Portal vein / hepatic a. |
| 10 | Splenic hilum nodes | Splenic hilum vessels |
- The peritoneum over the superior porta hepatis is divided from right to left
- Nodal tissue is swept off the proper and common hepatic arteries
- The left gastric artery is identified and suture-ligated at its origin from the celiac axis - this is the dominant blood supply to the stomach and its ligation is the key vascular step
- The left gastric vein is ligated at its confluence with the portal/splenic vein
- Nodes along the proximal splenic artery (station 11) are swept cephalad and included
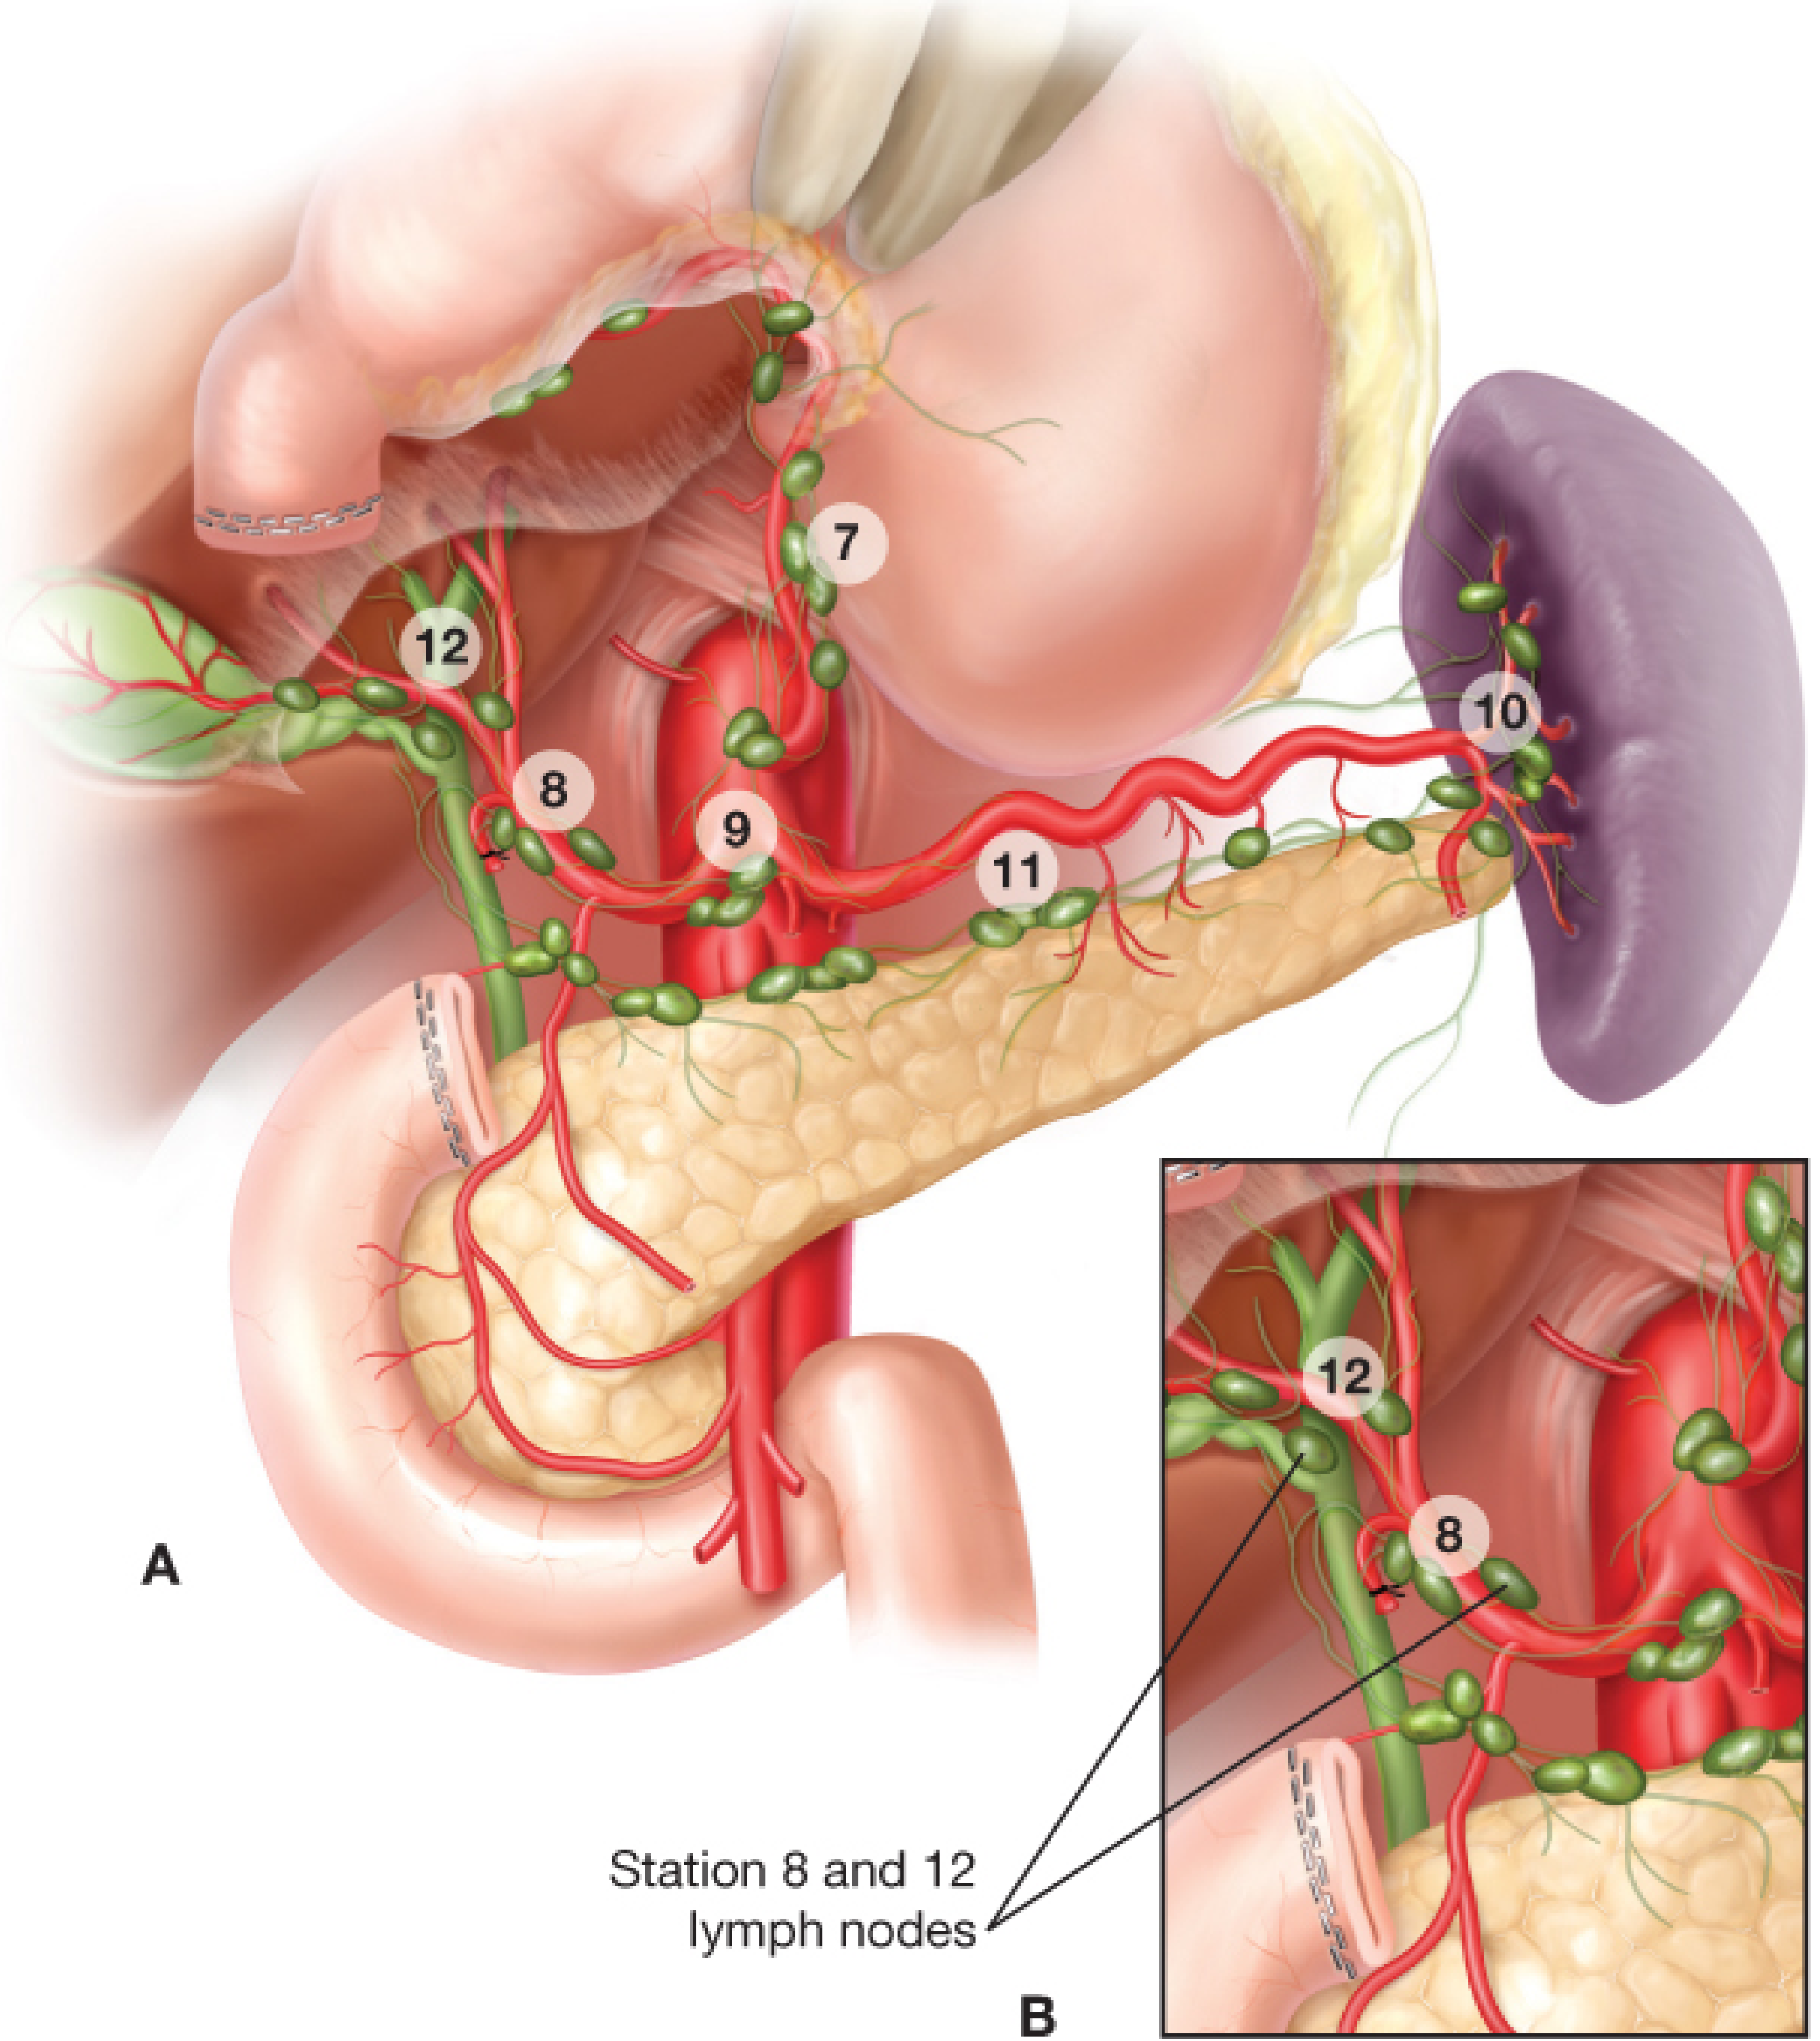
Why: The gastric lymphatics drain to these named stations in a predictable pattern. D1 removes only perigastric nodes; D2 adds clearance of the major arterial trunk nodes, which is the standard at specialist centres. D2 provides superior staging and better locoregional control. The spleen and pancreas are conserved in standard D2 (unless directly invaded), as splenopancreatectomy adds morbidity without survival benefit.
Step 7: Gastric (or Esophageal) Transection
- The esophagus is mobilised through the hiatus using stay sutures
- It is divided at an appropriate level with adequate clearance (>5 cm from tumour margin)
- A right-angled non-crushing clamp and/or circular stapler anvil is placed in the esophageal stump
- Frozen section biopsies of both proximal (esophageal) and distal (duodenal) margins are taken if margin status is uncertain
- The proximal stomach is divided near the GEJ/lesser curvature, preserving the blood supply via short gastric arteries
- A GIA linear stapler completes the gastric transection
Why: A clear resection margin (R0) is mandatory for curative intent. Frozen section intraoperatively confirms no microscopic tumour at the cut edge. If margins are involved, further resection is required.
Step 8: Reconstruction of GI Continuity
A. Roux-en-Y Esophagojejunostomy (after Total Gastrectomy) - STANDARD
- The jejunum is divided approximately 40 cm from the ligament of Treitz
- The distal limb (Roux limb) is brought up through a rent in the transverse mesocolon (retrocolic) to reach the esophagus
- The Roux limb must be at least 50 cm long from the jejunojejunostomy to avoid bile reflux esophagitis
- A circular EEA stapler (25 or 28 mm) is used: anvil placed in the esophagus via purse-string suture, stapler introduced through the open end of the Roux limb, fired to create the end-to-side esophagojejunostomy
- The open end of the Roux limb is closed with a linear stapler
- A side-to-side jejunojejunostomy is fashioned distally to restore biliopancreatic drainage into the alimentary stream
- Two complete mucosal "donuts" from the circular stapler are inspected to confirm full-thickness anastomosis
B. Billroth I Gastroduodenostomy (after Subtotal Gastrectomy)
- The gastric remnant is anastomosed directly end-to-end to the duodenum
- Physiologically most natural but only possible when the gastric remnant can reach the duodenum without tension
- Preferred for distal tumours, preserves normal food passage through duodenum
C. Billroth II Gastrojejunostomy (after Subtotal Gastrectomy)
- The duodenal stump is closed; the gastric remnant is anastomosed side-to-end to a loop of jejunum (antecolic or retrocolic)
- Used when Billroth I would be under tension
Why Roux-en-Y is preferred after total gastrectomy: The long 50 cm Roux limb physically prevents bile and pancreatic juice from refluxing up to the esophageal anastomosis, protecting against alkaline reflux esophagitis and stricture. A jejunal pouch can also be fashioned at this stage to create a gastric substitute reservoir, improving long-term nutritional outcomes.
Step 9: Haemostasis, Drain Placement, and Closure
- Meticulous haemostasis throughout the operative field
- The anastomosis is checked for integrity (air or methylene blue leak test)
- A closed-suction drain is placed near the esophagojejunal anastomosis to detect early leaks
- The abdominal fascia is closed in layers with mass closure technique
- Skin closed with staples or sutures
Why: The esophagojejunal anastomosis is the highest-risk anastomosis in gastrointestinal surgery (leak rate ~5-10%). A drain allows early detection and controlled management of any leak.
D1 vs D2 Lymphadenectomy - Summary
| Feature | D1 | D2 |
|---|---|---|
| Nodes removed | Perigastric (stations 1-6) | + Arterial trunk nodes (stations 7-12) |
| Morbidity | Lower | Slightly higher |
| Standard at | General centres | Specialist/cancer centres |
| Recommended | Low-risk/early | All curative resections |
Post-operative Care (ERAS)
- No routine nasogastric tube (randomised trials show NG tubes increase pulmonary complications and delay recovery)
- Early oral fluids (Day 1-2)
- DVT prophylaxis
- Monitor for leak, bleeding, delayed gastric emptying, anastomotic stricture