
How to check abdominal grith
how to measure abdominal girth waist circumference technique
measuring waist circumference abdominal girth technique
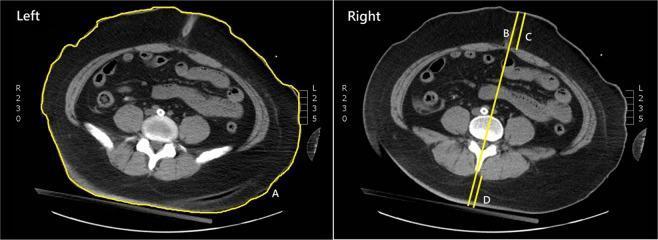
This diagnostic image consists of two axial non-contrast CT slices of the abdomen at the L4-L5 vertebral level, demonstrating standardized methods for measuring anthropometric parameters. The left panel illustrates the measurement of waist circumference (A), indicated by a yellow trace following the external skin contour at the umbilical level. The right panel displays several linear measurements: the sagittal abdominal diameter (B), a vertical line extending from the anterior skin surface to the posterior skin surface; the anterior subcutaneous adipose tissue (SAT) depth (C), measuring the distance between the skin and the anterior rectus sheath/linea alba; and the posterior SAT depth (D), measuring the distance from the skin to the tip of the vertebral spinous process. Anatomical structures visible include the vertebral column, paraspinal muscles, psoas major muscles, loops of bowel, and a significant layer of subcutaneous fat. These images serve as an educational guide for quantifying central adiposity and body composition using radiological cross-sections.
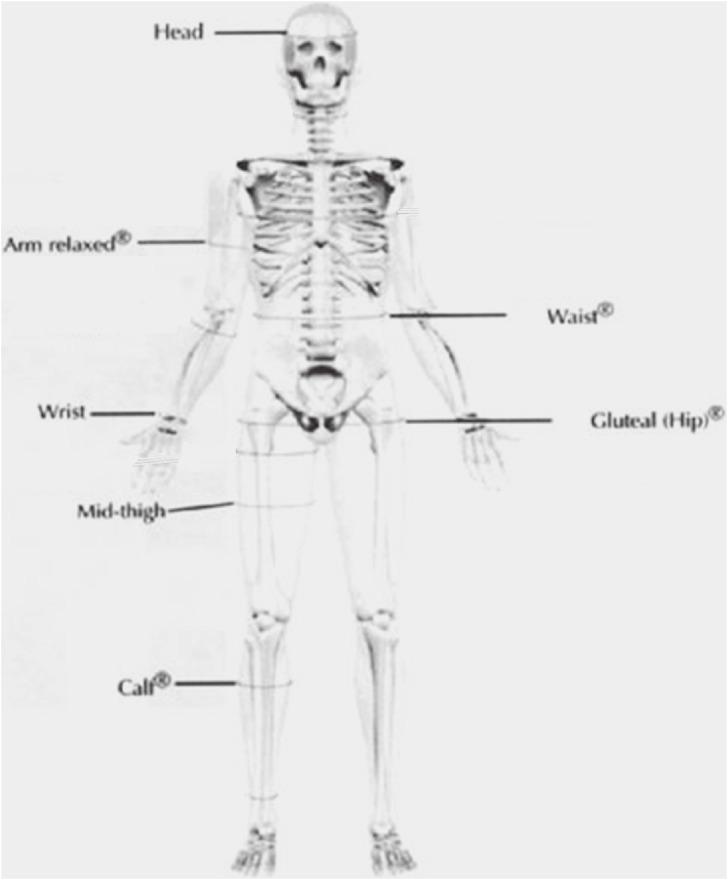
Anatomical Diagram. This illustration presents a full-body anterior skeletal view of a human, serving as an educational guide for standardized anthropometric girth measurements based on International Society for the Advancement of Kinanthropometry (ISAK) standards. The diagram identifies seven key measurement sites using horizontal lines and text labels: Head (cranial circumference), Arm relaxed (mid-upper arm), Wrist, Waist (abdominal midsection), Gluteal (hip), Mid-thigh (equidistant between the inguinal fold and superior patellar border), and Calf (maximal lower leg circumference). Following standard clinical protocol for consistency and comparative analysis, the diagram emphasizes measurement on the right side of the body, as indicated by the primary positioning of labels and lines. This resource is intended for students and professionals in sports medicine, nutrition, and clinical research to ensure high intra-observer and inter-observer reliability during physical assessment and body composition analysis.
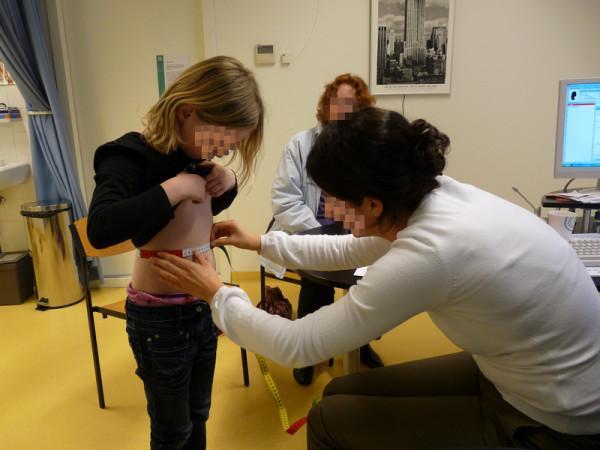
This clinical photograph depicts a general practitioner (GP) trainee performing an anthropometric measurement on a pediatric patient in a primary care setting. The professional is shown kneeling to maintain eye level with the standing child, using a flexible, non-stretch measuring tape to assess waist circumference. The child has appropriately lifted their shirt to expose the abdominal region, allowing for accurate tape placement midway between the lowest rib and the iliac crest. The procedure is conducted in a clinical environment, evidenced by the presence of an examination room sink, waste receptacle, medical privacy curtain, and a computer workstation. This image serves as an educational demonstration of standard physical examination techniques used in pediatrics to monitor nutritional status, assess metabolic risk, and calculate body mass index (BMI) correlates. The scene illustrates clinical best practices, including patient positioning and the use of standardized tools for longitudinal health tracking in general practice.
How to Measure Abdominal Girth (Waist Circumference)
Equipment Needed
- A flexible, non-stretch measuring tape (cloth or plastic)
- Optionally: a cosmetic pencil to mark the landmark
Step-by-Step Technique (NHANES / AHA Protocol)
- Have the person stand upright with feet together, arms relaxed at the sides.
- Ask them to lift or tuck their shirt above the waist so the measurement is taken against bare skin.
- Ensure privacy (exam room or private area).
- Stand to the right of the patient.
- Palpate the upper hip bone to find the right iliac crest (the uppermost border of the hip bone).
- Locate the midaxillary line (an imaginary vertical line from the armpit down).
- The measurement point is just above the uppermost lateral border of the right iliac crest at the midaxillary line.
- If desired, mark this point with a cosmetic pencil for consistency.
- Wrap the measuring tape horizontally around the abdomen at the marked level.
- Keep the tape parallel to the floor - not tilted.
- The tape should be snug but not compressing the skin.
- Make sure the tape is not twisted.
- Ask the patient to breathe in normally, then breathe out.
- Take the measurement at the end of normal expiration (not sucking in the stomach).
- Read the tape at the point where it meets itself, to the nearest 0.1 cm or 0.5 inch.
- Repeat 2-3 times for accuracy and record the average.
Reference Cutoffs (Health Risk Thresholds)
| Risk Level | Men | Women |
|---|---|---|
| Increased risk | > 94 cm (37 in) | > 80 cm (31.5 in) |
| High risk | > 102 cm (40 in) | > 88 cm (35 in) |
- A waist circumference > 102 cm in men or > 88 cm in women is associated with increased risk of type 2 diabetes, hypertension, and cardiovascular disease.
- Note: At BMI ≥ 35, waist circumference adds little extra predictive value beyond BMI alone.
Common Errors to Avoid
- Measuring over clothing (always measure on bare skin)
- Tilting the tape (must be horizontal/parallel to floor)
- Measuring at the navel rather than the iliac crest level (some protocols differ, but the iliac crest method is the clinical standard)
- Measuring during inhalation (always measure at end of normal exhalation)
- Compressing the skin with the tape
Clinical Relevance
- Screen for central (visceral) obesity
- Estimate metabolic syndrome risk
- Monitor treatment response in obesity management
- Supplement BMI in cardiovascular risk assessment (as per the AHA guidelines and NHLBI/NHANES protocol)