
Diagram of shoulder sling and shoulder immobilizer
Reading File
This is a visual query - searching the medical library for diagrams of shoulder sling and shoulder immobilizer.
Searching sources...
Finding Sources
Searching the Web
shoulder sling vs shoulder immobilizer diagram medical
Good - I found relevant image URLs. Let me also search the medical library more broadly and fetch the most relevant images in parallel.
Finding Sources
Loading Image
Loading Image
Excellent - found the textbook section with diagrams. Let me fetch the Pfenninger textbook block which mentions diagrams A, B, C for sling types, and also fetch relevant images from the textbooks.
Reading File
Reading File
Loading Image
Now let me get the Pfenninger textbook diagrams that specifically compare the shoulder sling vs shoulder immobilizer (the section mentioned figures A, B, C).
Reading File
Reading File
I have the image URLs from the textbooks. Let me now fetch the key textbook diagrams.
Loading Image
Loading Image
I now have excellent textbook diagrams. Here is a comprehensive answer:
Shoulder Sling vs. Shoulder Immobilizer
1. Triangular Muslin Sling (Simple Shoulder Sling)
The diagram below (from Roberts and Hedges' Clinical Procedures in Emergency Medicine) shows stepwise application of a triangular sling:
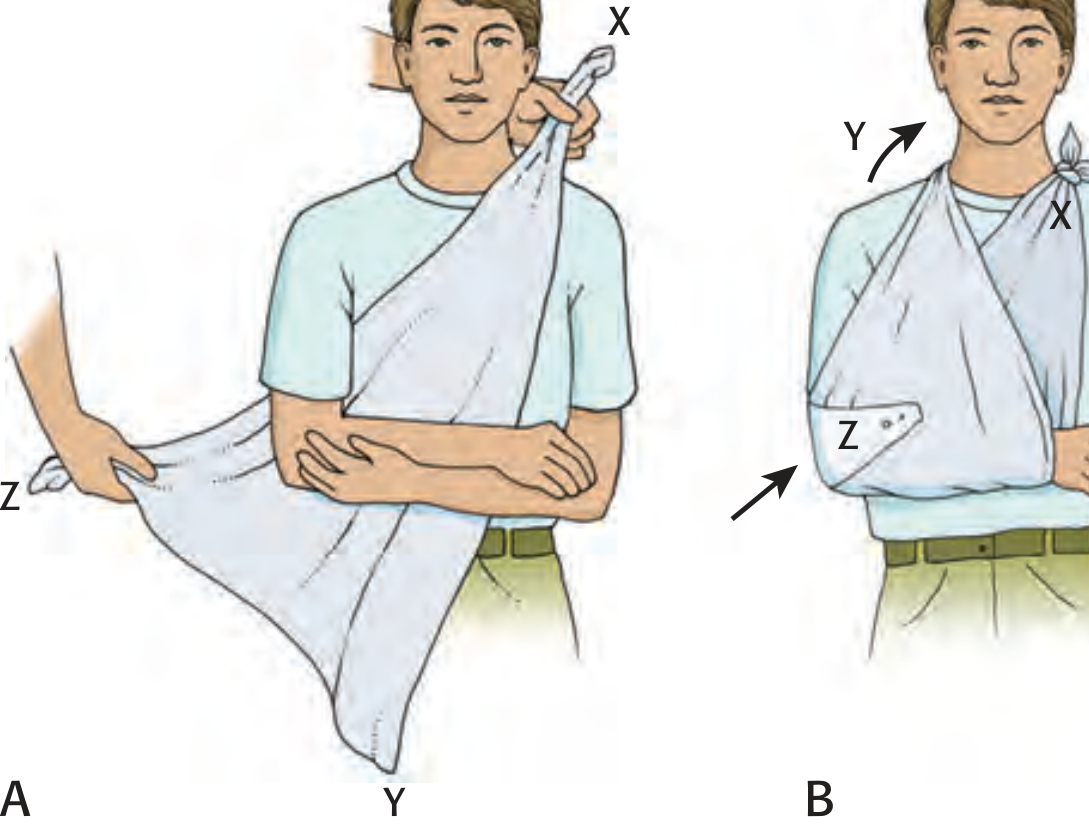
How to apply:
- Place tip X over the uninjured shoulder
- Bring tip Y over the injured shoulder to enclose the arm
- Draw tip Z around the front and pin
Important: The sling must be long enough to support the wrist and hand fully. A sling that is too short lets the wrist hang in ulnar deviation, risking hand edema and ulnar nerve injury.
Uses: Humerus fractures, clavicle fractures, radial head fractures, minor shoulder injuries.
2. Full Comparison - Types of Shoulder Immobilization
The figure below (from Pfenninger and Fowler's Procedures for Primary Care) shows all major shoulder immobilization methods side by side:
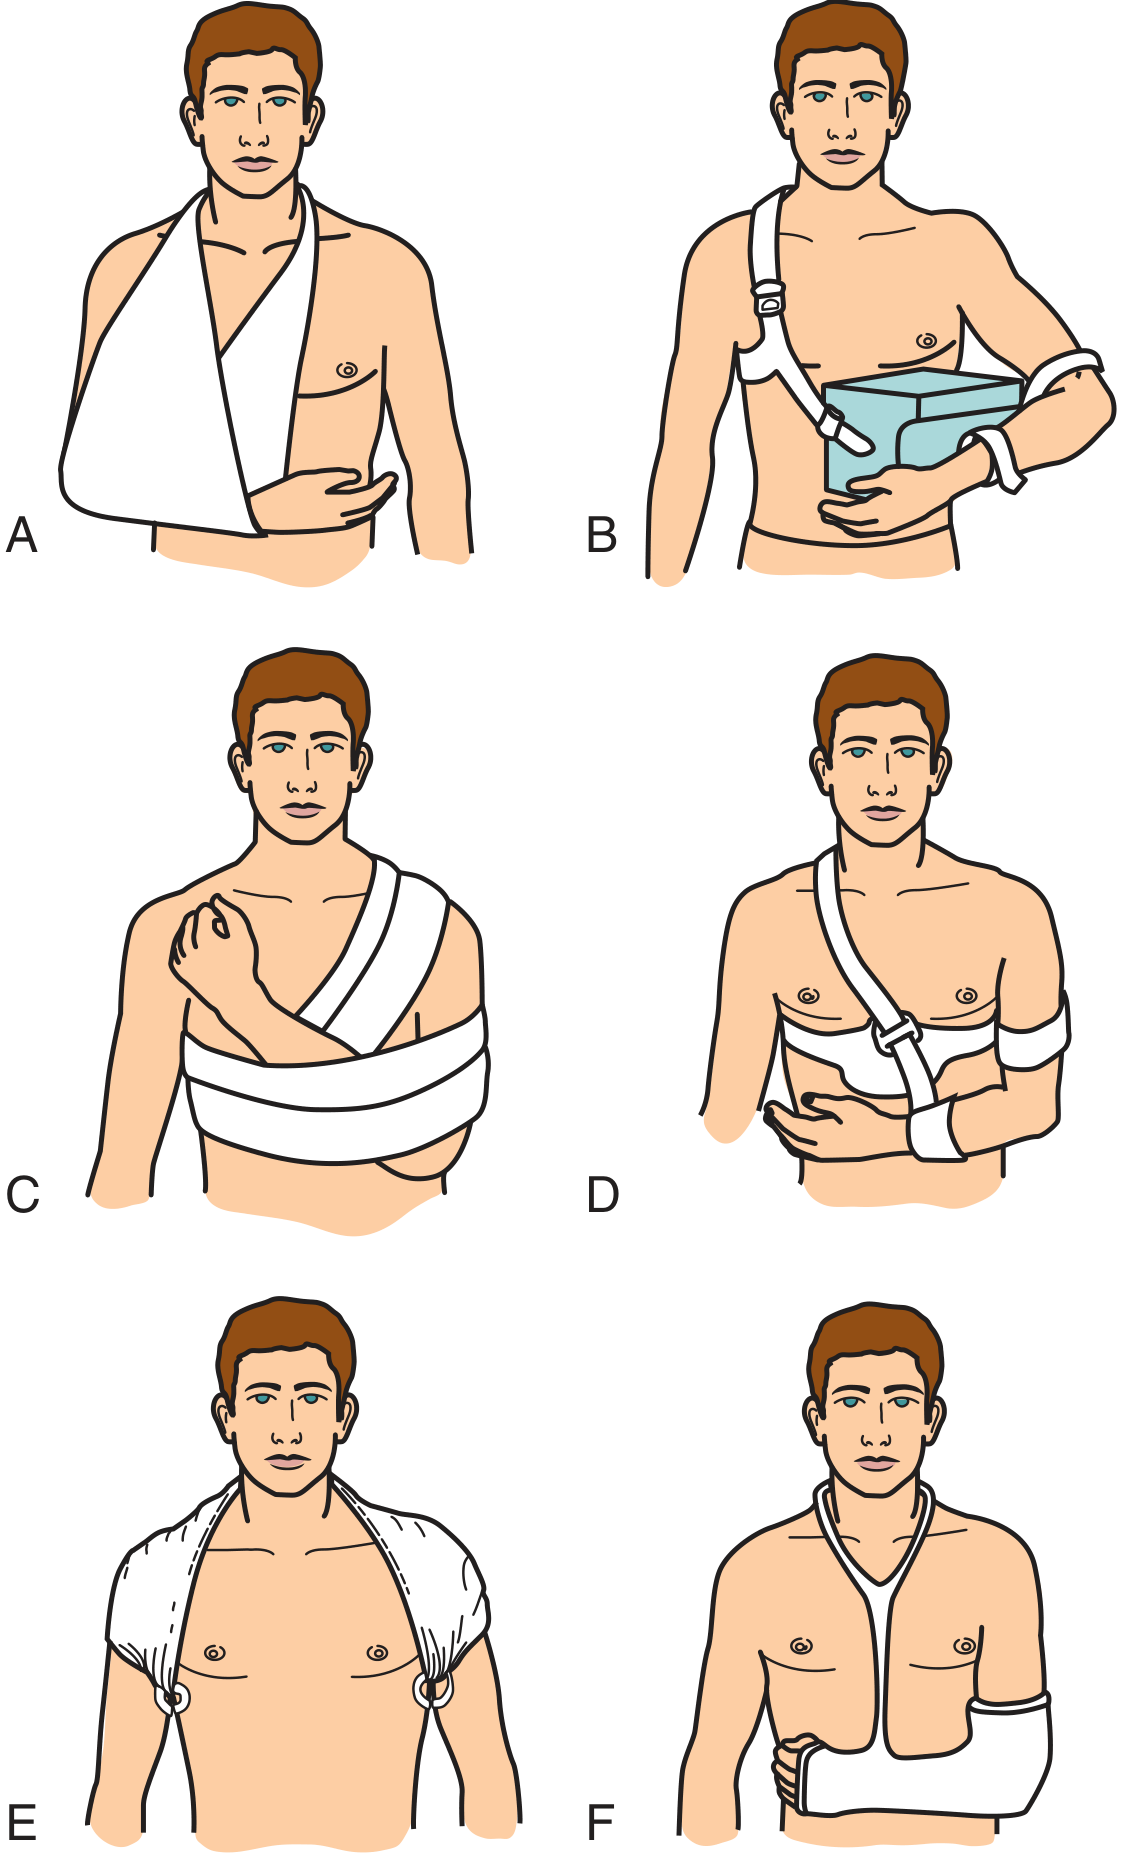
| Panel | Device | Indication |
|---|---|---|
| A | Simple shoulder sling | Humerus, clavicle, and radial head fractures |
| B | Abduction pillow shoulder immobilizer | Rotator cuff repair (post-op) |
| C | Sling and swathe bandage | Severe AC separation, upper humerus fractures |
| D | Shoulder immobilizer (commercial) | Humeral neck fractures, shoulder dislocations |
| E | Figure-of-eight strap | Clavicle fractures (less commonly used now) |
| F | Hanging arm cast | Humeral neck and shaft fractures (uses gravity for traction) |
3. Shoulder Immobilizing Sling - Step-by-Step Application
The diagram below shows how to apply a commercial shoulder immobilizing sling:

Steps:
- Place arm in sling; pull rings together
- Pull shoulder strap through the double rings and secure
- Bring waist strap around the back
- Pull waist strap through the ring at the underside front of the sling and secure
- Place thumb in thumb strap for comfort
- Adjust shoulder and waist straps as needed
Key Clinical Differences
| Feature | Simple Sling | Shoulder Immobilizer |
|---|---|---|
| Arm position | Elbow flexed, forearm horizontal | Arm adducted against chest |
| Chest strap (swathe) | No (or separate swathe) | Yes - built in |
| Removable | Yes | Yes (advantage over swathe bandage) |
| Axilla padding | Not needed | Needed if worn >few days |
| Shoulder motion restricted | Partial | More complete |
Clinical note: In most EDs, the commercial shoulder immobilizer has replaced the traditional swathe-and-sling combination because it is easier to remove for showering and range-of-motion exercises, and patients can reapply it themselves. - Roberts and Hedges' Clinical Procedures in Emergency Medicine
This is a shared conversation. Sign in to Orris to start your own chat.