
Indirect opthalmoscopy
Reading File
Indirect ophthalmoscopy is a technique for examining the fundus using a binocular headset and a hand-held condensing lens, providing a wide-field, stereoscopic, inverted image of the retina.
Searching sources...
Finding Sources
Finding Sources
Reading File
Reading File
Loading Image
Loading Image
Here is a comprehensive overview of Indirect Ophthalmoscopy based on Kanski's Clinical Ophthalmology (10th ed.):
Indirect Ophthalmoscopy
What It Is
Binocular indirect ophthalmoscopy (BIO) refers specifically to the head-mounted technique. Light is transmitted from the headset to the fundus through a condensing lens held at the focal point of the eye. The image produced is inverted and laterally reversed, observed through a stereoscopic viewing system.
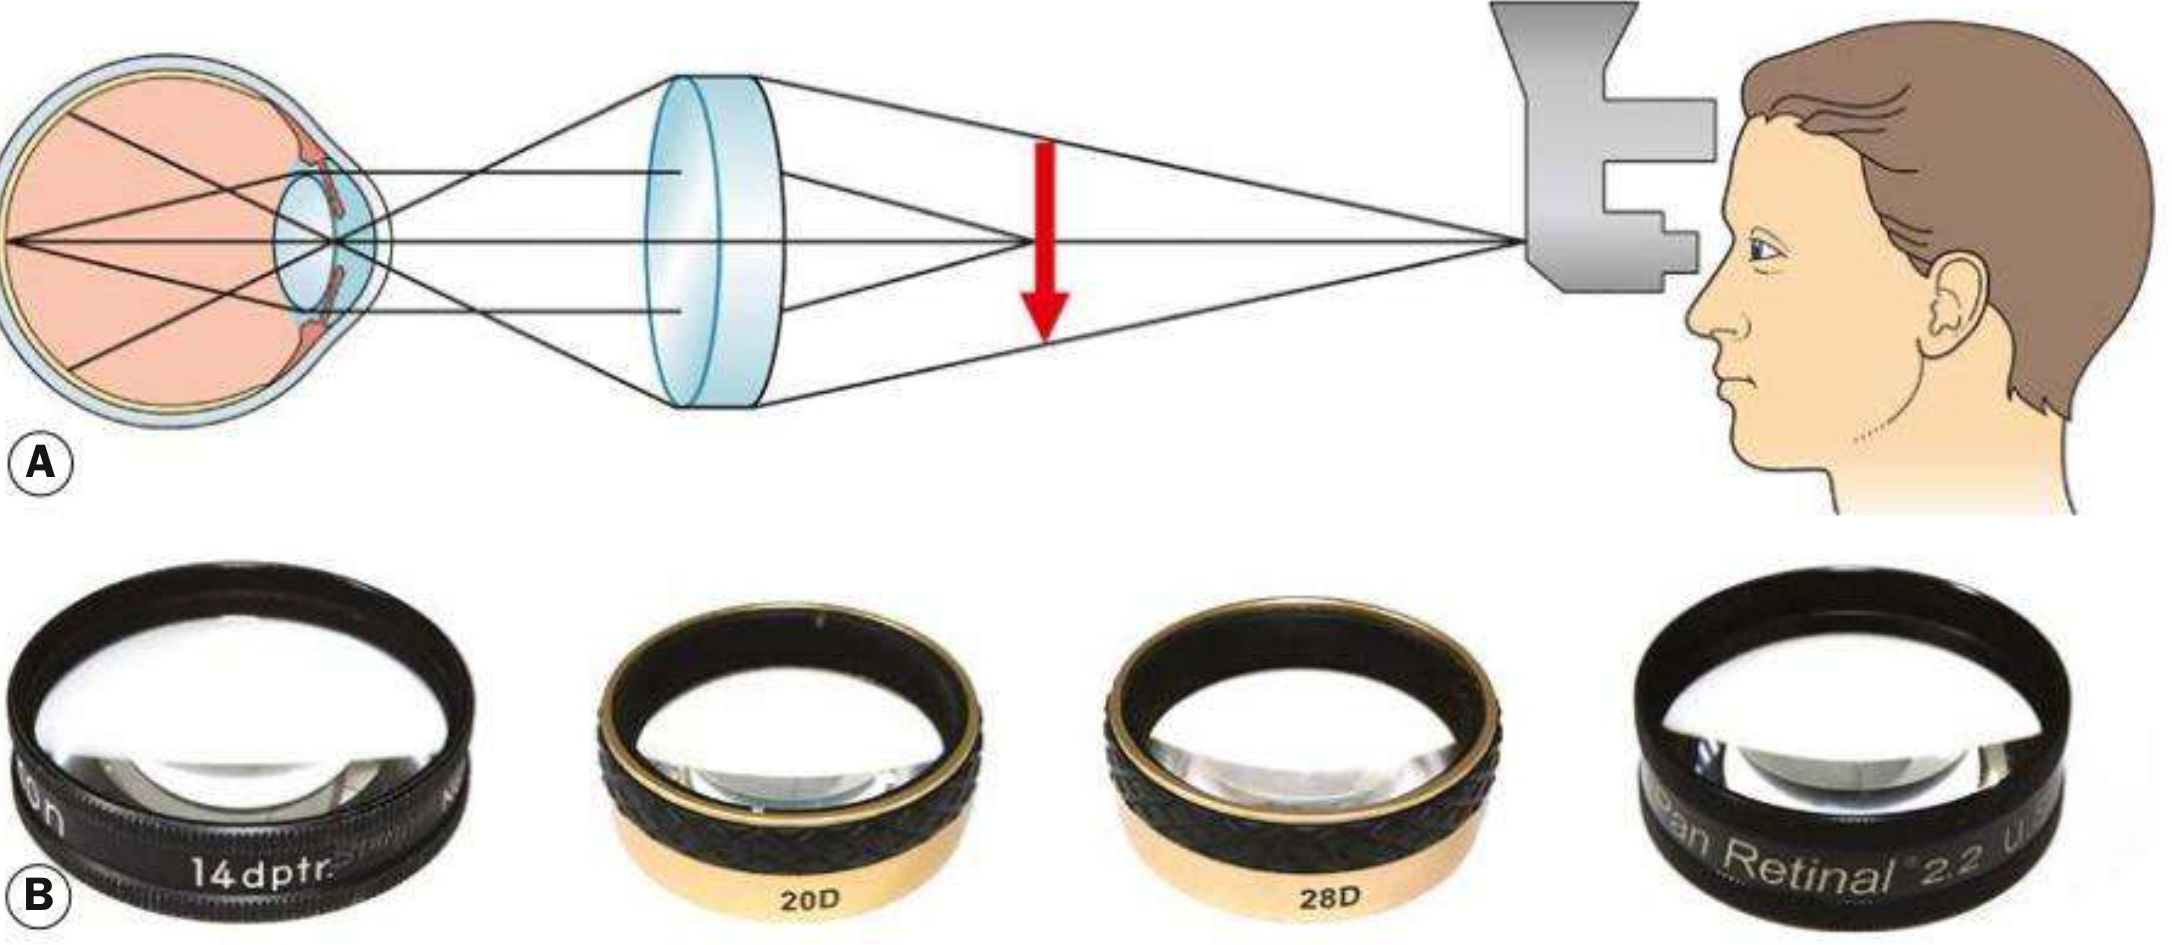
Fig. 1.38 - (A) Principles of indirect ophthalmoscopy; (B) condensing lenses - Kanski's Clinical Ophthalmology, p.40
Advantages over Direct Ophthalmoscopy
- Allows retinal visualization through greater media opacity (e.g., dense cataract, vitreous haemorrhage)
- Provides a much wider field of view
- Readily facilitates scleral indentation for peripheral retinal examination
- Stereoscopic (3D) view
Condensing Lenses
Magnification = 60 ÷ lens power
| Lens | Magnification | Field of View | Notes |
|---|---|---|---|
| 20 D | ×3 | ~45° | Most commonly used for general fundus examination |
| 28 D | ×2.27 | 53° | Shorter working distance; useful for small pupils |
| 40 D | ×1.5 | 65° | Used mainly in small children; also useful at slit lamp |
| Panretinal 2.2 | ~×3 | ~53° | Combines 20D magnification with 28D field; small-pupil capable |
| Macula Plus 5.5 | Ultra-high | Narrow | Macula and optic disc examination |
The flat surface of the lens faces the patient. Lower power = higher magnification but smaller field.
Yellow filters may improve patient comfort by reducing glare.
Technique
- Patient position: Supine on a bed or reclining chair (not sitting upright)
- Pupil dilation is required; reduce ambient illumination to improve contrast
- Set eyepieces to correct interpupillary distance, align the beam centrally
- Instruct patient to keep both eyes open at all times
- Hold the lens with the flat surface facing the patient
- Examine the peripheral fundus first to allow the patient to adapt to the light
- Ask the patient to look in the direction being examined (e.g., look away from examiner to examine the retinal periphery)
- For small children (e.g., retinopathy of prematurity): use a speculum to keep eyelids apart and a squint hook to direct the eye
Scleral Indentation
Scleral indentation (depression) is used to:
- Improve visualization of the retina anterior to the equator (between equator and ora serrata)
- Allow kinetic evaluation of retinal lesions
Technique:
- Should only be attempted after mastering basic BIO
- Requires coordination between the indenter and viewing apparatus
- Example - to view the ora serrata at 12 o'clock: ask patient to look down, apply the scleral indenter (or cotton-tipped applicator) to the outside of the upper eyelid at the margin of the tarsal plate, then ask the patient to look up while advancing the indenter parallel to the globe
- Exert gentle pressure to create a visible mound
- Keep the indenter tangential to the globe at all times - perpendicular pressure causes pain and risks perforation (especially if the sclera is thin)
- For 3 and 9 o'clock positions, direct scleral indentation may be needed with topical anaesthesia
Fundus Drawing
BIO findings are documented by a manually drawn, colour-coded illustration. Wide-field photographic imaging (when available) is an excellent supplement. For retinal detachments, the boundaries are drawn starting from the optic nerve.
Clinical Uses
- Screening and treatment of retinopathy of prematurity (ROP)
- Detection of retinal detachment, tears, and breaks (especially peripheral)
- Examination after ocular trauma (with scleral depression once open globe is excluded)
- Evaluation of vitreous haemorrhage and peripheral retinal lesions
- Examination through media opacities
Source: Kanski's Clinical Ophthalmology: A Systematic Approach, 10th ed., pp. 40-41
This is a shared conversation. Sign in to Orris to start your own chat.